Metal Clay Overview
Basic, or foundation skills, are the techniques, materials, and methods that you will use while making every metal clay creation. This article covers the basics of those skills. As you become more proficient, they will become second nature to you.
The more you practice and work with different clay types from different manufacturers, the more familiar you’ll become with their specific idiosyncrasies. You will learn to alter these guidelines to fit your style of work.
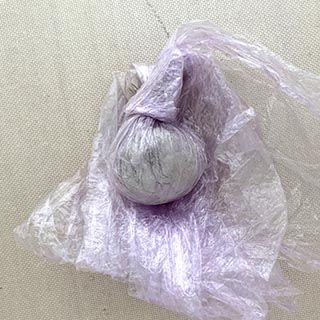
Silver clay in plastic wrap
Keeping Your Clay Fresh
When opening a new package of metal clay – any brand, any type – take a moment to notice what it looks like, what it feels like, and how it behaves the first time it is rolled out. These are the qualities that should be maintained while working, and recreated when the clay needs to be rehydrated.
All metal clays are approximately 90% powdered metal with a small amount of an organic binder that holds enough water to keep metal clay malleable. The goal should be to preserve the moisture content while it is being used or when stored.
When clay is exposed to air or warmth, it will begin to dry. Even holding or touching clay with your hands will cause the moisture to escape. To delay this, thin plastic wrap can be used to cover clay on the work surface while it is not being actively worked with, and used to wrap the clay when stored between work sessions.
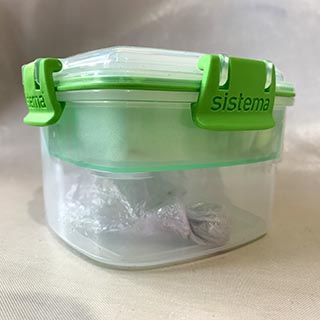
Plastic airtight container with a sponge in the top tray
Storing Clay
Longer term storage: One good method for long term storage is to cut a piece of plastic wrap about 4” x 4” or 10 cm x 10 cm, place the clay in one corner, roll it all the way to the opposite corner, twist the extra plastic in opposite directions, and tie once. This allows the moisture to be held in by many layers of plastic, which will allow the clay to remain fresh for a longer period of time.
In addition, a hydrating atmosphere can be maintained by placing a wet sponge or wet paper towel and the plastic wrapped clay back into the original zip lock package.
Hydrating chamber: To go one step further, create a hydrating chamber by attaching a sponge to the lid of a small, airtight container. Saturate the sponge and drop the clay into the container. A hydrating chamber can be used in the short term during the work session and for longer-term storage. It is important not to let the clay touch the sponge/paper towel directly or it will become too moist to handle
Rehydrating Clay
The water in metal clay evaporates quickly when it is exposed to air, held in the hands, or worked with fingers and tools. Some construction techniques create a small breeze, which also accelerates dehydration.
You will know the clay needs to be rehydrated when cracks appear, when the clay will not form a cohesive ball when rolled between the palms, when it takes on a marbled appearance (lighter clay is more moist, darker clay is dryer), and when it is difficult to imprint a texture or set a stone.
Some cities’ water contains minerals that might affect the clay. If you have problems with mold, you might want to use distilled water instead of tap water.
See our article Rehydrating Metal Clay for in depth instructions.
Using Lubricants
Metal clay sticks to all surfaces — to hands, textures, work surfaces, rollers, and almost everything. Lubrication is used as an anti-stick barrier, so the metal clay is easier to manipulate and handle. Easily accessible lubricants include Badger Balm, Burt’s Bees Hand Balm, and olive oil. You can also buy lubricants that are specifically formulated to work with metal clay.
- If using a solid product like a balm, melt the balm in your palms before applying a light coat to a texture or a flattened slab of clay.
- If using olive oil, saturate a sponge with the oil and place it in a small, open container, and tap a finger onto the sponge to apply. This is likely all the lubrication that will be needed.
- Too much lubrication can make the clay feel grainy and impact textures. If this happens, add an equal amount of fresh clay to the grainy clay and knead in plastic wrap until the two are well blended.
- Lightly lubricate all tools and textures before using them with metal clay. Rubber textures might have to be re-lubricated more often than plastic or metal textures. Lucite, acrylic and other types of plastic rollers may need a bit more lubrication than PVC rollers. Tip: Use a round, flat ended, stencil brush or a soft toothbrush to move lubrication into the recesses of a deep texture sheet.
- Lubricating your hands will keep metal clay from sticking to them, and will help prevent the transfer of moisture from the clay into your skin.
- Do NOT use petroleum products with metal clay! Products like Vaseline react negatively with the binder in metal clay and can cause a number of negative results.
Rolling Clay
Metal clay is most often rolled into flat slabs or sheets, textured, and cut into shapes to make individual jewelry elements.
A round roller will create a flat slab of metal clay. Most rollers sold through metal clay vendors are acrylic or another type of hard plastic, but you can also make your own with a 6” piece of PVC pipe in any diameter from ¾” to 2”. Tip: The larger the diameter of the roller, the smoother the surface of the clay will be.
Pressing firmly – either roll with hands open in one smooth motion from top to bottom, or place the roller in the center of the clay and roll towards the top and then to the bottom. Rolling many times causes ridges and unclean textures. If enough pressure is used, only one repetition of these movements should be necessary.
Over-rolling is not only un-necessary, it will dry the clay. Always roll off the edge of the clay so you don’t create a thickened area at the end of the slab. Tip: Standing while rolling will allow you to place more pressure on the roller.
Spacers, slats, thickness guides, and thickness frames are all names used for the tools that help create a consistently level slab of clay. The original metal clay spacers were playing cards; therefore, commercially made spacers correspond to playing card thicknesses. Slabs are rolled to specific thicknesses depending on the item being made, the preference of the maker, the method of construction, the function of the piece, and other considerations.
To make your own playing card spacers, use double-sided tape to attach cards to the back of a face card that denotes the thickness. Attach one card to the back of a 2, two cards to the back of a 3, three cards to the back of a 4, and so on. Because of the addition of the tape to homemade spacers, they will always be a little less exact than commercially manufactured spacers, but thickness is arbitrary, and a slight difference doesn’t matter in the long run. Using 2 card thick, home-made playing cards will work as well as using 2 cards thick, commercially made slats/spacers/guides/frames.
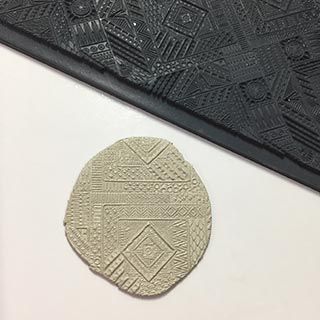
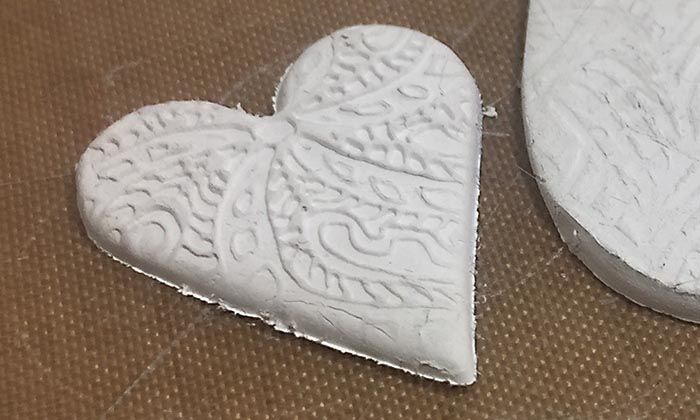
Texturing Clay
To texture clay, place it in the center of a texture tile or mat, then place thickness guides on either side of the clay. Roll with a roller. Remove the clay and re place it on a flexible work surface with texture side up, and cut out the shape you desire.
Textures come in all designs and thicknesses. A shallow texture will result an overall thickness similar to the thickness guides. A deeper texture creates a more 3D surface with deeper depressions.
Thickness Guidelines
The larger the piece or the longer the distance between edges the more delicate the piece will be; therefore, more thickness is warranted. A long, narrow shape is more fragile than a shorter, wider shape and would require more thickness to maintain its integrity. A ring and bracelet take more abuse in their function than a pendant hanging on a chain, so rings and bracelets need to be thicker due to the stress on the item when worn.
General thickness guidelines, depending on the type of clay and the texture used, are:
- Earrings: 3 – 4 cards thick
- Small pendants or charms: 4 – 5 cards thick
- Rings: 4 – 6 cards thick
- Bracelets: 6 – 9 cards thick.
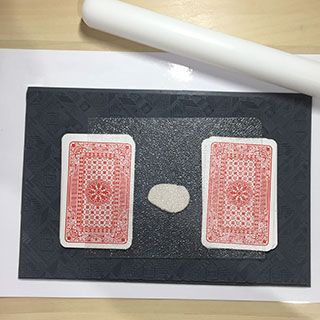
Using a roller and stacked playing cards with a texture tile/mat
Don’t forget the texture you get is the reverse of what you see on the texture tile/mat
Texturing Clay with the Reduction Rolling Method
To imprint a well-defined texture, first roll an un-textured slab of clay 2 cards thicker than your desired final thickness. Then place your slab onto the texture, reduce your spacers by 2 cards and roll again to imprint. The clay will be forced more deeply into the recesses of the texture and develop a more pronounced topography. Tip: Standing while rolling will allow you to place more pressure on the roller.
The spacers must always lie on top of the texture – not on the work surface next to the texture. If there is not enough room for both spacers and your clay on the texture surface, then make extenders by placing another similar texture sheet next to the one you’re using, or use spacers to build up to the thickness of the texture. Then place the working spacers on top of the extenders and roll.
Making Coils
Clay made into a solid, cylindrical shape can be used as a bail, fanciful decorations, or can wrap around a dry shape to create a frame. Coil, snake, log, and worm are all words used to describe this cylindrical shape.
Uniform coils can be made with the use of a 2” wide x 6” long x 1/8” or thicker flat piece of Lucite or other type of clear plastic or glass. The material should not flex, or the coil will not be consistent in diameter. This rectangular tool is called a snake roller.
A coil can be formed by first compressing the clay into a ball between your palms, then lengthening the ball by sliding your lubricated fingers from left to right and back again as you roll the coil on the work surface. Transfer the ball to a clean work surface and lightly roll it with the snake roller as you apply slight and even pressure. Roll until it becomes the thickness you desire. Apply a little pressure on the ends, if you want a tapered appearance.
Making Shapes
Architectural, geometrical and other general-purpose templates, in addition to fanciful, design templates and cookie cutters. can be used to create shapes in metal clay. Use a pin tool to cut out templates and press straight down with a cutter. Simply dragging a pin tool through the clay can create freeform silhouettes. The thinner the pin tool, the less drag is created and the smoother the periphery will be.
Curved Shoulders
Rounded edges can be formed naturally by laying a piece of plastic wrap over pre-textured clay before cutting with a cookie cutter.
This trick will not work well with a template.
Joining Wet Clay Pieces
Fresh, moist clay can be joined to other fresh clay with water and a little pressure. After joining, hold the connection lightly for 4-5 seconds to make sure clay is touching clay and not ‘hydroplaning’ on the water or slip.
Drying Metal Clay
If there is no need to rush the process, metal clay can be left to dry at room temperature for anywhere from a few hours or up to overnight. Drying can be accelerated by placing clay in a food dehydrator, on a coffee cup or candle warmer, on an electric warming tray, in a toaster oven, or by holding a hairdryer over it. Because metal clay shrinks about 1% as it dries, it may dry unevenly and warp out of its original shape if left unattended. Be sure to check the clay from time to time and flip it from one side to the other or gently press it to make sure it maintains the desired shape and form.
Joining Dry Clay
Dry metal clay can be joined to dry or fresh clay with a little slip or paste. The parts to be joined need to have matching surface areas for a good bond – so join convex to concave, or flat to flat. Sanding might be needed to create a good fit.
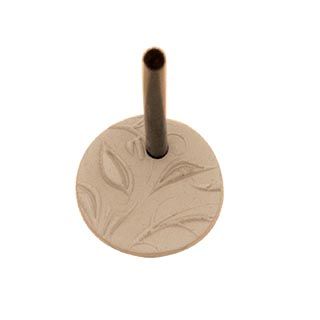
Hole made using a plastic cocktail straw
Making Holes
Holes can be used as decoration, or to hold the jump ring or wire wrap that acts as a necklace bail. Make a hole in fresh clay with a cocktail straw or a small metal tube with a sharpened end. Make a hole in dry clay with a handheld twist drill bit. Enlarge or ‘sand’ the hole with a dampened toothpick.
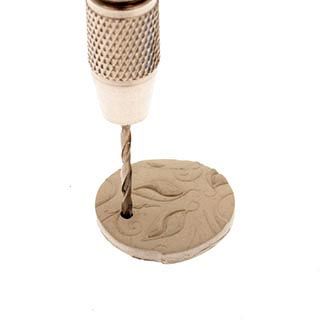
Hole made using a drill bit in a pin vice (handheld twist drill)
Preparing Dry Clay for Firing
The process is not complete after metal clay is textured and cut to shape. Your work should be sanded, refined and reinforced before it is fired. How much you finish the piece in the dry stage will determine how finished it looks as a fired piece.
Any number of tools can be used to finesse the surfaces and edges of dry metal clay. Needle files, emery boards, sandpaper in various grits, sanding sponges, and even a damp finger can groom the surface.
- Begin with coarse tools and sandpaper to remove a relatively large amount of clay in a short time, then
- Work with progressively finer polishing or sandpaper to reduce the marks left by coarse tools and apply the finish you desire.
Finishes can be rough or smooth, matte or shiny, but make sure they are intentionally and thoughtfully applied.
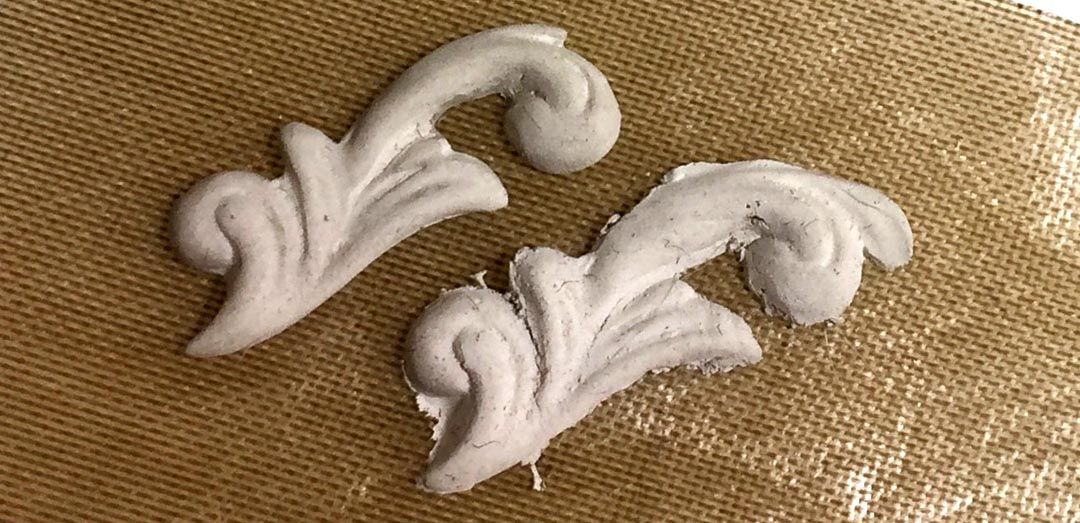
This image shows clearly the difference between a finished refined piece ready to be fired and an unfinished piece straight out of the mold.
Damp polishing paper, wet wipes, a moistened finger, or a damp paintbrush can all be used to smooth the topmost surface of the clay. A small amount of moisture will not only speed smoothing and finishing, but it will rehydrate the surface of the clay and make it fragile. Dry metal clay every time moisture is reintroduced.
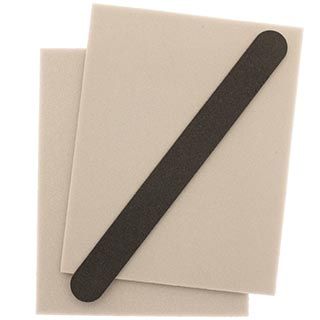
Sanding pads and emery boards work for the first sanding stage
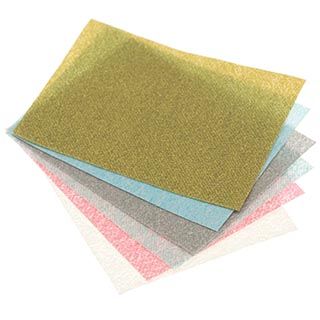
Polishing papers create a shiny finish on both fired and unfired dry clay
Making Repairs or Reinforcements
Take a good look at every aspect of a completed metal clay piece before firing. Reinforce joins, repair breaks and cracks, and pay attention to edges and backs. All areas of a jewelry piece should look like it was thoughtfully considered and finished.
Think about the material you want to use to make repairs and reinforcements. What is the metal content to moisture content ratio?
- Slip may not be a good filling material because there is a high water content, and when the water evaporates, the useful material will shrink in volume.
- Syringe clay has higher water content than lump clay, but it can be forced and extruded into deep crevices more easily than lump.
- Lump clay has the most metal content and may make the best repair material.
Firing
Fine silver metal clay and small pieces of some brands of copper and bronze clay can be torch fired; .950 and .960 sterling clay must be fired in a kiln. .925 sterling, larger pieces of copper and bronze, and all steel and brass metal clays must be surrounded by activated carbon and fired in a kiln. Fire according to the manufacturer’s directions, and your own experiments. Each clay body formulated by each manufacturer will have its own firing schedules and idiosyncrasies.
When firing metal clay it’s good to understanding sintering, read our Understanding Sintering for an in depth look at the process.
For more information on how to fire and firing equipment, check out our article Metal Clay Firing Methods and Equipment
Polishing
After your work comes out of the kiln, it should be polished:
- Use a wire brush to begin the finishing process: brass for all silver varieties, and steel for base metals.
- Then use a tumbler, steel or agate burnishers, a series of sandpapers, or polishing tools on an electric motor tool – either handheld or a flex shaft – to bring the piece up to a bright shine.
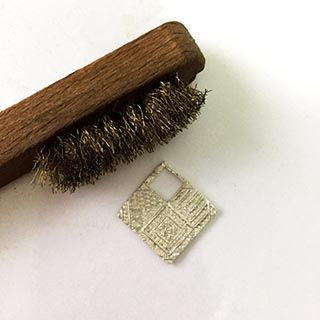
Brass brushing creates a satin finish
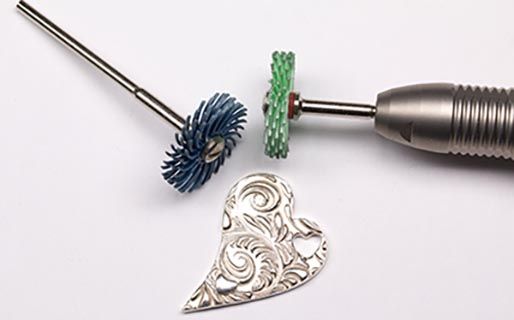
Polishing tools like a micromotor or flex shaft with polishing heads work well for a high shine
Patinas
- A deep black patina can be achieved with hydrochloric acid solutions such as Black Max™ or Jax®. Be sure to neutralize hydrochloric acid agents in a solution of warm water and baking soda.
- You can also apply patina with multiple dips in a warm Liver of Sulfur (LOS) bath. LOS is a salt, not an acid, and doesn’t need to be neutralized but will need to be rinsed.
- Remove patina from the high points of your texture by rubbing with a polishing pad or cloth, or by using any number of polishing bits on a rotary motor tool.