Search

An Introduction To The Wire-Wrapped Loop

Many jewelry artists arrive at metal clay’s doorstep after honing their jewelry skills making beaded pieces. Others start with metal clay, or metalsmithing, and want to incorporate beading and wire working techniques. This short article offers an introduction to this versatile, elegant, secure wire technique. A second article, titled Wire-Wrapped Loop – A How-To Guide contains detailed instructions and is available in the Learning Center Resources section of the AMCAW website as a members-only article.

This artisan-quality technique creates a closed loop that will not come undone, as open loops and unsoldered jump rings are prone to do. Properly using the wire-wrapped link can raise the level of an artist’s work from craft quality to artisan quality. It can also improve sales, taking an artist’s creations from craft show tables to art gallery or gift shop jewelry cabinets.

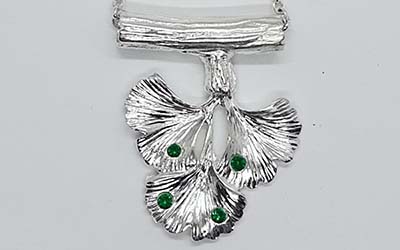
Hamilton leaf brooch

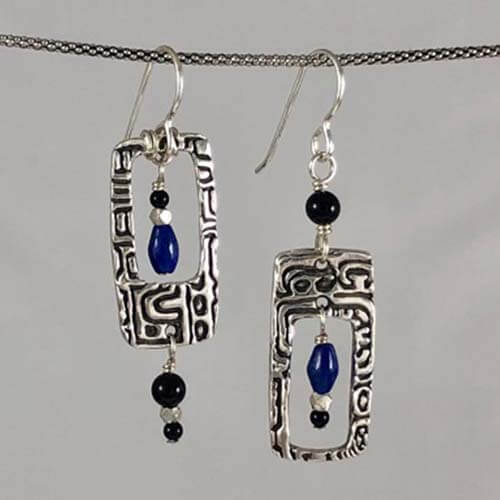
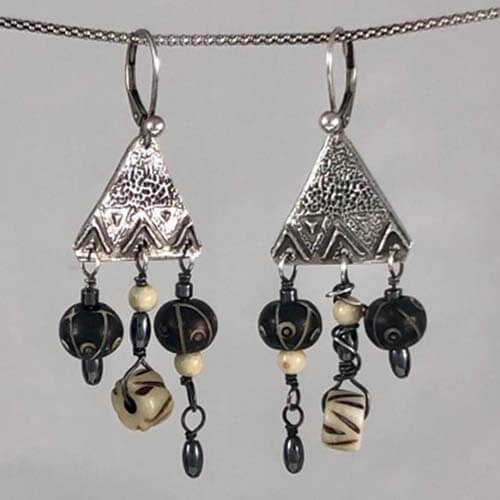
Earrings by Loretta Hackman, photo: artist’s own

Loretta Hackman, photo: artist own

Earrings by Loretta Hackman, photo: artist’s own

Metal Clay and Beads, 4, Loretta Hackman, photo: artist own

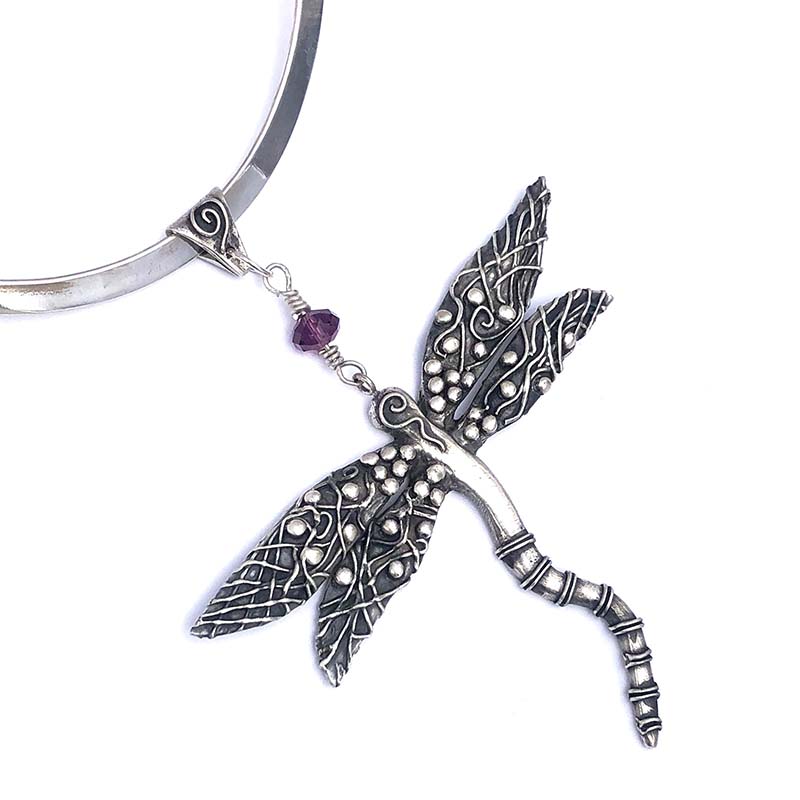
Dragonfly by Iliana Carrillo
Creatures & Critters Collection (AMCAW Tutorial)

Hamilton leaf brooch

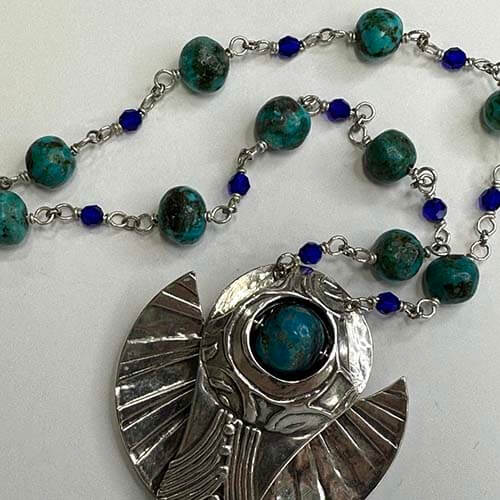
Necklace by Loretta Hackman, photo: artist’s own

As shown in these pictures, the wire-wrapped loop can be used:

  • to securely add a single beaded dangle from a headpin to a simple earring charm,
  • to create chandelier-style earrings or pendants,
  • to connect a clasp to a chain or a pendant to a bail,
  • to coordinate a series of accents in a flowing beaded chain, such as in a necklace, bracelet, beaded prayer tool, and much more.

Just Four Tools and Five Basic Steps

Double Pendant By Paola Mattioli

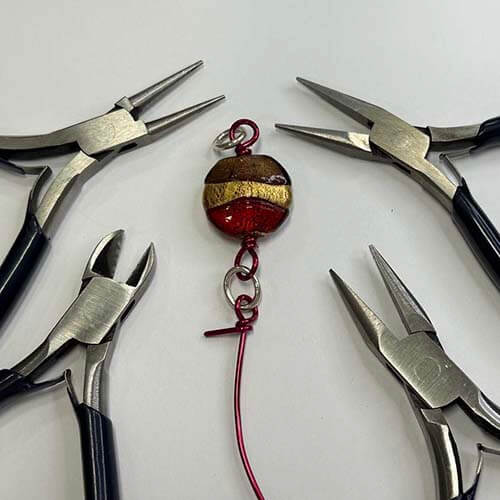
Creating a wire-wrapped loop requires just four standard jewelry making tools:

  • one round-nose plier,
  • two chain-nose pliers (one to hold the loop and the other to move wire at the same time), and
  • one sturdy wire cutter.

Note that jeweler’s pliers have smooth working faces, not the ridged surfaces that are typical with household shop-bought tools. Smooth working faces are important to prevent the wire from becoming marred during the work process. It is wise to invest in high-quality tools if this technique is to become a design standard for you. The tools shown here have standard handles, but ergonomically designed options are also available.

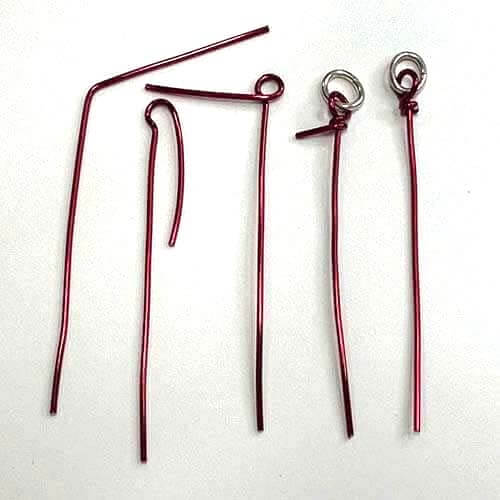
Here, the five basic steps are quickly demonstrated using 16-gauge/1.3mm red coated copper craft wire as opposed to jewelry wire.

From left to right, the steps are named:

  • boomerang,
  • shepherd’s hook,
  • lollipop,
  • wire-wrap, and
  • nip-and-tuck.
Star Earrings By Paola Mattioli
What If You Fly? By Annemarie Klappe

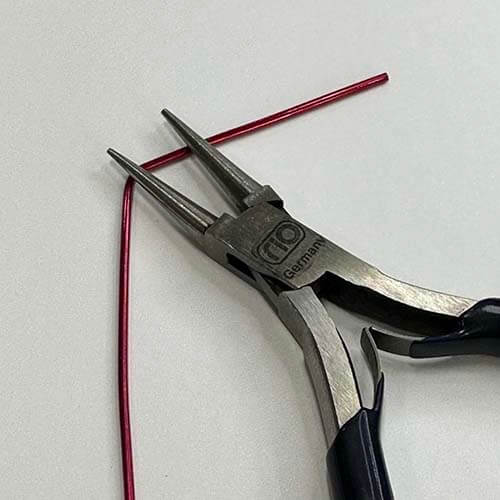
Step 1 – Boomerang – The goal of this step is to create a clean, sharp angle of approximately 105°. For this step, it is extremely important to use the tool to move the wire. Avoid moving the wire with the hand that’s not holding the tool. The wire should look somewhat like a very skinny, lopsided boomerang.

What If You Fly? By Annemarie Klappe

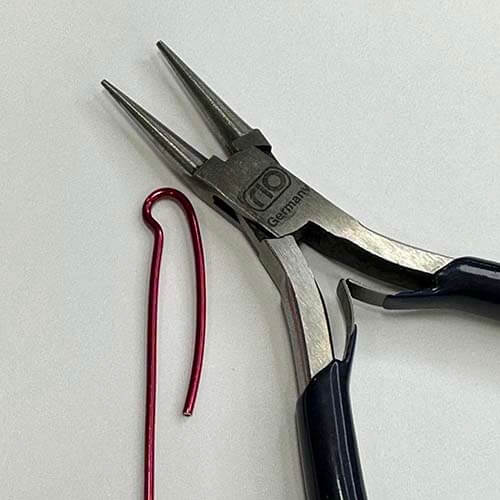
Step 2 – Shepherd’s Hook – The goal of this step is to begin to create the eye of the loop. The inside diameter of the loop is dictated by the placement of the wire on the graduated cone of the round nose plier. Some projects may require a smaller loop and the angle of the boomerang wire would be placed toward the tip of the plier. Others, such as attaching a wire-wrapped loop directly through the hole of a metal clay charm, will require a larger loop and the wire would be placed closer to the joint of the plier. To create consistent-sized holes, it is often recommended to mark the desired diameter directly on the tool using a fine-tipped permanent marker.

What If You Fly? By Annemarie Klappe

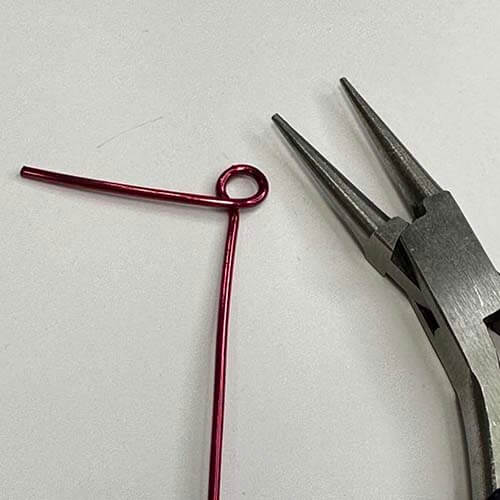
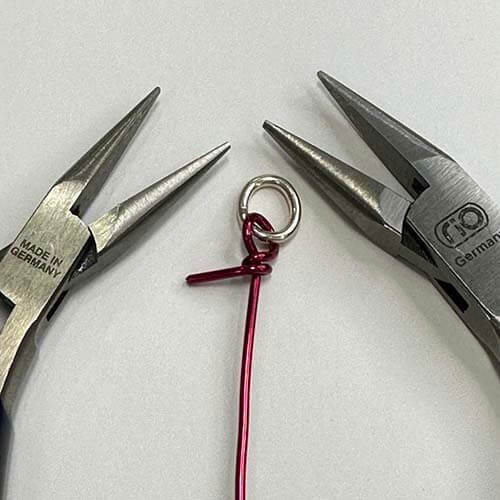
Step 3 – Popsicle – The goal of this step is to pull the short end of the wire across the front of the long end, right at the base of the loop, creating the front of the wire-wrapped link. The loop should resemble a round popsicle on a long stick. The long end of the wire should protrude cleanly below the wire. And the short end of the wire should create a 90° angle with the long end of the wire, right at the base of the loop.

  • Really Important – If the loop is intended to attach to a closed-loop component at this point, such as a soldered jump ring, a length of chain, a closed earring finding, a charm, or a pendant, now is the time to make that happen. Once the loop is wrapped, the only way to attach a closed-loop component is with an open-looped component, such as an open jump ring. This is not a disaster, but using open connections in a wire-wrapped piece defeats the purpose of adding strength by using a wire-wrapped loop.
What If You Fly? By Annemarie Klappe

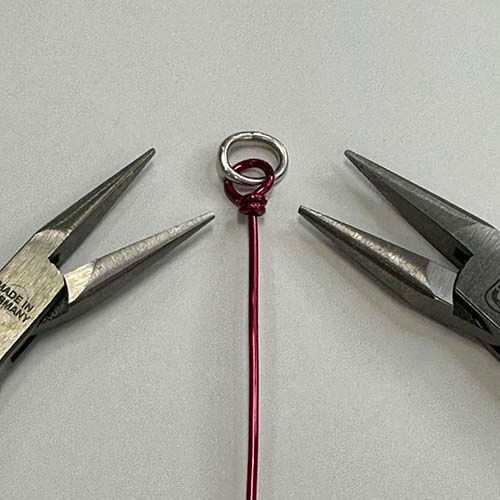
Step 4 – Wire-Wrap – Once any attachments are made as in Step 3, the open loop is now ready to be closed. This step gives the wire-wrapped loop its name. Here, we wrap the wire twice around the bottom of the loop. If you decide the piece calls for more wraps, the length of wire above the boomerang angle would need to be longer.

What If You Fly? By Annemarie Klappe

Step 5 – Nip-and-Tuck – In this final step, the short end of the wire, now at the back of the loop, is closely trimmed and tucked in so that it doesn’t snag during wear. A clean tuck is essential to a high-quality finish.

Those are the basic steps that are repeated for each and every wire-wrapped loop. Now it is time to add some beads.

What If You Fly? By Annemarie Klappe

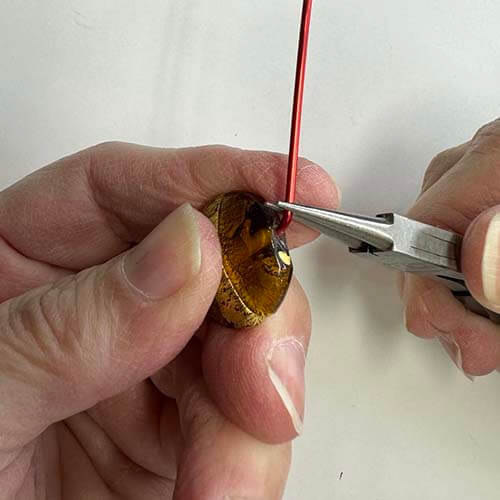
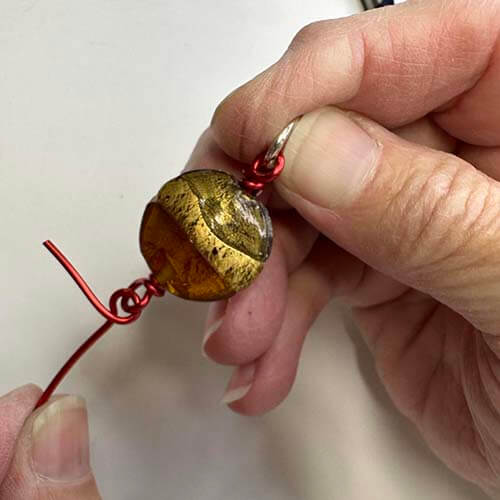
Step 6 – Create the Link – The first five steps complete the wire-wrapped loop but have created just one end of a link. Let’s add a bead. The goal here is to create a second wire-wrapped loop that is two wire widths above the bead. The two-wire gap allows space for wrapping the wire twice around the bottom of the new loop, matching the top of the loop.

This image shows a new link in the popsicle stage connecting directly to a finished link. To create a more flowing necklace or bracelet, consider placing a length of chain or a decorative link between beaded links. This is added between steps 3 and 4 while the popsicle of the original link is still open.

A deep-dive into the details of creating the wire-wrapped link is included in the members-only article in the AMCAW Learning Center Resources. [link to members-only article] The expanded article also contains important safety tips, design tips, and tricks of the trade to expand your options for working with what originally seemed like difficult beads. It takes time and effort to become proficient with this technique but adding it to your skills inventory can greatly expand your market.

Step photo credit: Loretta Hackman / Tom Hackman

Star Earrings By Paola Mattioli
Could the wire-wrapped loop be the missing link to your future?