Greenware Findings Formed From
and For Metal Clay
In a nutshell, findings are the individual elements that are contained in jewelry designs.
This series of AMCAW Learning Center Resources, homes in on three different categories of findings:
- Prefabricated findings that can be incorporated into metal clay jewelry before or after firing.
- Fired findings formed from metal clay that can be incorporated directly into multi-faceted jewelry designs (the subject of this article).
- Greenware findings formed from and for metal clay. These are elements that can be stored in the greenware stage to later be included in wet clay or greenware stage metal clay designs.
In addition to public videos and articles such as these in the AMCAW Learning Center, a study of the AMCAW Member Tutorials allows members to filter through an ever-expanding gallery of resources related to metal clay techniques and projects, including detailed guidelines for creating many metal clay findings. This series of articles provides a directed path to some of those resources.
GREENWARE FINDINGS FORMED FROM AND FOR METAL CLAY
By pre-creating often used design elements (greenware findings) and storing them in the greenware stage to be included in later metal clay designs, the metal clay artist can produce their unique work more efficiently, saving time and making more profit in the long run. Note that it is important to:
- keep clear records of the type of metal clay used in creating greenware findings and,
- either match the clay used in the future piece to the greenware finding or ensure that the clays are compatible in terms of shrinkage, firing requirements, and clay type.
Don’t Bail Out On Bails AMCAW Learning Center Resources
For example, generally speaking, many low-fire fine silver clays can also be co-fired with other fine silver clays or many sterling silver clays. However, co-firing the same fine silver greenware finding with copper or bronze will almost certainly result in an undesirable outcome.
As metal clay artists progress through the early stages of learning jewelry design principles and metal clay techniques, they often find that they are drawn to certain styles and effects that eventually define who they are as an artist. Some develop a whimsical style. Others gravitate toward geometric shapes (symmetric or boldly asymmetric). Yet others go rogue and develop a more flamboyant approach to design. An artist’s repeated style choices becomes their personal signature.
This style development is also reflected in the findings that the artist repeatedly reproduces, creating a theme that influences their toolbox of techniques. Certain bail styles begin to prevail. Specific embellishments are showcased over and over again. Favored stone setting techniques are identified.
This convergence of styles and techniques creates an opportunity for the individual artist to streamline their creative process. How? By deliberately and proactively pre-producing elements that routinely go into their designs, and then saving those elements in the greenware stage. The artist can then create a one-stop greenware shop in their own studio. This slight modification in the artist’s personal design process has the potential to save time and manage resources. It also puts a spark in the creative process which is now not as bogged down in creating embellishments… they’re already available. The process is akin to a chef prepping vegetables and seasonings in a grand kitchen, readying them to be used later in precisely the proper measure and at precisely the proper time.
What design elements might qualify for early prep work? It is helpful to think in terms of two categories: undecorated functional components (such as bails, tags, and beads) and decorating elements (such as dots, discs, and pre-set stones). Remember, these are stored in the greenware state. They can be embellished later to coordinate with future designs.
Undecorated Functional Components
This category includes plain bails, beads, earring elements, identity tags, tubes, end caps, etc. All are deliberately created and carefully stored in the greenware state, waiting to be embellished in a future design.
Bails/Bales – There are a wide variety of bails/bales used in metal clay jewelry designs. Here, we show you a few that are often seen in metal clay pieces. The Don’t Bail Out On Bails article in AMCAW’s Learning Center Resources has an excellent overview.
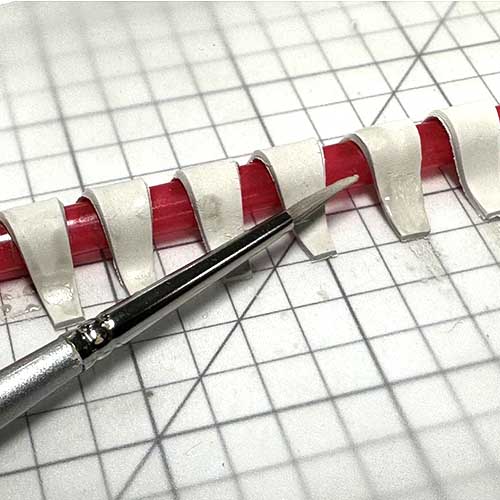
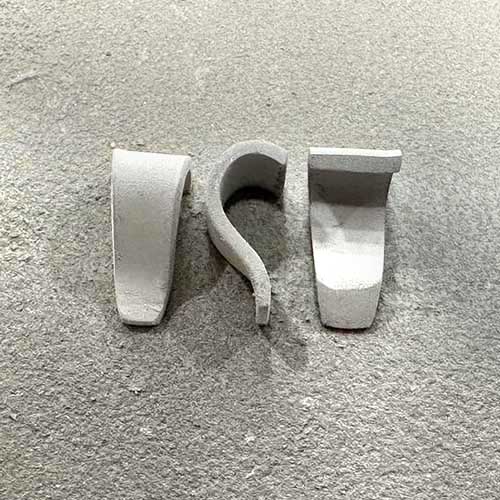
Simple ear shaped bails are classic must-haves in any greenware inventory collection. See the pictures below. The following guidelines are appropriate for low-fire fine silver clays and may be modified for other clay types.
- Roll out clay to 4-cards/1mm thickness.
- Cut tapered wedges with a wider top edge and a narrower bottom edge.
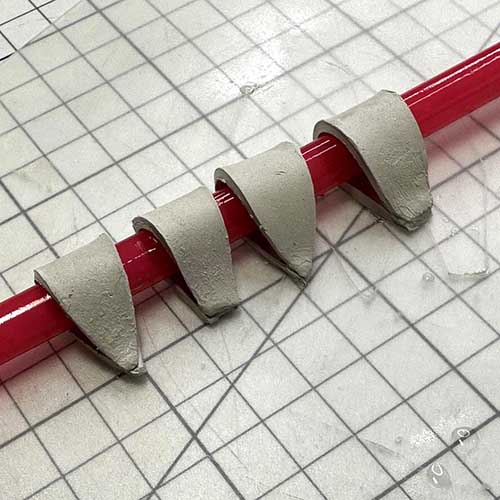
- Form the wedges over a plastic drinking straw or similar tube shape, tucking the wide top edge under the side of the straw. Shape the length of the wedge so that it loosely follows the curve of the straw. Ensure that each bail lays square from top to bottom.
- Allow to dry partially, then remove the drinking straw. Allow the bails to dry completely.
- Once dry, sand the edges with progressive grit sanding pads, taking care to ensure that the side edges are symmetric. Then, sand the top and bottom edges to bevel the attachment points. This increases the surface area of the attachment, which results in a stronger connection.
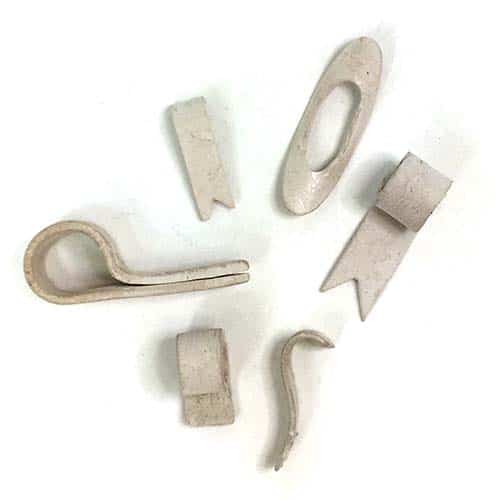
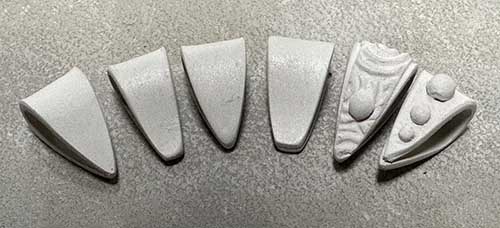
Simple discrete slab-formed fold-over bails can either be attached directly to a pendant as a fixed bail or fashioned as an articulated element, referred to as a floating bail. Note that a template was used as a reliable guide to cut the shapes of these bails. Each bail is approximately ¼-inch/6mm wide and 1 ¼ -inch/35mm long in the wet clay stage. To create fold-over bails:
- Roll metal clay out to 4-cards/1mm thickness.
- Fold each bail over a plastic drinking straw or similar tube shape. Align the bail so that is square from top to bottom. Join the lower edges with a tiny dot of water. This ensures that the ends stay together as they dry. If the bail is later intended to straddle across the front and back of a future flat pendant, use a craft knife to carefully slice the join between the two ends. This will later allow the bail to carefully slide across the top of a flat pendant or earring element with a strong join. See AMCAW Virtual Guild “Brilliant Bails” by Julia Rai.
- Partially dry the bails, then remove them from the straw. Allow the bails to dry completely.
- Once dry, sand the edges (and faces, if necessary) with progressive grit sanding pads, taking care to ensure that the side edges are symmetric. Store the fold-over bails for future use.
- The two greenware bails shown on the right of this image have been embellished with decorative accents to coordinate with the pieces that they are designed for. One piece has a two-card thick textured top element that is slightly narrower than the greenware bail. This allows the smooth untextured edges to create visual contrast and interest in the finished piece. The rightmost bail is embellished with three different sizes of dots and there is also a dot on the back.
Artist: Annemarie Klappe, Photo: Artist’s Own
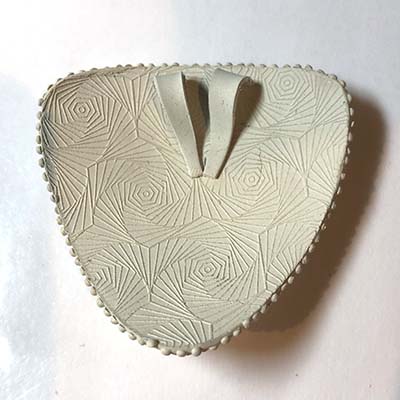
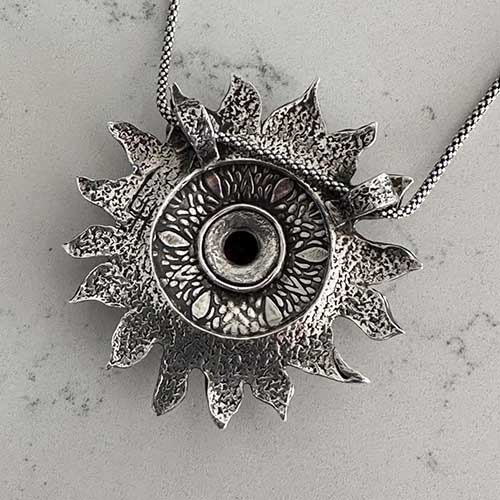
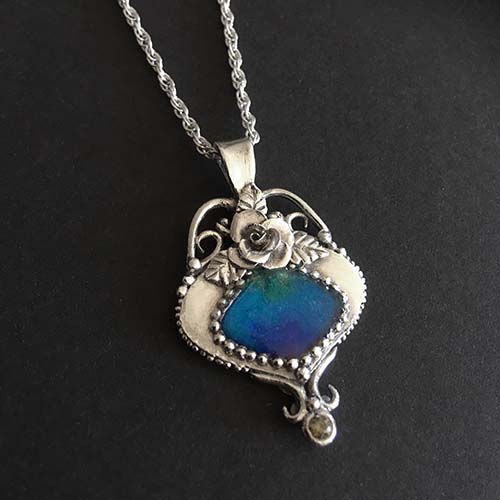
The pendant with the blue stone is an example of a slab-formed fixed bail where the bail is physically attached to the front and back of the pendant. A fixed bail can be attached in two ways:
- By straddling the bail with the front leg of the bail attached to the front of the piece and the back leg attached to the back. This attachment results in the bail showing above the top of the pendant. Or…
- By attaching the bail directly to either the front or the back of the piece, but not to both. This treatment allows the bail to either show above the top of the piece or be hidden on the back, below the top edge of the pendant.
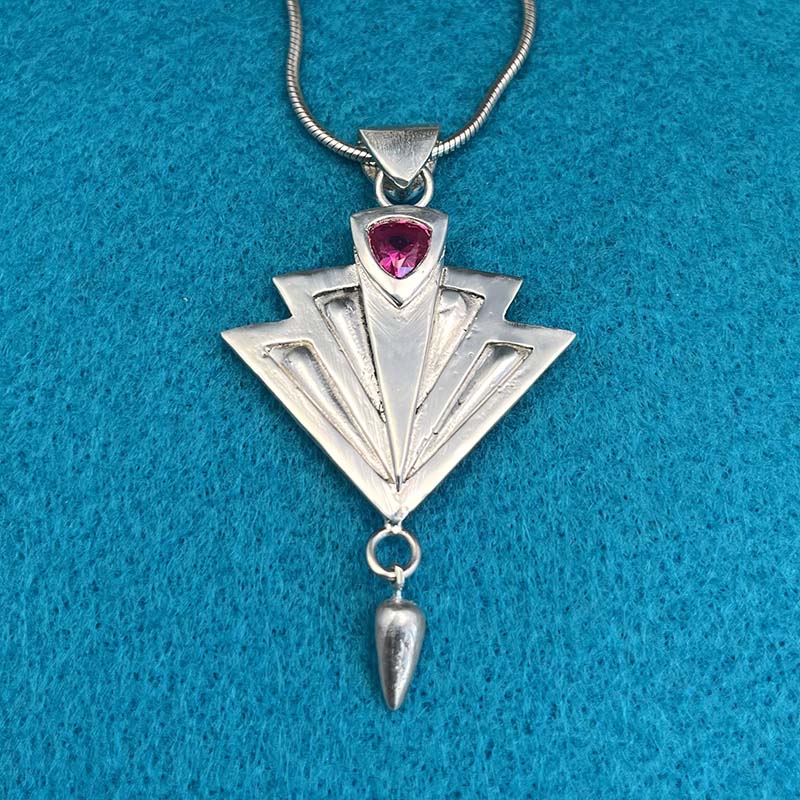
Art Deco Fan Box Pendant By Tracey Spurgin,
All That Glitters Collection (AMCAW Tutorial)
The Art Deco Fan Box AMCAW members only tutorial showcases a slab-formed classic articulated or floating bail where the bail and pendant are separated by a connecting piece. This treatment creates eye-catching motion in the finished piece. Please refer to the Art Deco Fan Box tutorial for specifics on how to attach a floating bail.
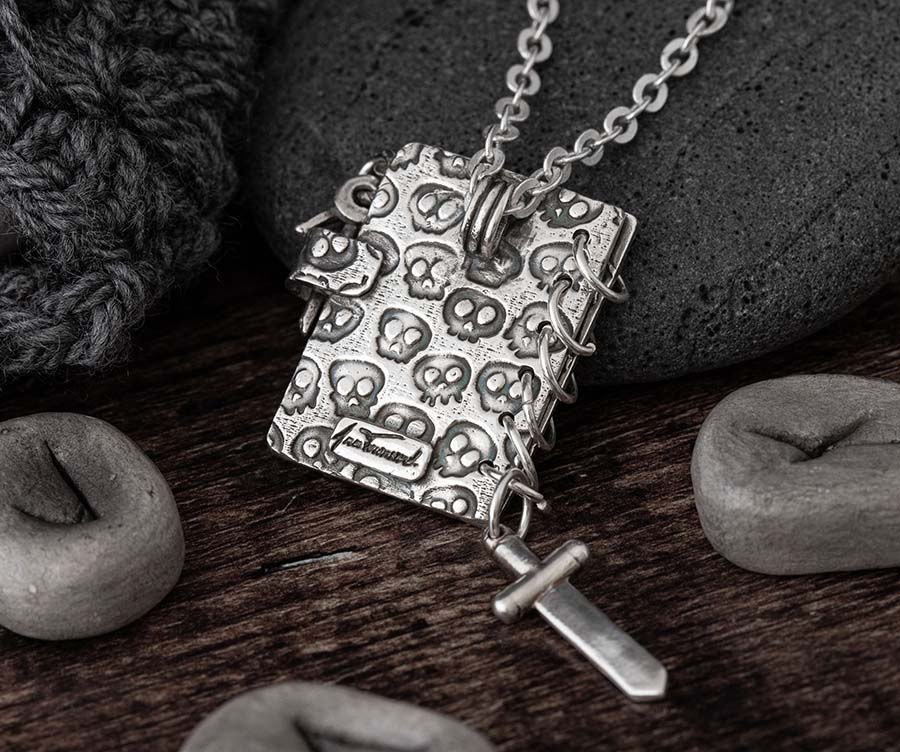
My Little Book of Runes By Ana Townsend,
20G Collection (AMCAW Tutorial)
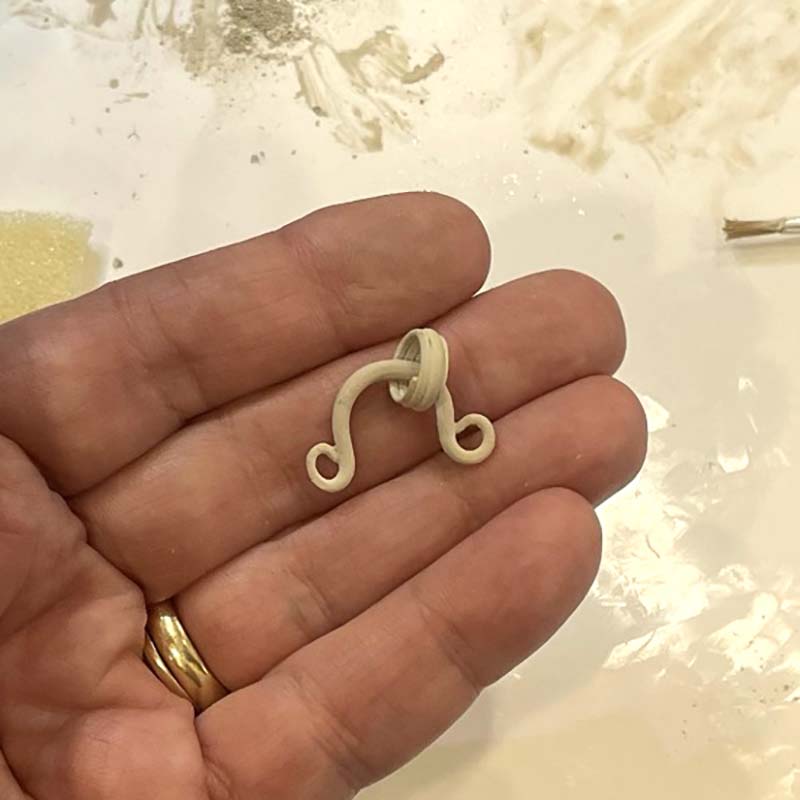
A coiled bail can also be either fixed or floating. These are created by rolling a long strip of coil-formed metal clay around a plastic drinking straw or similar tube shape. Allow the clay to dry partially, then remove the straw and dry completely. Note that if the coiled clay dries completely on the straw, it can be particularly hard to remove without breaking the coil.
The fixed coiled bail shown in this image is attached directly to the back of the My Little Book of Runes pendant.
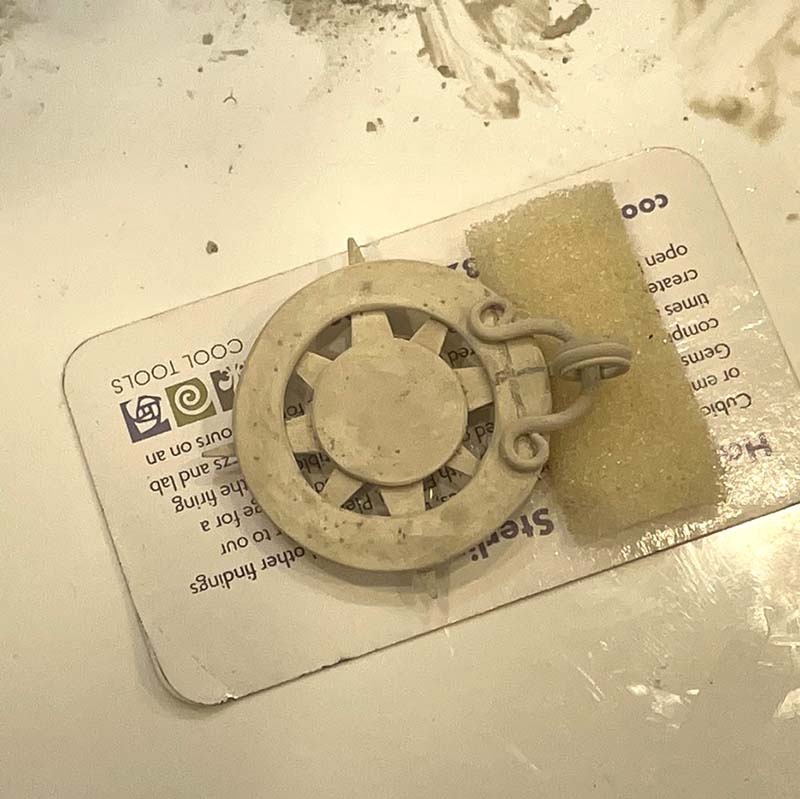
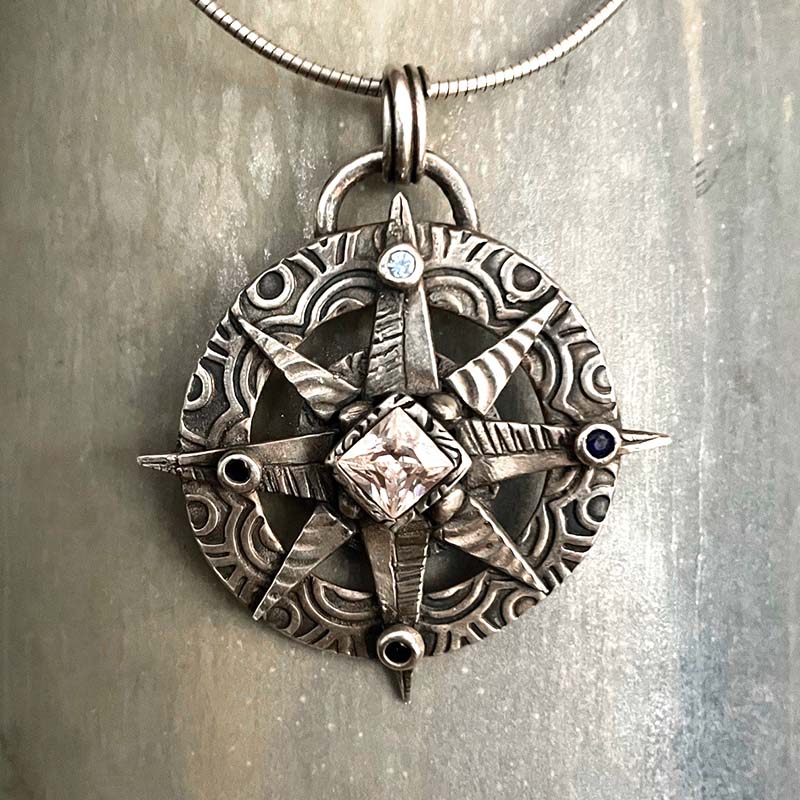
The next example shown is that of a floating coil-formed bail. The process of creating and attaching this beautiful bail is explained in the Points of Interest: A Compass Rose Pendant by Kim Rumberger Tutorial.
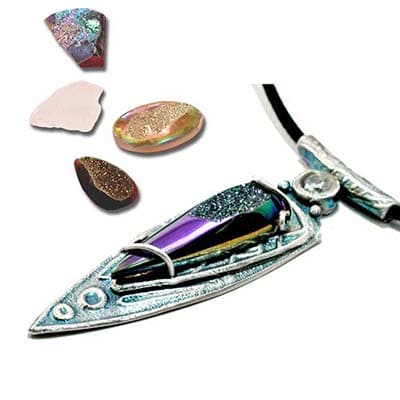
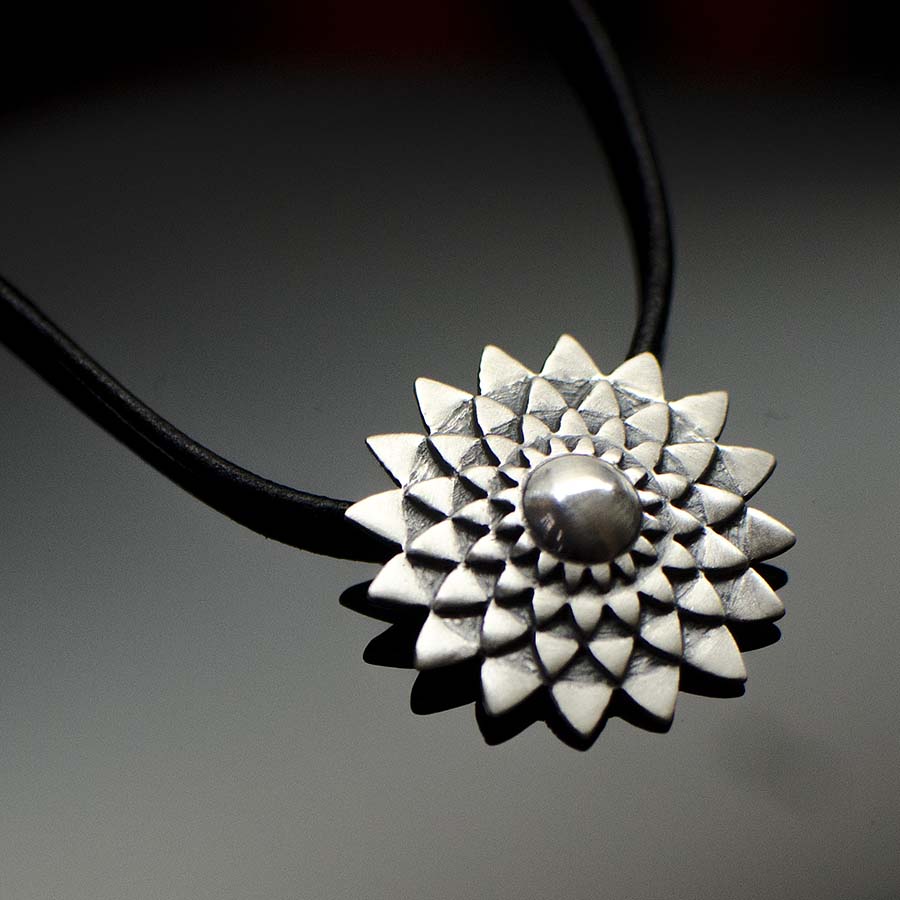
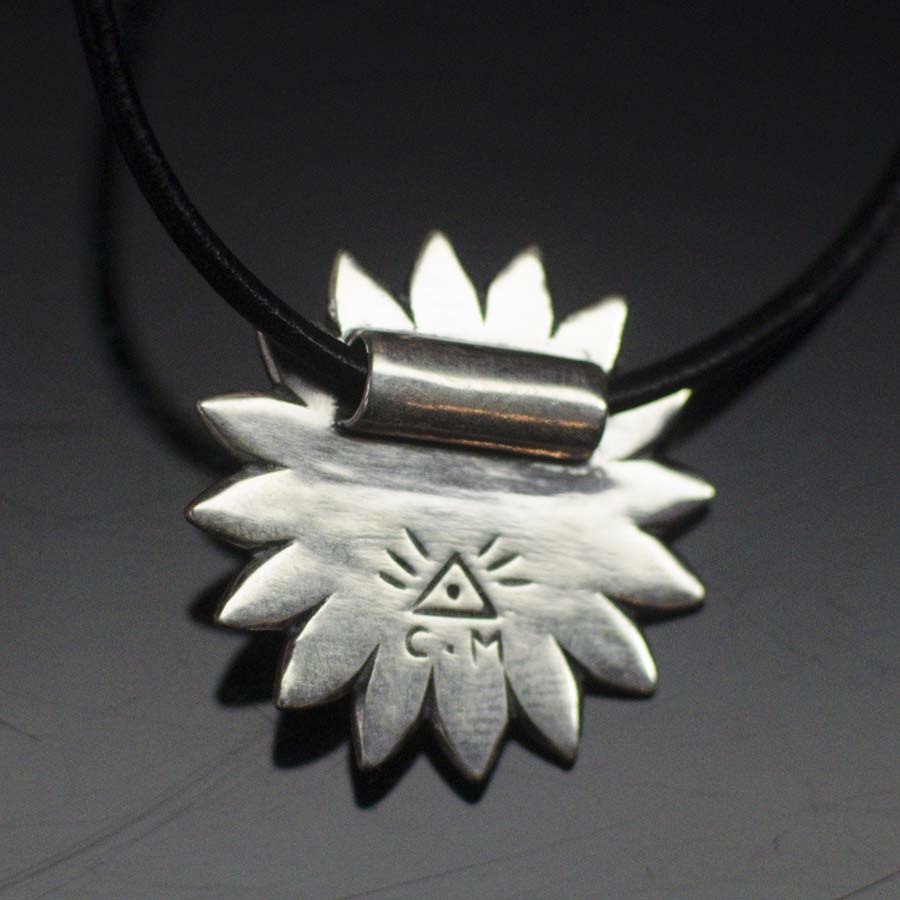
A final example is the tube bail which is created by wrapping a wide strip of wet metal clay around a plastic drinking straw or similar tube shape. The first pendant shown here is from the Custom Prong Settings by Lis-el Crowley tutorial. The second and third images, from the Lotus Blossom Pendant by Clement Marquaire tutorial depict the front and back of a piece with a well-designed hidden tube bail.
Note that there are many other treatments for creating metal clay bails. The options presented here are by no means complete, but they are representative of several good candidates for pre-creating as multiples and saving in the greenware stage. A virtual library of examples is included in the AMCAW member tutorials.
See Attaching Greenware to Greenware [jump to Sian?] toward the end of this article for guidelines on attaching bails to future designs. Also see Storing Greenware Elements [jump to Sian?] for storage suggestions.
Custom Prong Settings By Lis-el Crowley,
Flash & Fire Collection (AMCAW Tutorial)
Lotus Blossom Pendant By Clément Marquaire,
20G Collection (AMCAW Tutorial)
Beads
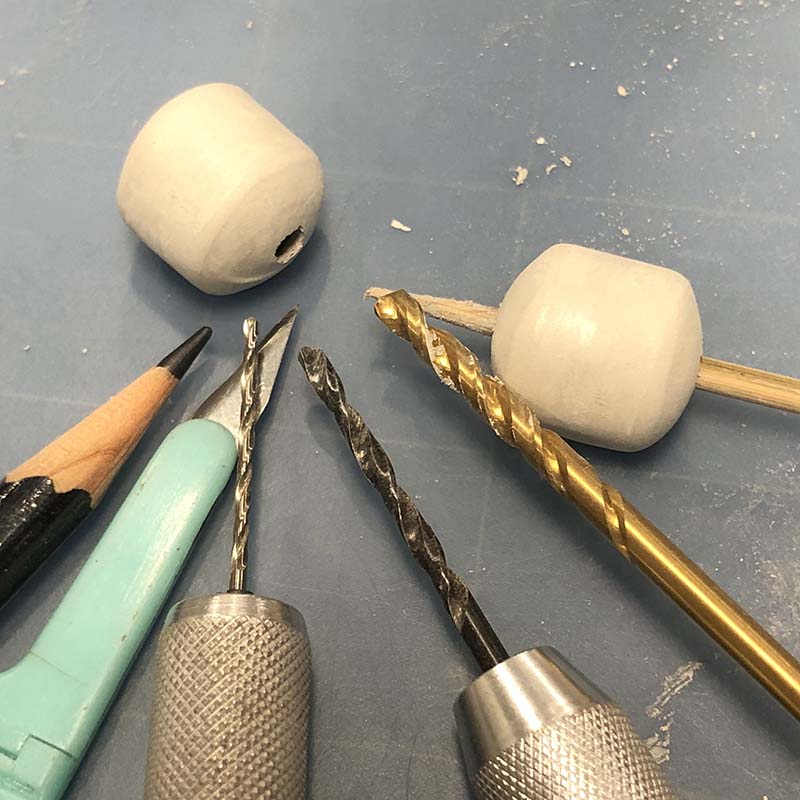
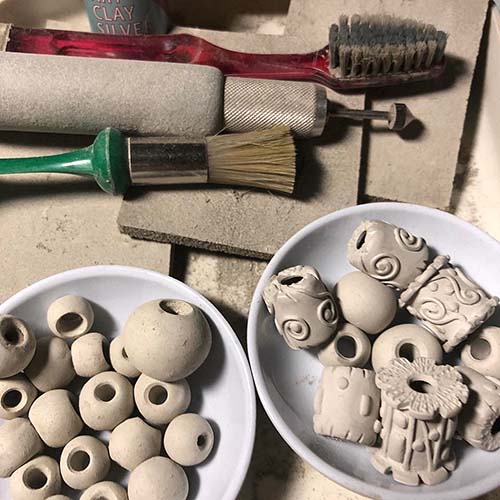
Basic bead shapes can be created and later embellished with syringe work, coils, decorative raised elements, hand-carving, and/or the addition of thin textured elements.
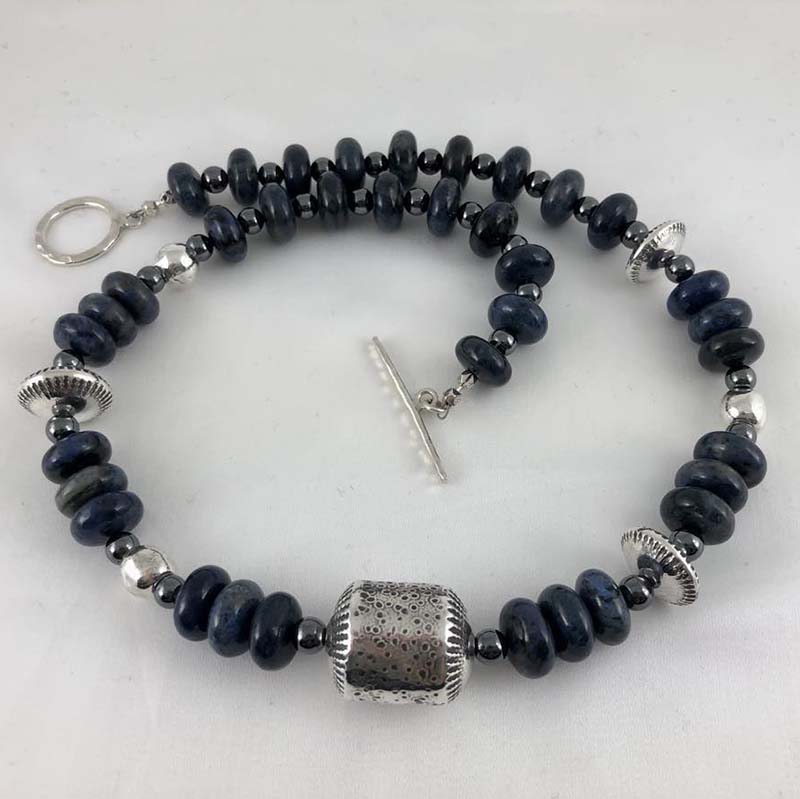
Small round or cylindrical metal clay beads are fun and functional tools for an artist to add a special flair to a beaded necklace. They can be worn individually as a minimalist stand-alone pendant, strung together in a collection of silver, or interspersed with stones, glass, or pearls to create mixed-media masterpieces. See Bodacious Beaded Necklace By Loretta Hackman,.
But artists who work in larger shapes can also benefit by pre-creating unadorned pieces for future decoration.
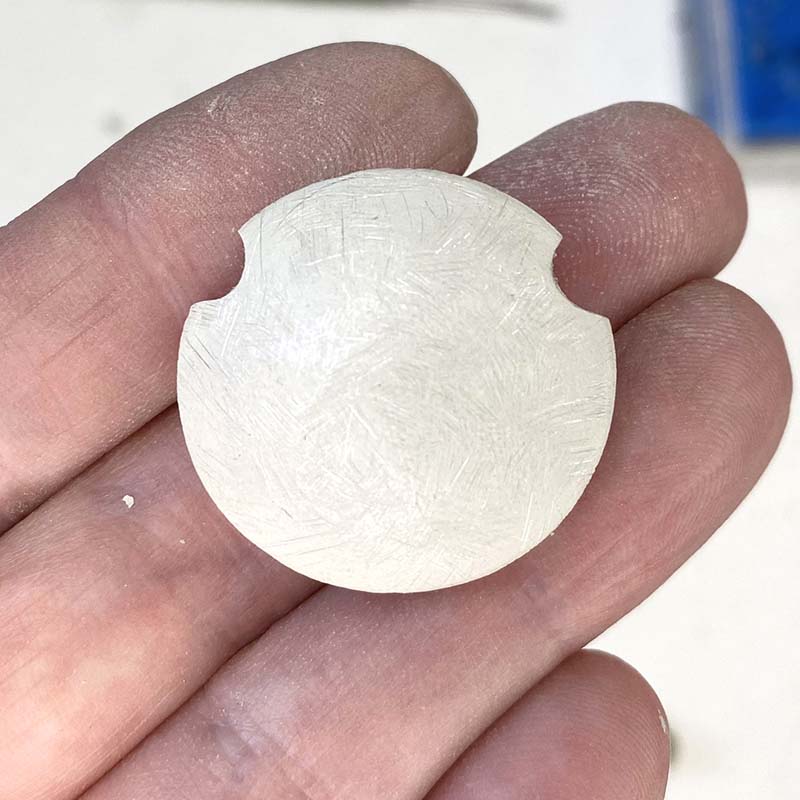
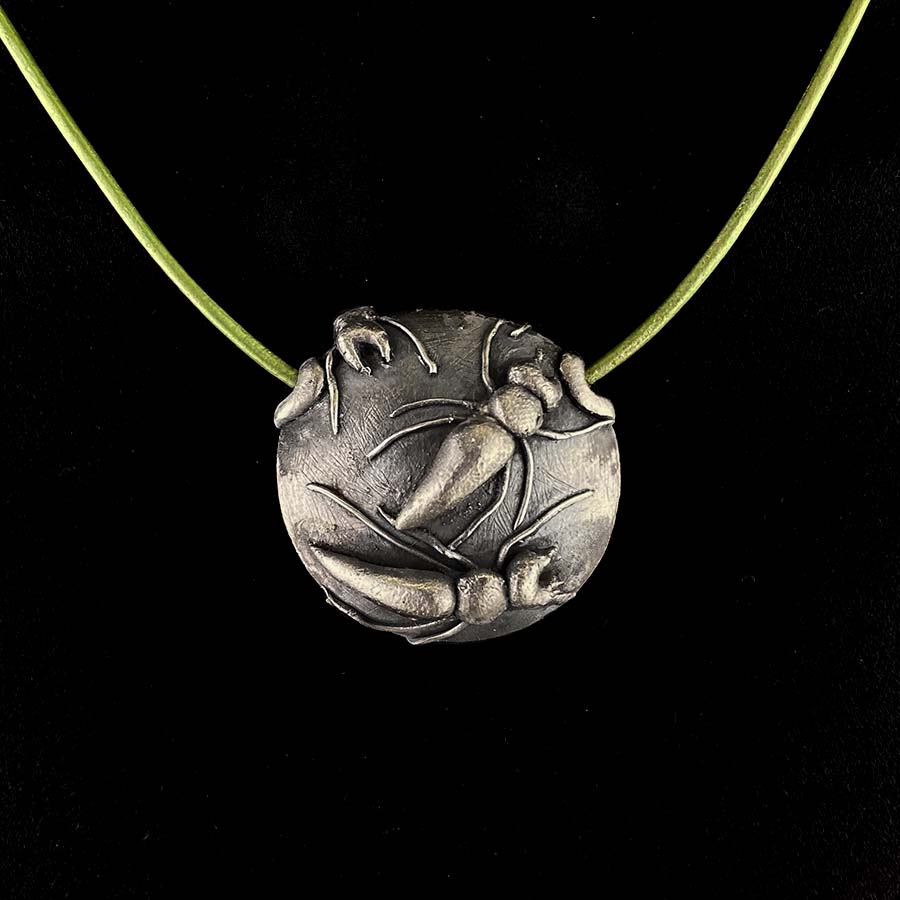
Here, a larger basic lentil bead is embellished with carved features and three-dimensional elements which, themselves, can be pre-created and saved in greenware.
Texture can be created directly on a thicker lentil base using dry or wet carving techniques, or thin textured slabs of wet clay can be added. See Colony Pendant by Barbara Becker Simon.
Colony Pendant by Barbara Becker Simon.
Creatures & Critters Collection (AMCAW Tutorial)
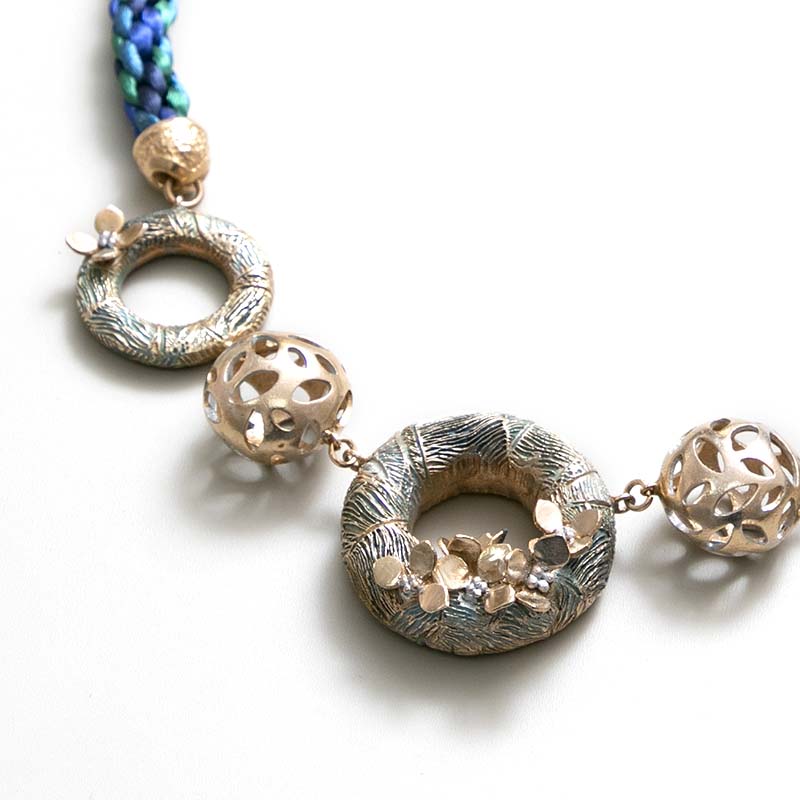
Hydrangea Necklace By Irina Vasilieva,
Mixed Media Collection (AMCAW Tutorial)
Similarly, artists creating a design series with repetitive complex shapes can prepare these ahead.
The hollow-form donut and spherical shapes shown here are detailed in the greenware stage.
Even the end caps for the Kumihimo necklace can be prepared ahead and embellished later. See Hydrangea Necklace by Irina Vasilieva
Decorating Elements
This category includes dots, shapes, pre-set stones, etc. These are saved in the greenware state and create fabulous flourishes for future designs.
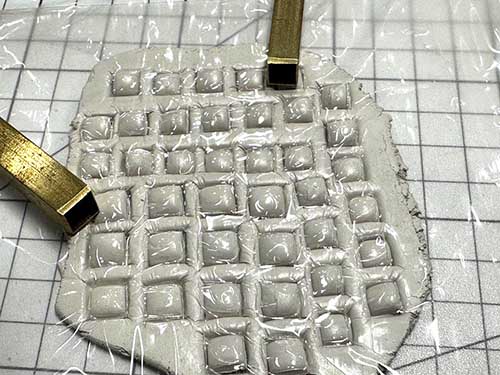
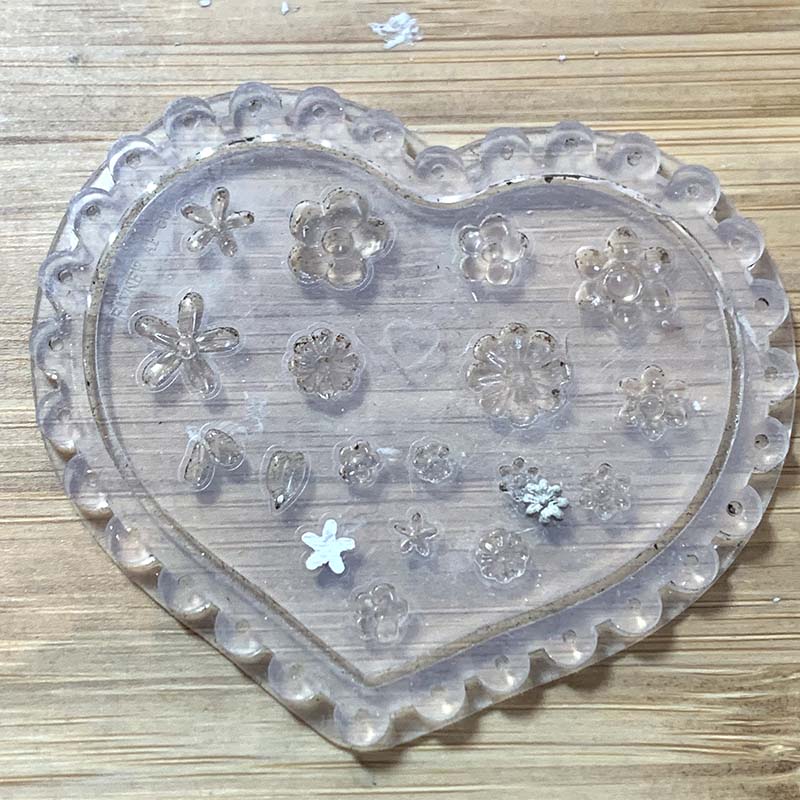
Going Dotty – Many metal clay artists use tiny nail art molds or other tiny commercial molds in floral, geometric, animal, and abstract shapes to create 3-dimensional greenware accents. Shapes can also be created using small cutters for example, teardrop, square, circle, rectangle, flower, and heart shapes as shown here. Soft shouldered elements have gently curving sides rather than the blunt sides normally associated with using cutters.
To create soft-shouldered greenware elements from small cutters, follow these steps:
- Roll out a flat slab of clay to the desired thickness of the accent, those shown here are 1.5mm/6 cards thick.
- Lay a sheet of stretchy plastic wrap or cling wrap over the slab.
- Press small cutters directly into the clay through the plastic wrap, pushing the cutter all the way through the thickness of the slab. The plastic wrap will stretch over the surface of the clay, creating soft-shouldered accents that match the shape of the cutter. NOTE: if a more blunt edged accent is preferred, eliminate the plastic wrap and cut directly through the clay as normal.
- Remove the excess clay and dry the accents completely.
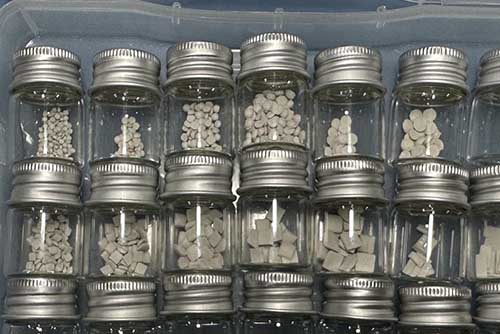
- Store the accents in separate containers according to shape and size – see Storing Greenware Elements [jump to?] at the end of this article.
- To attach these small shapes, first wet both the back of the greenware accent and the front of the greenware piece. Allow the water to soak in for two minutes to reactivate the binder. Carefully position the accent into place and apply pressure until the accent locks into position. Use a gentle squidge or wiggle motion, if necessary, to test for a good connection. Generally speaking, these small shapes don’t need paste or clay to attach to a base.
- Note that larger and often thicker accents can be used as stone-setting frames.
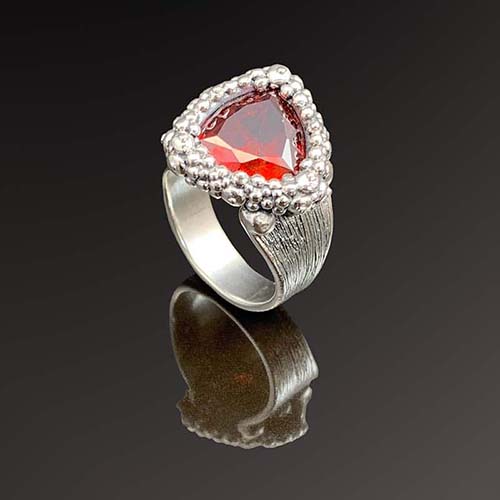
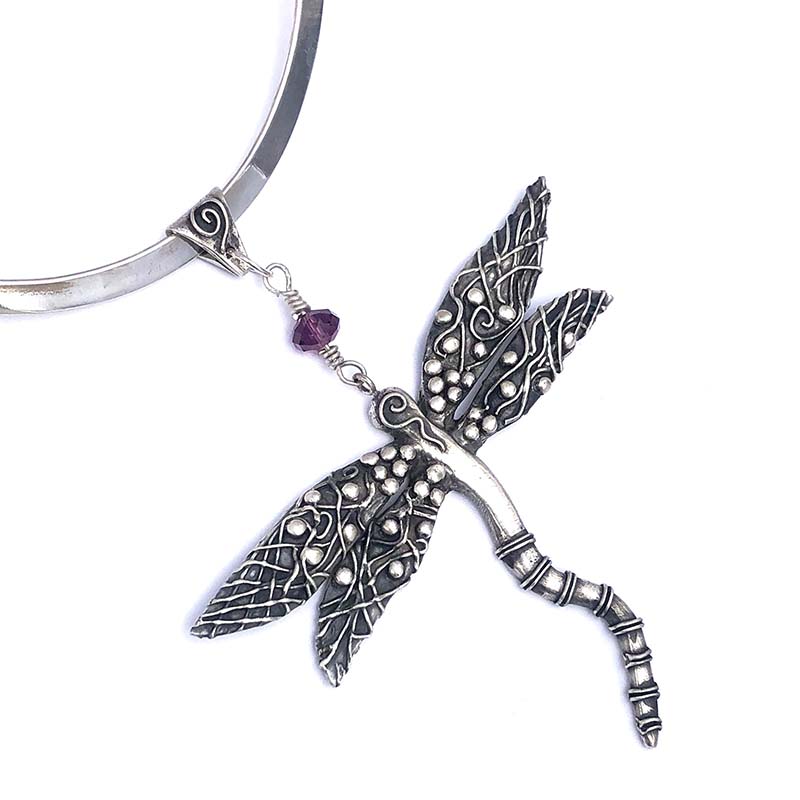
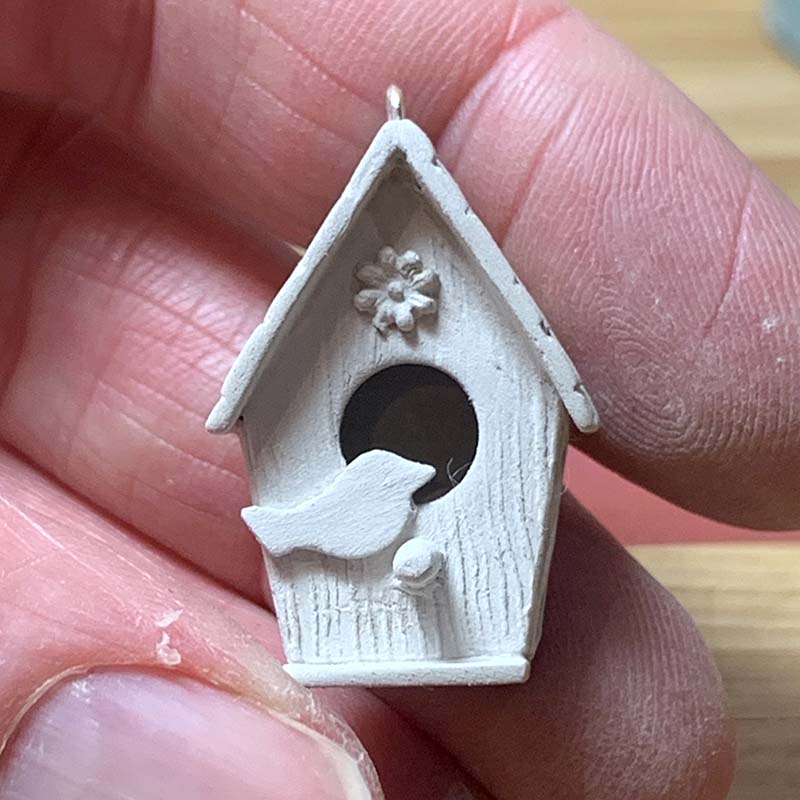
The following images show projects created using greenware stage embellishments such as dots or flowers from nail art molds. The dragonfly pendant also shows another example of a floating bail design.
Cocktail Ring By Tracey Spurgin,
20G Collection (AMCAW Tutorial)
Dragonfly By Iliana Carrillo,
Creatures Collection (AMCAW Tutorial)
Bird Box Pendant By Lisa Johnson,
Boxes & Lockets Collection (AMCAW Tutorial)
Bird Box Pendant By Lisa Johnson,
Boxes & Lockets Collection (AMCAW Tutorial)
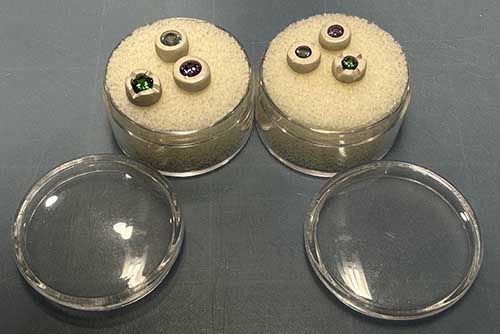
Stone Setting In Advance
Pre-creating routinely used stone settings can be a massive time-saver.
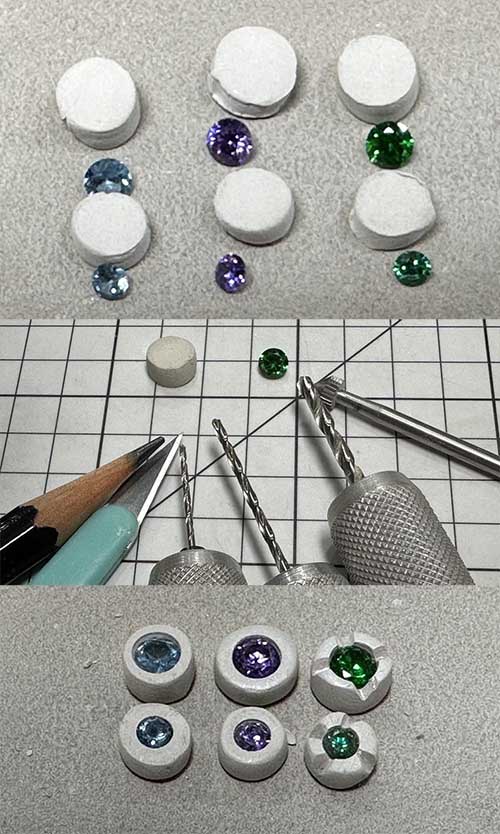
The image shows round faceted stones in the process of being flush set or gypsy set using stone-setting burs.
The stone is often set in metal clay by creating a pavilion-shaped hole with a cylinder above it. The pavilion of a stone is the part that runs from widest part of the stone, the girdle, down to the point, called the cullet, which forms a V or cone shape.
The diameter and depth of the cylinder above this matches the diameter and depth of the stone’s girdle and crown and is the element that grabs the stone during firing shrinkage to hold it in place.
It is important to note that same-sized faceted round stones, even those of the same color, can have variations in the depth of both the girdle and the pavilion.
However, by creating generic flush settings for same-diameter stones, where the pavilion and girdle sections are slightly deeper than required for many stones, you can have stone settings on hand that can be modified to match the needs of many stones.
As shown in this image, settings can be stored rough (top), then cleaned up to suit the specific stone, or even carved to create a more decorative setting (bottom).
Note that these bur-created settings can also be used for flat-backed fire-safe round cabochons of the same diameter.
Attaching Greenware to Greenware
To attach a greenware element to a greenware base:
- First sand the back of the greenware element with coarse sandpaper, this creates a better surface for attachment.
- Similarly, sand the greenware base at the point of connection.
- Wet the attachment points on both elements and allow the water to soak in for two minutes. This reactivates the binder.
- Use either thick paste or a thin piece of clay to join the two elements together.
- Hold the join for at least one minute to ensure a good connection.
These guidelines work especially well for most silver clays. Base metal clays often need more attention to achieve a secure connection in the greenware stage, such as thicker paste or paste made with a strengthening additive. They also require you to hold the two elements together firmly for a little longer to ensure the connection is secure.
Storing Greenware Elements
It is helpful to store small greenware inventory elements such as raised decorative embellishments and smaller simple bails in small see-through containers. These containers are readily available at bead and craft supply stores.
For larger, heavier greenware inventory such as beads, it may be wise to use dry rice in a small container to separate neighboring items and prevent them from damaging one another. Greenware-set gemstones may benefit from being stored in small, cushioned containers, such as those used for storing gemstones.
