Dial Controlled Kilns
by Pam East
Computer controlled kilns are so prevalent these days, it’s hard to remember not long ago all kilns were controlled by a simple dial. If you were lucky, you also got an analog needle gauge pyrometer to squint at and try to interpret. The thing is, those kilns were workhorses. We made beautiful things in them, and you can too.
A willingness to learn how to use the dial opens up the possibility of picking up a used kiln at a bargain price. For the budget minded artist, these finds can be a godsend.
So let me see if I can demystify this for you.
What is a dial controller?
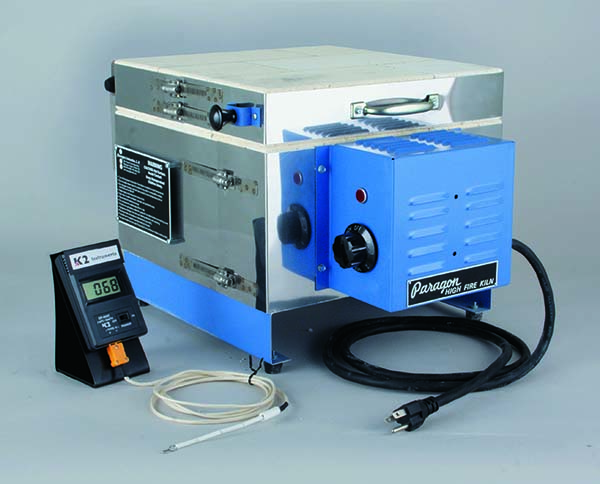
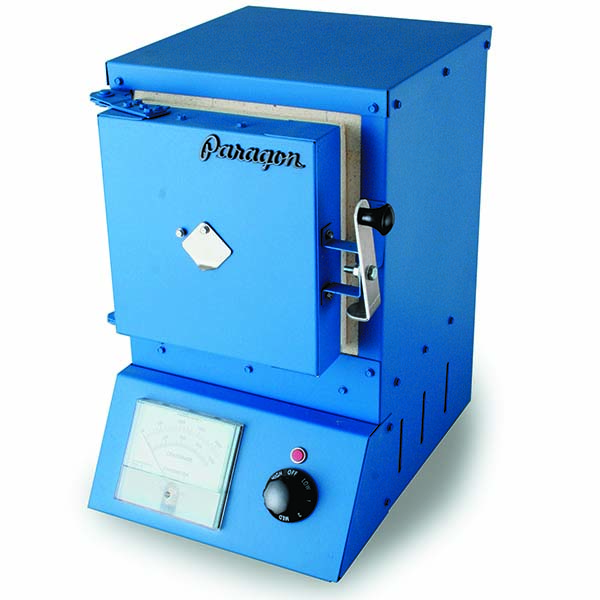
Simply put, a dial controller, also known as an infinite dial switch, is a round knob on the front of the kiln that controls the kiln. It is not, as many people believe, a temperature controller. You cannot simply turn the dial to a particular number and expect it to correlate to a specific temperature.
The dial controls the amount of power the unit is receiving. The varying amount of power controls both the speed of the kiln and the temperature it can reach. A lower setting is not only giving you a lower temperature, it’s also slowing the unit down. This is actually good news. It means you have complete control over your firing schedules and ramp speeds.
Do I need a pyrometer?
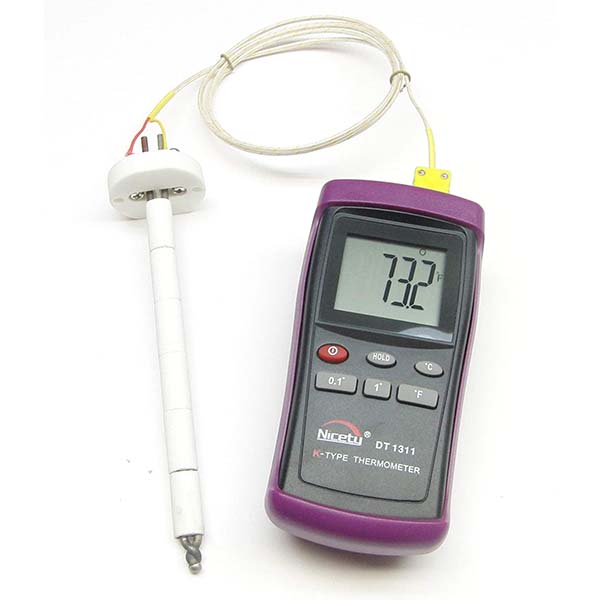
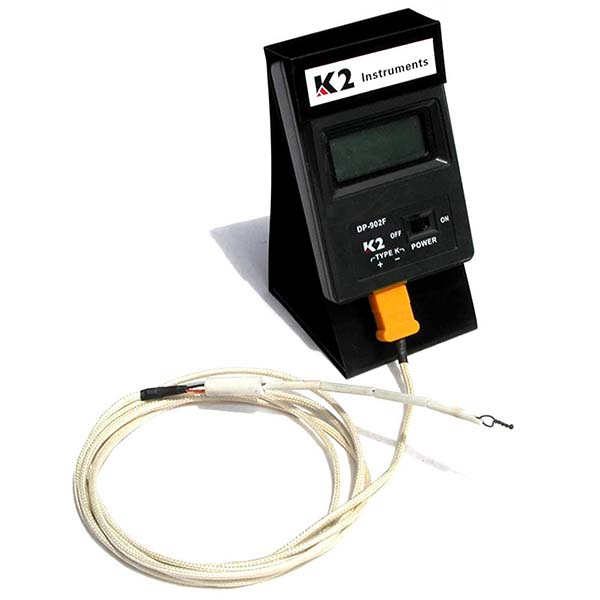
Yes, absolutely! A pyrometer is a temperature gauge which lets you know how hot it is inside your kiln. You aren’t going to be able to accomplish anything without one. I highly recommend a digital model over analog. They are relatively inexpensive and can be found on Amazon. Just make sure it’s rated for kiln use.
What’s a firing profile and why do I need to do it?
It’s important to know how your particular kiln, in your personal environment is going to fire. There is a lot of variation from place to place. Because the dial is a power regulator, environmental differences will change how your kiln fires compared to someone else with the same model. Factors such as how many devices are plugged into the same circuit, the temperature of the room, and a host of other variables will affect how the kiln runs.
A firing profile is a map of how your kiln, in your workspace, runs. It will give you the knowledge you need to get the most efficient use out of your kiln, and will reduce the need for constant tending.
Performing the firing profile is not difficult, just a little time consuming.
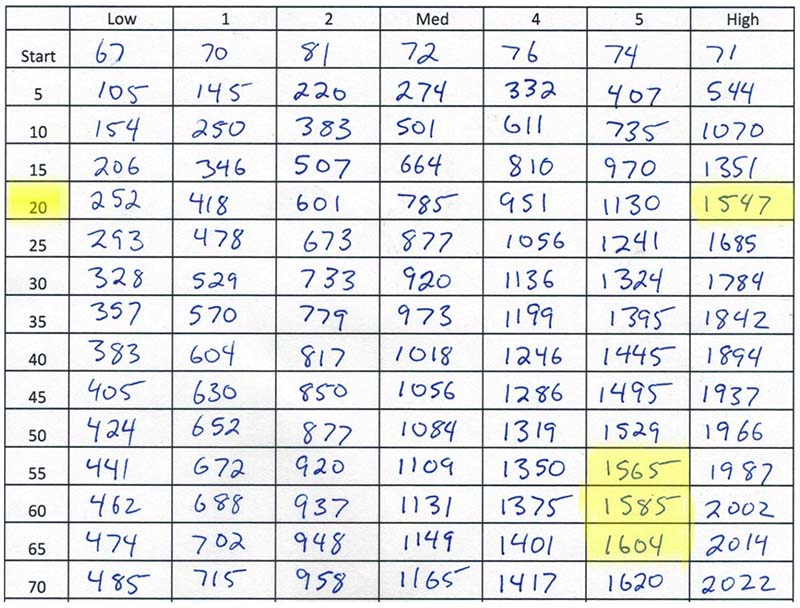
- Create a work sheet with the dial settings across the top and time in 5 minute increments down the side. (Blank Chart on Page 6)
- Set the kiln to a power setting and note the temperature every 5 minutes to fill in the form.
- Cool the kiln and start from room temperature between each setting.
Once you have this profile, you have everything you need to make a dial controlled kiln jump through hoops for you.
Can a dial maintain a holding temperature?
In a nutshell, yes it can. But the term “holding temperature” is something of a misnomer. There is a perception if you set a kiln to a particular temperature it’s going to hold steady there. That’s not how it works. All kilns, whether controlled by a dial or computer, rise and fall up to 10 to 15 degrees above and below the set point. That’s completely normal. I refer to this state as “Neutral Buoyancy.” There’s a bit of drift up and down, but remaining around the desired temperature.
Neutral buoyancy with a dial kiln takes a bit more practice than with a computer control, but it’s perfectly achievable. Unless a slower ramp speed is needed for the materials in the kiln, set the kiln to “high” to reach the desired temperature. Use your firing profile to figure out how long it’s going to take and set a timer instead of watching over it. Once it’s at the temperature you want, look at your firing profile again to determine about where you should set the dial to maintain it. Wait a bit. Watch your pyrometer and see if the temp rises or falls too fast. Make micro adjustments to correct it. Remember, the numbers on the dial are just reference points, they don’t lock into place. You can set the dial anywhere in-between to get the results you desire
I spent a couple months testing the SpeedFire® ElectricMini™ FrontLoader kiln (Sadly discontinued). From here on out, my examples are based on that; however, all the same concepts apply no matter which dial controlled kiln you are using.
Firing Silver Clay
My first test was an Art Clay™ Silver piece. I wanted to fire the piece above 1500°F (816°C) and below 1650°F (900°C) for 10 minutes. Referring to my firing profile, I could see setting the kiln on “High” would get to about 1550 in 20 minutes, and on “5” it would rise from about 1550°F (843°C) to 1600°F (871°C) in another 10 minutes. Piece of cake! (See Sample Profile Page 5)
I put my piece in the kiln, set it on “high”, and set a timer for 20 minutes. When the timer went off my kiln was, indeed, just over 1500. I dropped the dial down to “5” and set the timer for another 10 minutes.
Voila! My piece was perfectly fired in 30 minutes, about the same amount of time it would have taken in an SC2. Brick kilns will take longer, of course, but with the firing profile and a timer in hand, very little tending is required.
Enameling Silver Clay
My second test was to enamel the silver piece I had made. Enamels fuse between 1350°F (732°C) and 1550°F (843°C). Generally I run at 1450°F (788°C). Pre-heating the kiln on “High” took about 18 minutes. I dropped the kiln to a little above setting “4” to keep it at an appropriate enameling temperature. With enameling, making it hold steady is not critical so long as you are in the firing range, so this worked fine.
Firing enamels requires putting the piece in while the kiln is at the appropriate firing temperature and firing it for 2 to 3 minutes. It’s normal for the kiln temperature to drop when you open the door. What’s important to note is the recovery time. Remember, lower settings are not only keeping the kiln temperature lower but also slowing the kiln down. To mitigate this problem, Once I put the piece in, I turned the kiln back up to “High” long enough for the temperature to rise above 1400°F and then turned it back down to just above “4” to finish out the firing.
This method worked like a charm and I was able to do everything I can do in my bigger kilns. There were no enameling tasks any more difficult than in my more expensive, computer controlled kilns. In fact, I liked the instant control I had. Some colors require firing at lower temperatures, others fire better higher. With the dial, I was able to make firing adjustments on the fly without having to stop and reprogram a computer.
Firing Copper Clay
I did an open shelf firing for Art Clay™ Copper. I needed to fire it between 1780°F (971°C) and 1800°F (982°C) for 35 minutes. According to my firing profile, on “High” the kiln would reach 1784°F (973°C) in 30 minutes. I set the timer for 30 minutes and let it run. When the timer went off my kiln was right at 1784°F (973°C). I wrapped the piece in fiber blanket, placed it in the hot kiln, and waited for the kiln to recover back up to 1780. At that point I set my timer to 35 minutes and got down to the business of adjusting it to hold in range. Setting “5” fell below 1700°F (927°C). Setting “High” gets over 2000°F (1093°C); too high. So I set the kiln between the two, around 5.5.
It took me about 5 minutes of making very small adjustments to reach neutral buoyancy, drifting up and down between about 1785°F (974°C) and 1799°F (982°C). After that I was able to let it run. After firing I pulled the piece and quenched it. It came out perfectly!
I enameled this piece as well, and had no difficulty using the same kiln control methods as I had with the silver piece.
Firing Bronze Clay
Testing FASTFire BRONZclay introduced two new variables to the mix; Carbon firing and a slower ramp speed. I loaded up a pan of carbon with a pendant and a couple pairs of earrings. I also included a test strip, a practice I recommend whenever firing bronze clay.
Bronze clay can blister and/or fail to sinter properly if fired too fast. I used a setting half way between “4” and “5” to achieve a ramp speed of approximately 1500°F (816°C) in an hour. The settings are not precise; it ended up taking about 70 minutes to get to 1500°F (816°C). In this case slower is better, so that was fine. I turned the unit down to a little above “4”and set the timer for 1 hour. Again, it took me about 5 minutes to get it hovering between 1500°F (816°C) and 1510°F (821°C). Since this was a longer firing, I checked it periodically during the hold time to ensure it wasn’t drifting too far in one direction or the other, but I did not have to stand over it constantly.
After the firing was finished I turned the unit off and let the bronze cool in the carbon. Everything came out fine. There was no blistering or signs of being over fired, and my test strip bent 90° without a problem showing the batch was fully sintered.
Any carbon fired metal clay would work as well. It’s simply a matter of adjusting the unit to deliver the correct ramping and hold temperature.
Glass Fusing
Ramping up the complexity again, my next test was glass fusing, which requires multiple phases. I chose to use a fairly complex firing schedule to push the capabilities of the kiln.
- Slow ramp to 1000°F (538°C)
- Full ramp to fusing temp of 1550°F (843°C) and hold for 5 minutes
- Slow cool down to 1000°F (538°C)
- Annealing hold at between 950°F (510°C) and 1000°F (538°C) for 10 minutes
- Cool down to below 300°F (149°C)
I started by setting the kiln on “Med” and setting a timer for 40 minutes. That got me a nice slow ramp to 1000°F. Next I turned it to “High” for 10 minutes which brought it to 1550°F (843°C). I adjusted the dial back down to around 4.5 and made micro adjustments to keep it at 1550°F (843°C) for 5 minutes. The next phase was a slow cool down. I turned the unit down to “1” until it dropped to 1000°F (538°C). I inched almost back up to “2” and held it at just under 1000°F (538°C) for 10 minutes for annealing. After 10 minutes I shut the unit off and allowed it to cool with the door closed until it was below 300°F (149°C).
Yes, this was more kiln tending than punching in a multiphase program on my SC2, but I was also able to successfully fuse and anneal glass in a kiln costing almost $500 less. I was making small cabochons for setting in silver, but theoretically you could make a piece approaching 3” x 4” using the same methods.
My final test for the dial controlled kiln was setting my glass cabs in Art Clay Silver, and of course, it came out as well as everything else.
Sample Profile
I hope the next time you’re at a garage sale or browsing used equipment on the internet you won’t be intimidated by a dial controlled kiln. Once you get the hang of it, you’ll wonder why you ever hesitated!
Photo credit and copyright 2022 Pam East
All rights reserved. No part of this document may be reproduced or used in any form or by any means graphic, electronic, or mechanical, including photocopying, recording, taping or information on storage and retrieval systems without the written permission of the author, who is the owner of this copyright. The Author gives permission to AMCAW and its members to download the material contained in this document. Due to differing conditions, materials and skill levels, the author and AMCAW disclaim any liability for unsatisfactory results or injury due to improper use of tools, materials, and/or misuse of the information contained in this document.

