Setting Fire In Place Stones
Many people are attracted to shiny objects, so it’s only natural to want to set stones in metal clay. Some stones can be set directly into metal clay and fired in place, while others will have to be set after firing using more traditional methods. This article is an overview of the types of stones that can be set directly into metal clay and includes brief descriptions of some basic setting techniques.
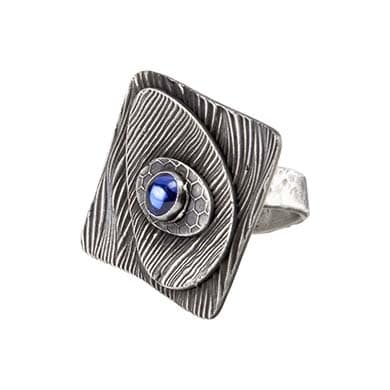
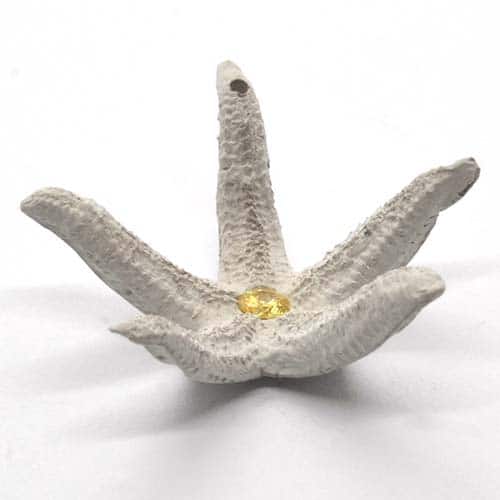
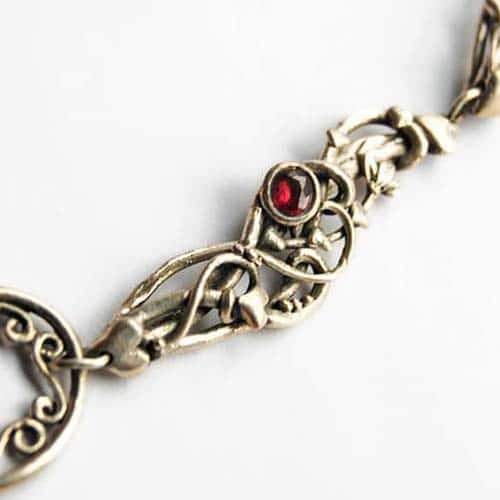
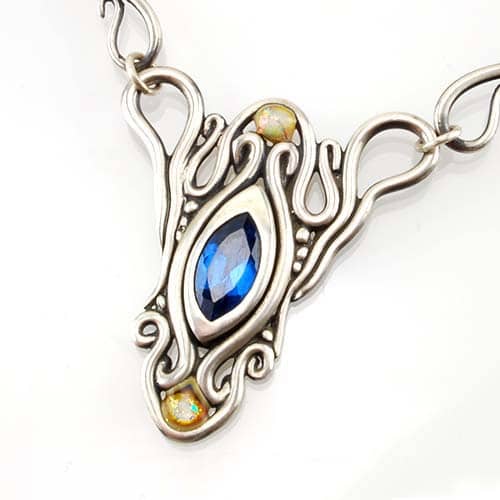
Artist: Paula McDowell, Photo: Cool Tools, Marty Longrie
Stone bezel set after firing.
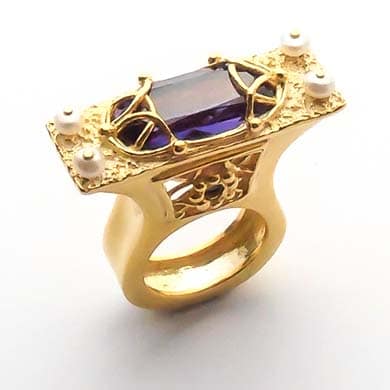
Artist: Meropi Toumbas, amethyst lab gem fired in place
Types of Gemstones
Natural
- Natural gemstones are commonly categorized as precious or semiprecious. While there are some natural gemstones that can be fired in place with metal clay, imperfections like fractures, inclusions, or other flaws may cause the stone to shatter and high heat may discolor it.
- Enhanced or genuine gemstones are natural stones that have been treated to improve the appearance, durability, color, or value of the stone. Some of these treatments may not be able to withstand kiln firing.
Lab Grown
- Synthetic or created gemstones are made in a laboratory setting and have the same properties as the natural gemstones they are meant to resemble. Many of these can be fired in place.
- Simulated gemstones are stones made using glass, plastic, or composites, this category includes Swarovski crystals. These stones will not be able to withstand kiln firing.
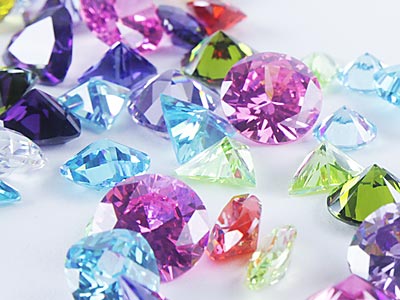
- Cubic zirconia (CZ) is a lab grown gemstone made at high temperatures and is perfect for firing in place with metal clay. Small CZ’s can even be torch fired but be aware that not all CZ’s are created the same! While most can be fired to 1650ºF (900ºC), there are some colors that require a lower temperature.
- Nano Gems are a type of lab created; glass-ceramic gemstone that are extremely heat tolerant. All colors can be fired to at least 1650ºF (900ºC), but it is advised to create a hole in the setting so that the stones don’t lose luster or look muddy.
Always check the firing recommendations of each stone you want to fire in place.
Note: Don’t confuse hardness with durability when heating gemstones. The Mohs scale of hardness does not correlate to the ability to fire a stone
Heat Sensitivity: Stones that Can Be Fired in Place
There are several stones that can be fired in place, but not all can be fired at the same temperature or using the same firing technique.
Natural corundum (sapphire and ruby) are very heat tolerant and are a good bet if you want to fire a natural stone, but diamond fired in the oxygen rich atmosphere of an open kiln will vaporize. Small diamonds have survived when buried in carbon, so the method of firing can also affect success when firing a natural stone.
High-fire stones that can be fired in place in an open kiln at 1650ºF (900C) for at least one hour without color change include:
- Alexandrite – natural gemstone
- Corundum (rubies and sapphires)
- Cubic Zirconia (CZ)
- Spinel
- Zircon
- Nano Gems
Low-fire stones can be fired in place at temperatures from 1110º F (600C) to 1300ºF (700˚C) for at least 30 minutes. These are stones that are not only heat sensitive but may change colors at higher temperatures.
Some examples of these stones are:
- Amazonite
- Chrome Diopside
- Garnets
- Hematite
- Labradorite
- Moonstone
- Sunstone
- Peridot
No-fire stones are those that cannot be fired in place, either because the stone would be destroyed, or the color would be significantly changed. These stones would have to be set using traditional methods after firing the base metal clay piece.
Some examples of no-fire stones are:
- Agate
- Alexandrite
- Amethyst
- Citrine
- Malachite
- Opal
- Pearl
- Quartz
- Tigers Eye
- Topaz
- Turquoise
Cool Tools, Nano Gems
Setting the Stone
Choosing a stone to set is just the first step to completing a design. Next, you’ll need to consider how it will be set into the clay. All stones need to be held in place with some kind of mechanical capture. In traditional methods, that includes prongs, bezels, or a combination of both.
When using metal clay, shrinkage must be also taken into consideration. Capturing the girdle – the widest part of a faceted stone – and accounting for the height of the prongs or bezel will take slightly more thought and preparation than when setting in milled or cast metal.
About Faceted Stones
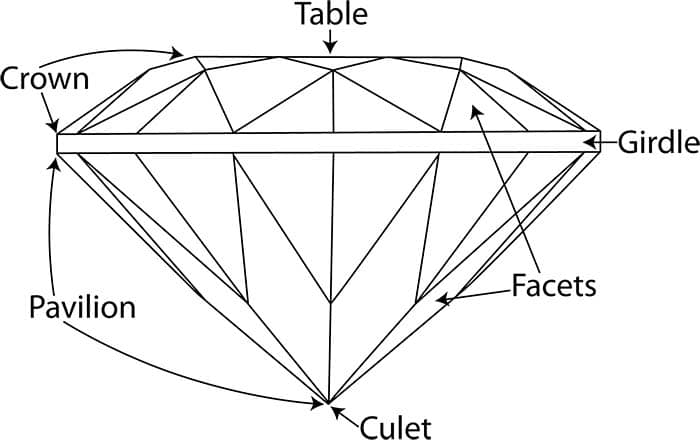
Parts of a Faceted Stone
- Table – the flat circle facet on the top of the stone
- Girdle – the widest part of the stone
- Culet – the pointy bottom
- Crown – facets between the table and the girdle
- Pavilion – facets that bridge the girdle and the culet
The diameter of the stone at the girdle will correspond to the size listed by the vendor. (e.g. 3mm, 4.5mm, etc.) While this is an important factor while setting any stone, when using metal clay, a more important measurement might be the depth of the stone from table to culet. Faceted stones, whether cut by hand or machined will vary in depth, some will have steeper pavilion angles, and others will be shallower.
There are two ways to measure a faceted stone to determine its depth.
1. Place the stone table side down on the work surface and stack thickness slats or playing cards on either side until it looks like they match the height of the stone. Place a transparent, flat object (like a Lucite coil/snake roller) on top of both the stone and slats and move it back and forth. If the stone slides with the movement, add more slats on either side until the stone remains stationery. Roll a slab of clay to that thickness in which to set the stone.
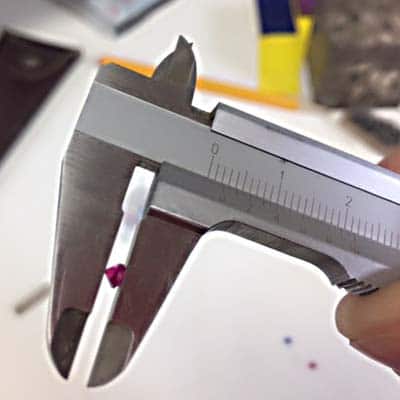
2. Using a digital caliper, carefully balance the stone between the jaws, then close them until the table is caught by the lower jaw, and the culet is pressed against the upper jaw. Read the resulting number and compile a stack of slats or cards to match. Use these to make the metal clay setting.
Fire in Place Faceted Stone Settings
The girdle (the widest part of the stone) must be captured by the clay, meaning that the girdle must be below the clay surface. If the girdle is not below the surface, the stone will be pushed up and out during the sintering process as the clay shrinks.
Tip: To make sure the stone is set well, look at it from the side. The table should be perfectly in line with or slightly below the surface of the clay. If any of the crown facets show above the clay, push the stone down a little more

Push Setting
The simplest method for placing a fire in place stone in metal clay is simply to push it directly into the clay.
- Two-millimeter faceted gems are approximately 1mm deep from table to culet and can be pushed into a flattened slab of lump clay that is about 4-5 cards thick (1.25mm). For larger stones, measure the depth of the stone using the instructions above.
- Faceted stones can also be pushed into preformed balls of lump clay. Larger stones may be easier to push into a ball than into a flattened slab.
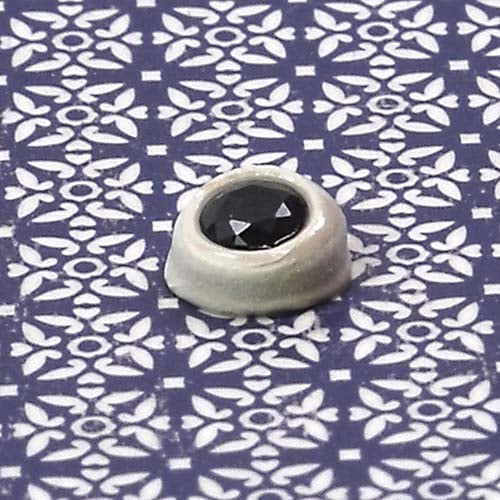
Artist: Julia Rai, push set fireable gem
Artist: Julia Rai, syringe set fireable gem
Syringe Method
This technique makes use of syringe clay to wrap a bezel around the stone.
- Extrude syringe clay in a continuous circle, building a wall at least three layers high with an opening that is slightly smaller than the circumference of the stone. Push the stone into the opening and gently press down until the clay is over the girdle.
Coil Bezel
This is similar to the syringe method, except a coil is rolled from lump clay instead of extruded from a syringe.
- Use your fingers or a coil roller to create a thin rod of lump clay that is slightly higher than the depth of the stone.
- Place the stone table down on the work surface and wrap the coil around the stone, trim to length, join the two ends, and reinforce the join with paste.
- While this technique can be used with any shape, it works particularly well when using round, oval, or marquis shaped stones.
Artist: Corina Gheorghe, Coil Set Stone
Artist: Lisel Crowley, bezel set fireable gem
Slab Bezel
The outer circumference of a slab bezel can mimic the shape of the stone or can be decoratively shaped with a cutter or template.
- Determine the thickness as described above.
- Roll out clay to the depth needed.
- Use a drinking straw or other cutter to create a hole as a seat for the stone. This should fit the stone perfectly.
- Push the stone into place in the hole.
- With the thickness slats or cards in place on either side of the slab of clay, use a flat roller to push on the stone again to level it in the setting.
- Cut the outside perimeter of the bezel with a cutter or using a pin tool and template.
- When the clay is dry refine the shape with sanding tools.
- Keep this pre-set stone to use in future projects or attach it to a fresh or dried base using paste.
Appliqué Prong or Partial Bezel Settings
You can also use small decorative metal clay elements, such as flowers, leaves, granulation balls or syringe ‘vines’, that connect to the metal clay base and reach over the girdle of the stone to hold it in place. If using separate elements as prongs, space at least three (or as many as desired) so that they capture the stone securely. Or use two longer appliqués as partial bezels. Partial bezels do not fully encompass the stone, but still surround it enough to capture the stone securely.
- Make the metal clay backing piece and create a small hole to rest the culet in, or push the stone directly into the clay, leaving the girdle slightly above the surface of the clay.
- Dry the backing so that the stone is well supported as you attach the appliqués.
- Make one decorative appliqué at a time and place it on the stone making sure that it is securely attached to the metal clay backing and rises up onto the crown facets of the stone.
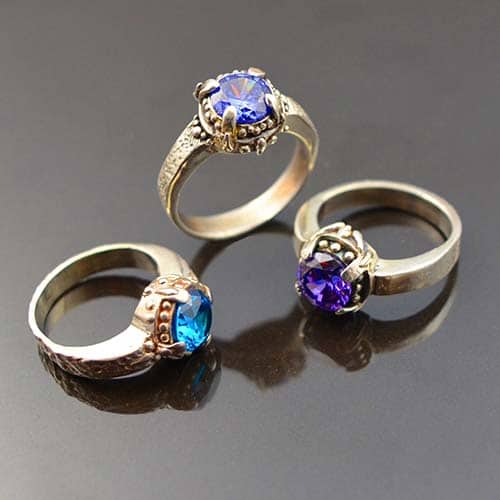
Artist: Tracey Spurgin, Claw (prong) set rings
Fire In Place Cabochons
The outer circumference of a slab bezel can mimic the shape of the stone or can be decoratively shaped with a cutter or template.
- Determine the thickness as described above.
- Roll out clay to the depth needed.
- Use a drinking straw or other cutter to create a hole as a seat for the stone. This should fit the stone perfectly.
- Push the stone into place in the hole.
- With the thickness slats or cards in place on either side of the slab of clay, use a flat roller to push on the stone again to level it in the setting.
- Cut the outside perimeter of the bezel with a cutter or using a pin tool and template.
- When the clay is dry refine the shape with sanding tools.
- Keep this pre-set stone to use in future projects or attach it to a fresh or dried base using paste.
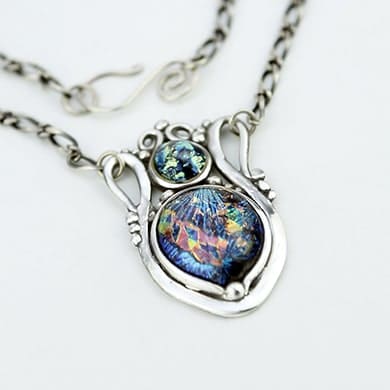
Artist: Julia Rai, Glass cab held in place with silver clay balls
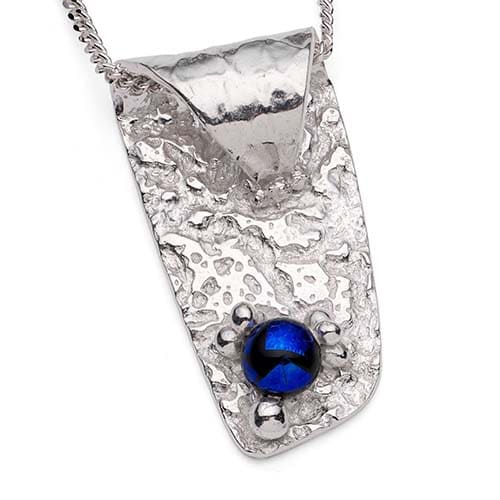
Artist: Stephanie Chavez, Glass cab set with sheet clay
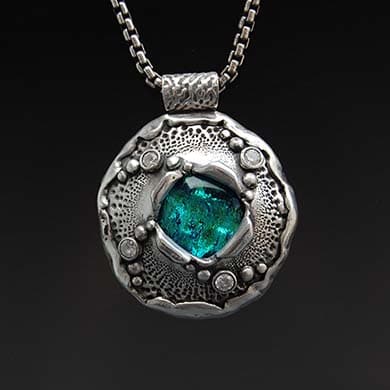
Artist: Lis-el Crowley, Glass cab set with a bezel
What About Light Holes?
Holes made behind stones are not just about light. When a pendant is worn against the skin, no light can get through. Unless a stone is elevated above a ring band (as in a Tiffany setting), no light can enter through the back.
When you make a hole in a metal clay setting it helps to decrease the amount of clay that would be displaced when pressing the stone into the clay (thereby distorting your piece) and it creates a portal through which to clean the stone. Lighter colored stones like aquamarine and citrine seem brighter, and tarnish doesn’t have a chance to develop and change the appearance of the stone.
- Use a drinking straw or other cutter that is smaller than the stone’s diameter to create a hole before setting the stone into clay.
- When fabricating ‘pre-set’ stones in bezels to use in future projects be sure there is a matching hole in the backing piece.
- All holes can be round, but they can also match the shape of the stone if desired.
- Decorative, pierced designs on the back of a stone setting are sometimes referred to as á jour or azure settings. (azure is the English pronunciation/spelling of á jour and means ‘open to the day’).
Tips to Remember
- Anytime anything solid (a gem, wire, or even dry clay) is pushed directly into fresh clay that hasn’t been prepared with a hole or depression, there will be some movement or displacement of the clay. The circumference/shape may distort, and the edges may rise slightly above the surface of the surrounding clay. This is one more reason to create a divot or hole before setting any stone larger than 2mm.
This video shows the process of setting stones in metal clay.
- Always clean the stone surface to remove any metal clay before firing. Clay residue will adhere permanently to the surface of the stone or will cause a silver haze over the surface of the stone.
- Let clay residue dry completely.
- Use a toothpick to break up the dry clay and use a clean fluffy brush to remove the dust.
- Finish up by swiping a little denatured alcohol over the stone. Denatured alcohol contains less water and dries faster than isopropyl/rubbing alcohol although either of these will also work.
This video shows the process of cleaning up a stone before firing.
- When setting stones in metal clay never quench after firing; the thermal shock may cause the stone to fracture.
As with most metal clay skills, it may be best to begin with a simple setting using fire in place stones which are embedded directly into the clay. Once you have mastered this method, you can move on to other approaches to set stones. As your understanding of and skill with metal clay grows, you will discover more creative ways to use stone setting techniques to enhance your designs.
Read More About It /References
For more on natural gemstones and durability read this explanation from the Gemological Institute of America (GIA):
GIA | Understanding Gem Durability
For more info on Nano Gems read this article:
Interweave | Nano Gemstones by Lis-el Crowley
For an explanation of simulated, created, and synthetic stones view this page:
Jewelry Notes | What Are Synthetic and Created Gemstones?
For a list of heat tolerant gemstones check out the following links.
Cool Tools | Gemstone Firing Guide
Gem Resources (look for an Excel file)
Rio Grande | Natural Gemstone Firing Guide
Artclay Silver | Natural & Synthetic Gemstone Firing Tests pdf

