Metal Clay Firing Methods and Equipment
Most brands of metal clay include instructions in the package, some of which offer a number of different firing options which will all result in a successful sintering. These options might cover anything from kiln firing to the method of using a hand-held torch and firing for shorter periods of time at higher temperatures or for longer periods of time at lower temperatures.
The reason manufacturers suggest these options is to help you find the best schedule for the project. For instance, when using fine silver metal clays, instructors may need to complete a short firing to fit the class schedule, so they fire hot for a shorter period of time. On the other hand, you may want to co-fire glass or gemstones that won’t survive high heat, so you can fire at a lower temperature for a longer period of time.
Note: If there’s no reason not to, always fire fine silver at the hottest recommended temperature for at least an hour
Each type of clay has specific firing requirements. Some are able to be torch fired, and others require a kiln. Whether you’re using silver or base metal clay, firing times and temperatures as well as the method of firing determine the strength and density of the finished product. Insufficient firing will produce a weak or brittle piece.
Here are some general guidelines for some of the types of firing equipment you can use when firing metal clay.
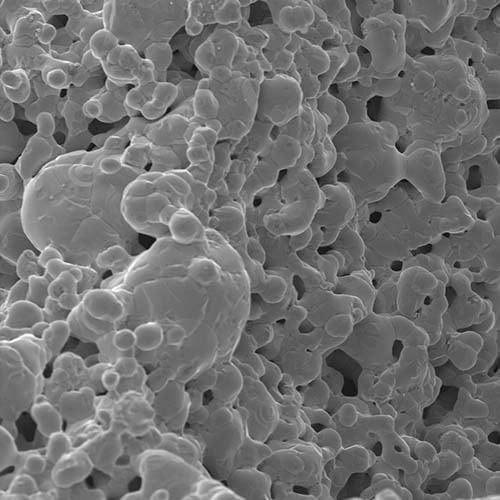
Minimum fired silver clay viewed under a microscope. Photo Credit: Tina Carvalho
Silver Metal Clay
Most fine silver can be either torch or kiln-fired directly on a fiber shelf that has been raised on stilts, also known as kiln posts, supported in a bowl of vermiculite or nestled onto fiber blanket. .950 and .960 sterling silver clays should be fired open shelf in a kiln. .925 sterling silver must be fired in a kiln, in a carbon filled container.
Note: PMC Classic must be kiln fired for two hours
After firing, fine silver clay has a white surface, .950/.960 is a light grey, and .925 is dark grey. This is the irregular surface of the newly fired clay. When viewed under a microscope, the fired surface is bumpy and uneven, like a gravel road. This irregular surface reflects back all the colors of the light spectrum, so the human eye sees it as white or matte grey. To see silver, you must compress the surface by polishing and burnishing, so it becomes reflective.
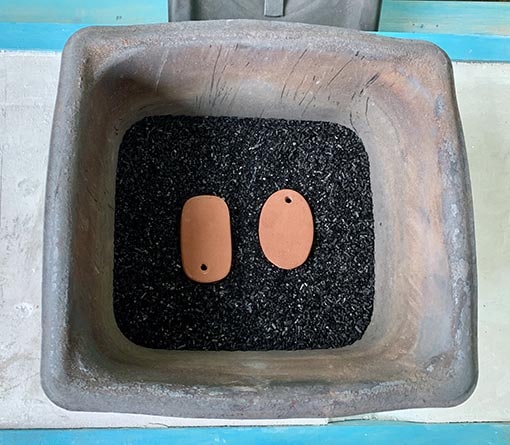
Base metal clay fired in a steel container
Base Metal Clay
Most base metal clays must also be fired in a kiln, surrounded by activated carbon to prevent the formation of oxides that would prevent the metal from sintering properly. Carbon consumes the oxygen in a kiln, creating a reducing atmosphere, which is ideal for firing base metal clays and .925 sterling silver.
There are a number of factors that can affect the outcome when firing in carbon. Each brand and clay type has specific time and temperature requirements. In addition to this firing schedule, the size of the piece, the position of the firing container in the kiln, the position of the metal clay item in the container, the type of kiln, the type of container, the type of carbon, and the depth of carbon above and below the piece can all affect the outcome of the sintering. Base metal clays need to cool naturally in the carbon to prevent surface oxidation. Get to know your kiln by firing test strips and experimenting with different conditions before you fire an elaborate and/or time-consuming piece.
A few brands of copper and bronze clays state that their formula can also be torch fired. Please see ‘Butane Torch Firing’ for more info.
Kiln Firing
All types of metal clay can be fired in a small-chambered kiln. As long as the kiln can heat up to the required temperature (as high as 1800º F/982º C for copper clay) and can hold that temperature for anywhere from ten minutes to four hours, it can be used to fire metal clay. Check the clay manufacturer’s time/temperature requirements to determine how high and how long it must be fired.
When kiln firing, it’s imperative to make sure that both the temperature gauge and the kiln’s internal clock are accurate. If metal clay pieces are under-fired (for example fired at lower temperatures for a shorter period of time than required), the piece will not be fully sintered. It will be subject to breakage because the organic material may not have been able to fully burn out or the metal particles haven’t been able to sinter together. This is why a two-part firing for base clays is often recommended. Fire first in an open-air kiln to burn out the binder, and then in carbon to complete the sintering.
Extra Accessories Needed: Stilts/kiln posts, firing tile or soldering board. If using base clays: firing container, carbon.
Pros: The most efficient and successful tool used for firing any brand or type of metal clay.
Cons: Pricey – The most expensive option. Heavier than the other options, potentially less mobile.
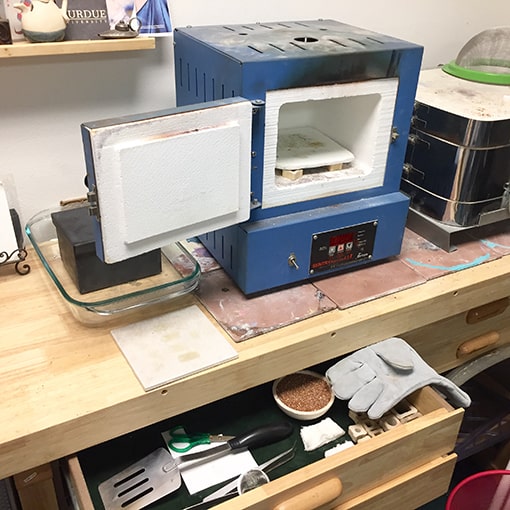
Small Tabletop Kiln
There are a number of small, electric, ‘beehive’ kilns (one of the most popular being the Ultralite), which are able to fire many small pieces of fine silver at the same time. The basic versions of these kilns reach about 1550ºF/843ºC, which is hot enough to fire both low and mid-range fine silver metal clay. Used in conjunction with the additional temperature controller and copper or ceramic firing surfaces, this little kiln will be useful even after you have graduated to a full-size metal clay kiln.
Extras Accessories Needed: Drying disk set, timer.
Pros: Mid price, less than a full-sized kiln. Small footprint, electric, useful for enamelling, keum boo, granulation, annealing metal, and as a soldering assist.
Cons: Not used for firing sterling, or base metal clays
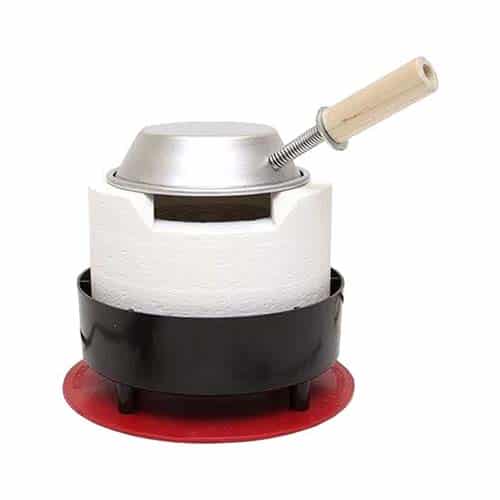
Speedfire Cone System Firing
This system is made up of a fiber cone; mesh grid; and pyrometer, which have been connected to a camping style propane fuel tank. Because propane burns well above the 1650 º F/900 º C mark needed to fire fine silver metal clay, it gets hot enough to sinter it successfully. This system is less expensive than a kiln, but there is no way to program it, so it’s important to keep an eye on it during the entire process. Start timing when the clay reaches a glowing orange, and manually turn the kiln off at the end of the firing schedule.
Tip: Use a kitchen timer to help you remember when to turn off the kiln.
Extra Accessories Needed: Timer
Pros: Low price, more firepower than a torch, can fire a number of fine silver pieces at the same time.
Cons: Working with open flame and propane requires the user to be present during the entire firing process. Potentially more dangerous unless safety concerns are taken seriously. Not used for firing sterling or base metal clays.
Butane Torch Firing
Some base metal clays (depending on their size) and almost all fine silver metal clays can be torch-fired rather than requiring a kiln.
An inexpensive, handheld, butane torch can be used as an entry level firing method for small, simple pieces. Pick up a butane torch at a hardware store, jewelry supply company, or online.
Tip: Triple filtered butane fuel will help keep the torch cleaner, which will help it last longer.
A torch may be one of the least expensive pieces of equipment you’ll find that can successfully fire metal clay; however, you’ll be limited to the low-fire varieties of fine silver clay, and only a few brands of copper and bronze. Fine silver pieces should be no larger than 20 grams in weight and about 1.25in (30mm) in diameter. Copper and bronze work should weigh about 15 grams or less and will need to be quenched immediately to avoid forming a very heavy oxidized crust. The thicker the base metal clay is when being torch fired, the stronger the overall piece will be. The thickness also helps protect some of the textural loss which occurs when the oxides pop off. Sterling clays (.925, .950, and .960) cannot be torch fired at all.
Tip: If necessary, use two butane torches at the same time to sinter slightly larger work but take appropriate safety precautions.
Items that cannot be fired with a torch include projects made over cork or wood clay, paper clay, or other organic material, and projects that include glass, or ceramic materials.
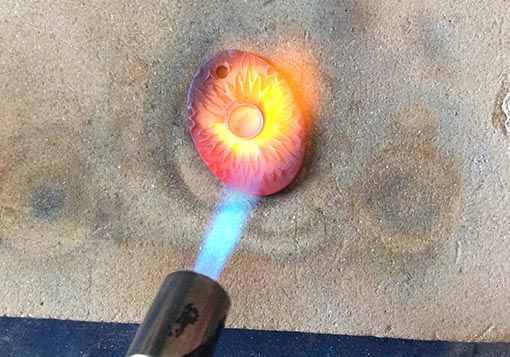
Base metal clay being torch fired. Photo Credit: Carrie Story
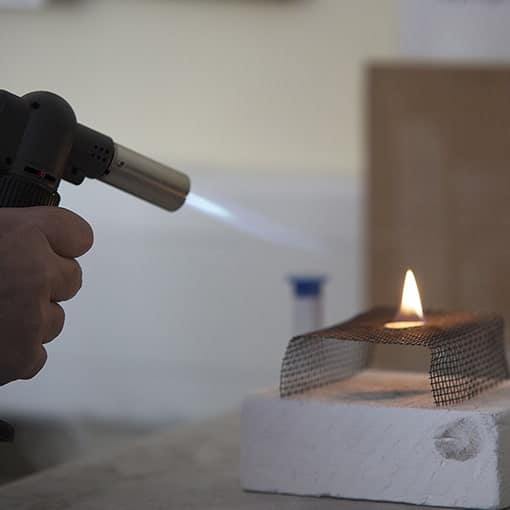
Binder burning off
You can fire fine silver findings and small fire-in-place gemstones (5mm or under) with the torch. Metal clay work that has been appliquéd with paper/sheet can be torch fired, but whole sheets of unbacked metal clay paper/sheet (such as origami, or quill work) should be kiln fired.
Metal clay can be re-fired numerous times, so repairs and additions can be made in a second torch firing if necessary. Use thick paste to complete the join, dry, sand, and torch fire for at least 10 minutes so the bond between the fresh and pre-fired clay is as strong as possible.
Torch firing should take between four and 10 minutes depending on the size and thickness of the work. Firing in a low light area makes it much easier to see the color of the metal than firing in a well-lit room. Make sure timing starts after the metal has reached an overall bright orange glow. A handheld torch firing will require your complete attention, so the metal doesn’t begin to melt. Always focus your attention on the piece, not necessarily where the tip of the flame is. Watch videos or read more about it to fully understand the torch firing process.
Extra Accessories Needed: Firing surface/soldering board, butane fuel, timer.
Pros: Inexpensive. Wonderful tool for new users of metal clay, portable.
Cons: Not as consistently reliable as kiln firing and work is easier to melt if not performed correctly. Can fire only fine silver and small pieces of some brands of copper and bronze clay. Will not sinter .950/.960 clays.
Microwave Kiln Firing
A specialized kiln chamber that was originally designed to fit inside a conventional microwave oven to allow a maker to fuse glass can also be used to sinter metal clay. These kilns are made of bio-soluble fiber, which is very light and non-hazardous. The lid of the chamber has a special coating on the inside that makes it possible to reach the high temperatures needed to fuse glass and sinter metal clay.
The lowest temperature used for sintering fine silver clay is 1200ºF/650ºC (although it can go as high as 1650ºF/899ºC) – however microwave ovens do not have the option to set the temperature, one can only monitor wattage and time. Therefore, the most important thing to do when using a microwave kiln is to determine the best schedule for a full sintering and not exceed these figures since silver clay will melt if fired at too high a temperature. Each microwave heats differently so it will be important to do a series of test firings to determine the best process for your microwave and metal clay work.
As when firing with a torch, you’ll be limited to small amounts of low-fire, fine silver metal clay, but there is the added advantage of not having to watch it for the entire firing process. Microwave kilns can be used for firing small charms, earring components, and pendants, and are a good option for beginners who may not feel comfortable using a torch but want to get started with metal clay without having to buy a more expensive kiln.
It’s important to carefully read your microwave oven safety manual to make sure this complies with the manufacturer’s recommendations. Please note that the kiln chamber must be removed from the microwave oven as soon as the oven turns off. Caution: without the oven’s fan removing hot air, the hot air emitted from your kiln chamber will damage the interior of your microwave oven and could create a fire.
Extra Accessories Needed: Microwave oven
Pros: Inexpensive, can be used in conjunction with a home microwave oven. No need to be in close proximity as the kiln operates.
Cons: The jury’s still out on this one. It’s more popular in Europe but is gaining admirers in the US and around the world. May create a fire hazard if not removed immediately after firing. Not used for firing sterling or base metal clays.
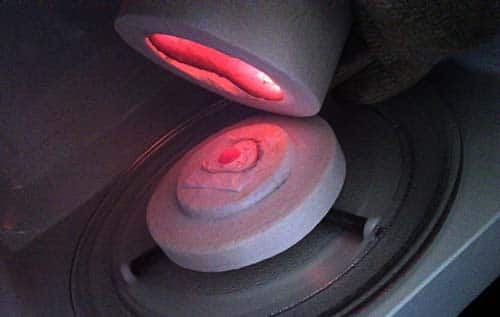
Gas Stove Firing
Firing metal clay with your own gas stove at home is a simple process too!
A regular gas burner can be used for low-fire varieties of fine silver metal clay, 20 grams or less in weight. Cover the burner with stainless steel mesh to support the work and start timing after the binder has burned out and the clay has reached an orange glow. Use the same timing as you would when torch firing, make sure there is good ventilation, and use common sense safety precautions.
It may take longer for metal clay to reach sintering temperatures when fired on a gas stove than it does when using a torch. Do not start timing until the entire piece glows orange.
Extra Accessories Needed: Stainless steel mesh screen, timer
Pros: Practically free! Little to no financial investment to begin, sinters as well as when torch fired.
Cons: Working with open flame, requires the user to be present during the entire firing process, possibility of melting the work. Not used for firing sterling or base metal clays.
Safety notes
Always follow the manufacturer’s specifications on creating a safe firing station when using a traditional or microwave kiln. When firing with the open flame of a butane torch, a gas stovetop, or the Speedfire system, wear natural fibers (cotton, wool, or silk) – synthetic fibers can melt and stick to the skin if they catch fire. Tie back long hair, don’t wear loose-fitting clothes, and most importantly do all types of firing in a well-ventilated area or outside on a calm day.
