Finishing Metal Clay Jewelry
Part One – Refining Dry Clay
There are many techniques you can use to create a professional-looking piece. This article will review three of the most effective – executing repairs, sanding, and burnishing.
Sanding, polishing, and finishing are arguably some of the most essential aspects of the jewelry making process. When using metal clay, most of the finishing should be completed before it is fired while it is still dry. Work that is firm and dry is in the perfect condition to inspect it for scratches, blemishes, flawed connections, and other anomalies that you don’t want to see in the fired piece. Taking the time to examine your work before it is fired and carefully finishing it will make a significant impact on the overall success of the design.
Repairs
Before you begin to sand, inspect all joints and connection points to ensure that they will be as durable as possible. Fill gaps, cracks, or air pockets, finesse seams, and strengthen thin areas.
Choosing the right material to make the repair will take experience and a good understanding of the various types of metal clay. The goal is to use a product with an appropriate amount of metal density for the specific task. A tiny pin-sized divot can be filled with a drop of thin paste or a dot of syringe clay. A gap in a pre-formed bail might require a ball of moistened lump clay.
All metal clay is primarily made of three things: powdered metal, binder, and water. That’s it.
- Commercially blended paste usually contains the most water.
- Commercially packaged syringe has slightly less moisture than paste and will fill small gaps well.
- Lump clay has the least water content and makes the best material for most repairs.
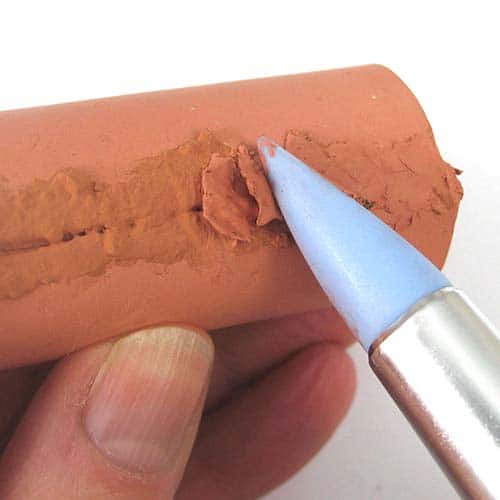
Fill gaps with lump clay and a rubber ended tool
Filling Gaps
The more liquid the clay is, the more water content it has. If you fill a gap with thin paste, little metal will remain after the water has evaporated, and the repair will need to be repeated. Using a rubber-tipped tool to pack a small amount of moistened lump clay into a void will create a denser and more reliable repair.
On the other hand, using pressure to pack lump clay into an area of a delicate design may result in a break. In this case, multiple applications of moister syringe clay may be a better choice.
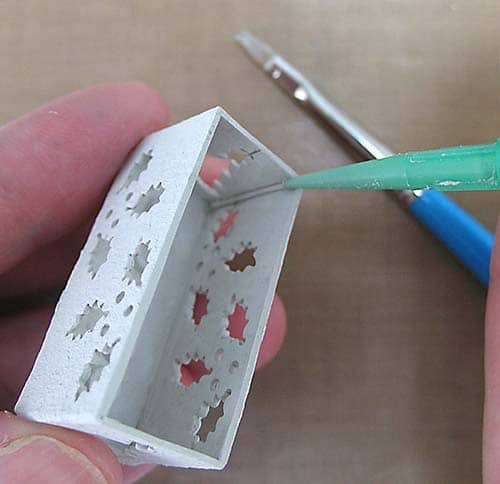
Syringe clay is also an excellent material to fill gaps that are difficult to access. Allowing the tip of a syringe to make contact with a gap will force the repair material deep into the space as the pressurized clay is extruded.
Repair a seam with syringe
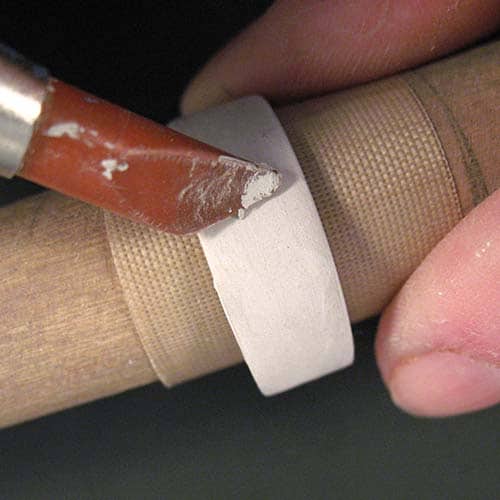
Refine a seam with a rubber ended tool
Finessing Seams
A seam can be considered part of the design or it can be a distraction. To create a smooth transition between edges, use a tiny coil of lump clay or an extruded line of syringe to smooth the seam. Think of the strip of material that is used to bridge the joint between two different types of flooring and try to mimic that look.
- Position a coil of clay or line of syringe directly on top of the seam and use the tip of a paintbrush to pat and press it into or onto the line.
- Smooth the repair by brushing back and forth with a damp paintbrush, feathering the clay to an unnoticeable edge.
Strengthening Thin Areas
Occasionally we’ll unintentionally make or sand a design too thin. The easiest way to strengthen it is to back the dry piece with a thin layer of lump clay.
- Roll a large slab of clay one or two cards thick, slather it with water, and press the dry work onto it, wiggling it slightly to be sure the two are well bonded.
- Use a pin tool to cut away the excess fresh clay from the perimeter of the dry work.
- Let it air dry for a few minutes before using a heat source to dry it thoroughly.
Tip: If there are any air gaps between the layers, using high heat too soon may produce steam, which could cause the fresh clay to bubble
Sanding
Sanding is a way to refine, alter, and pre-polish work before it is fired. Learning to perfect the edges of a dry piece is usually the first finishing technique students are exposed to, but edges shouldn’t be the only areas taken into consideration. Making sure all aspects of the work are examined before firing, including the back, edges, surface, and any added elements like bails or stone settings, is a necessary part of production. Even the inside of a hole or bail may need some attention.
Dry metal clay is much easier to modify, requires fewer tools, and is less time consuming than working with fired metal.
The assortment of tools and materials that can be used is virtually endless. The most common are:
- Sandpaper from the hardware store
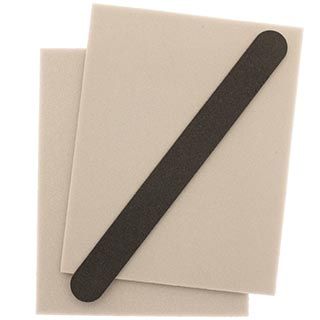
- Salon and emery boards from the beauty supply
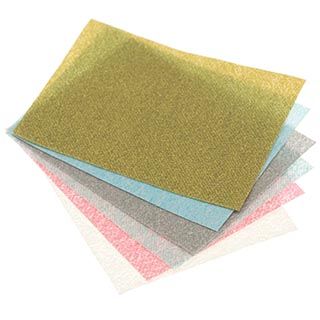
- Jeweler’s finishing/polishing paper
- Sanding sponges
- Small, detail sponges (like eye-shadow applicators)
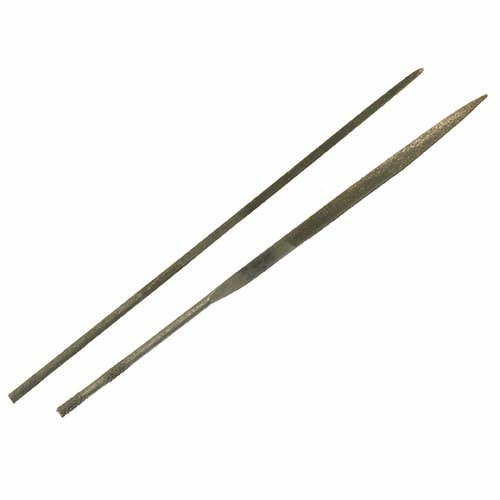
- Needle files
- Your own fingers
Note: Hardware store sandpaper can be distinguished by color. Grey, wet/dry, papers are generally used for metal and metal clay, and brown paper is more suited for use with wood
Jeweler’s polishing papers
Sponge backed sanding pads and emery boards
Needle files
Get in position
How a piece is held and whether it is placed on a flat surface or held suspended in the air will directly affect the outcome. As you sand, you are holding the work steady with one hand and using pressure with the tool you’ve chosen in the other hand. Finding the correct position and support is vital. Use too much pressure, and you’ll break the work.
- Stabilize your body as you work – hold the upper arms close to your body, brace your elbows on the edge of the work table or bench, and use the fingers of one hand to steady the other hand.
- Hold the work in your non-dominant hand with your fingertips as close to the area to be refined as possible.
- As you sand other areas, move your fingers to support the work where you’re sanding.
- Support a flat piece on the work surface or on a raised aid, like a rubber bench block.
- Let the tool do the work, not the pressure from your hands. If the tool you chose isn’t doing the job, you may need to switch to one that is coarser or use a tiny dot of water to reactivate the surface of the dry clay.
Note: Any time water is added to previously dry metal clay, it is being rehydrated and will be more fragile and prone to breakage. If you use any kind of moisture as a sanding aid, dry the piece again before you continue
Refining an edge with a sanding pad
Work on the Edges
Coarse sandpaper is a standard go-to material when beginning the finishing process.
- Start with 320 or 400 grit for all silver clays and 280 or 320 for base clays, which are harder and denser.
- Move on to a higher grit sandpaper or switch to jewelers finishing or polishing paper to remove scratches and marks left by the coarse sandpaper.
- The lower the number, the coarser the grit. Note: The grit material used in finishing paper is finer than that which is used in sandpaper. 400 grit sandpaper is coarser than 400 grit finishing paper
- A straight, flat, salon or emery board is a great tool to choose when sanding perfectly straight edges.
- Another option is to make use of a flat needle file to quickly remove the most clay in the shortest time. You’ll then have to use other methods to remove marks left by the file.
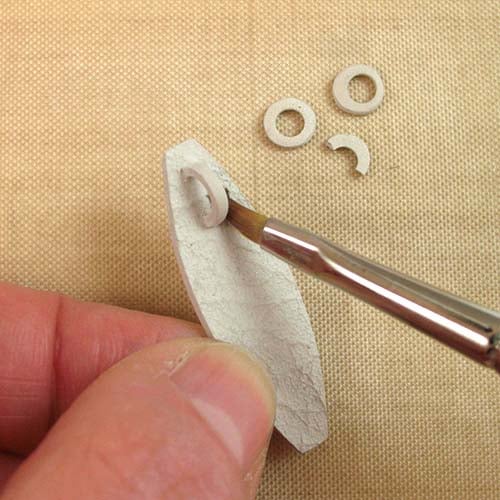
Keep the back clean, add a bail carefully and refine with a paintbrush
Attend to the Back
The back of a piece, such as a pendant, offers an excellent opportunity for more design details or texture. When it is blank instead, small flaws, divots, and scratches become unwanted focal points.
- Begin the finishing process on the back by finger sanding – that is, using a damp (not wet) finger to smooth the clay into a uniform surface. When you finger sand, you’re moving material from the high areas and smoothing it into the low areas. If you start by using sandpaper, you’re permanently removing material and thinning your work.
- After finger sanding and drying the piece, switch to finishing paper. Fold a small square of 400 or 600 grit finishing paper to stiffen it and make small circles on the back of the work, or tape a piece of finishing paper to the work surface, hold the piece with your fingertips and sand by moving the work in a figure eight motion.
- As you sand, you’re polishing the metal content. Take periodic breaks to look at the sanded area. If you see lighter areas, those are most likely depressions that haven’t made contact with the paper yet; the darker areas have been sanded perfectly flat and burnished a little darker. Decide whether to continue with sandpaper, go back to finger sanding, or use a little clay to fill the depression. Take care not to sand away more than around half a card (0.125mm) thickness.
Examine Surfaces, Bails, and Added Decorations
Even the tops of textured surfaces may benefit from a light sanding. There are sometimes flaws in the depressions of a texture sheet, a hair may have been pressed into the surface of the clay as it was rolled, or you may simply want to pre-polish the high points of a design. Most often, finishing paper is used for this task, but finer grades of sandpaper can also be effective.
- Use the paper of your choice in fine grit like 600 or 800. A single pass with this grit is usually enough but you can progress to much higher and finer grits up to 1200 to begin the process of creating a mirror finish.
- Don’t forget about the surface or edges of a bail. A forgotten nugget of dry clay, paste, or syringe will transform into metal and may interfere with a necklace chain or snag on fabric.
Damp Sanding
Instead of sandpaper you can use a damp finger or sponge tool to soften edges or remove small amounts of dry clay.
It’s tempting to use saliva when finger sanding but is not a healthy habit to adopt and can be hazardous when working with base metals. Get in the habit of dipping a fingertip in a small container of water instead. Be sure to tap a wet finger on your hand or a towel to remove most of the water. Too much moisture can make a mess and makes it difficult to see the surface of the work through the water.
- Dampen a finger and rub the work in tiny circles. The goal is to create a small amount of thin paste that will smooth or fill minute depressions in the clay.
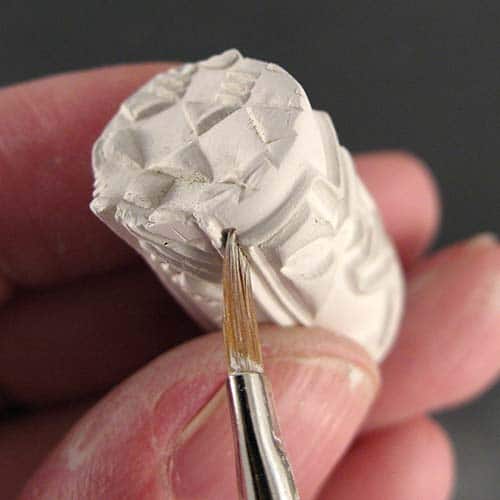
- A watercolor brush can also be used to damp sand your work. Repeatedly stroking back and forth on either a fresh or dry area can fill small cracks and smooth surfaces.
- Simply tapping a new piece of sandpaper on a damp paper towel or sponge will provide enough moisture when trying to smooth the rough edges left on of a piece that has been shaped or cut with a pin tool.
Tip: Invest in good quality paint brushes. Looking after your paint brushes will extend their life and benefit your work. Do not allow a large amount of paste or clay to fill bristles that are close to the ferrule of the brush, leaving clay to dry in a brush will cause the bristles to splay outwards. Placing a brush bristles down in a pot of water will bend the bristles and impair the brush’s effectiveness. Always clean, re-point and blot dry a brush before putting it away for the day
Use a damp brush in areas where your finger will not fit
A Few Extra Sanding Tips
- Use a wooden toothpick to finesse or enlarge the inside of a small hole. The wood has enough grit to be an excellent sanding tool.
- The paper used to back finishing paper is not as stiff as that which is used for sandpaper. Stiffen finishing paper by folding it multiple times, or reinforce the back with packing tape.
- Make sure you can see what you’re doing! Create a stiff point by bending each corner of a piece of sandpaper towards the center, resulting in a triangle shape.
- Cut the tip of an emery board into a V. When you can’t see what you’re doing, you’re more likely to use too much pressure, and potentially break the piece as you work on it.
- Wrap a round needle file with high grit sandpaper to create a fine tool that will fit into a small space.
Burnishing
Burnishing is a technique that is usually used for finishing fired metal clay. When rubbing the work with a hard tool, like a steel or agate burnishing tool, the metal crystals are being compacted and creating shine. Burnishing raw metal clay also polishes the metal content and smoothes the clay so much that flaws and scratches become more visible.
This technique takes some pressure and force and is usually used to smooth flat, un-textured areas in preparation for a mirror finish, but sometimes you might want to burnish the high areas of a textured design. It’s definitely a tricky technique and not a common practice but there may be times when it is called for.
- Pre finish the work by sanding and smoothing with finer and finer grits of sand or finishing paper before moving on to burnishing.
- Make sure the burnishing tool you’re using is smooth and has no scratches. If there are marks on the tool, they may be transferred onto your work.
- Take care to support the area of the work being burnished. Place a flat item on the work surface, or support it on a hard object that matches the shape (e.g., brace a domed object on a pool ball).
- Noticeable scratches will not disappear by burnishing. If you see scratches, divots, or other scars go back to sanding until fine grit paper leaves no marks. Then return to burnishing.
- Burnished dry clay will still need to be polished after firing.
- Burnished greenware can reveal flaws that need to be refined before firing.
This video shows the process of burnishing unfired silver clay using an agate burnisher.
