Finishing Metal Clay Jewelry
Part Two – Polishing Fired Work
When metal clay work is correctly finished and refined before firing, sintered work should be a breeze to polish (see Finishing Metal Clay Jewelry, Part One for more information). Whether you’re after a quick polish and patina, planning a mirror finish, or want to prep the surface to add color or gold, how a metal clay piece is finished can be a game-changer.
The number of tools and techniques you could use to finish your work is practically endless, so this article will just describe a few of the most popular.

Clément Marquaire, Golden Bronze Clay Cuff (photo: Artist own)
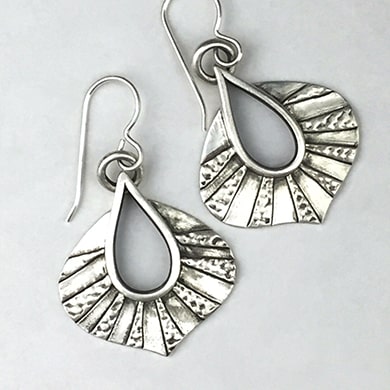
Donna Penoyer, Peacock Teardrop earrings (photo: Artist own)
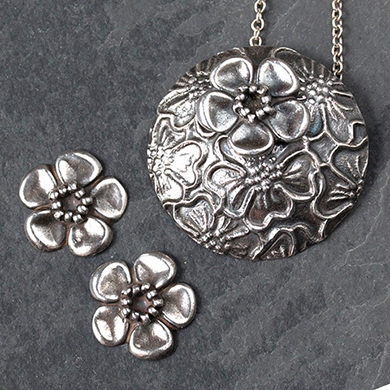
Sian Hamilton, Floral Delight (photo: Artist’s own)
Safety First
Tools used for finishing often shed microscopic particles and dust, so wear protective goggles and a mask to prevent damaging your lungs, scratching your eyes, and generally creating a mess. Use bits on motor tools correctly to prevent a safety issue.
Rotating tools like a flex shaft or micromotor can grab onto any loose, flexible material and spin it out of control. Make sure hair is tied back, flowing sleeves are rolled up and out of the way, and dangling jewelry like bracelets, and long necklace chains are removed.
Let the tool do the work, don’t try to use pressure to force it to work harder. Change to a different tool if the one you chose isn’t doing the job. Pressing too hard can result in excessive wear, deform the tool or the work, and may cause your hands to fall into the path of spinning metal.
Metal brushes and steel wool can scatter individual wires into the air, which might force them into clothing and skin. Rubber tools will deteriorate with use, creating a fine aerosol of abrasive material that can be inhaled, so protect yourself as you work.
- Eyes – Wear glasses, safety goggles, or a visor to shield your eyes and face from flying debris.
- Ears – Some tools and machines create such loud noises that wearing earplugs may be indicated.
- Lungs – So much debris is created and lofted into the air when finishing work – both from the metal being refined and the tools doing the work – that protecting your lungs requires a multi-pronged approach.
- Make sure there is adequate ventilation. Search the web for large scale solutions, mount a box fan inside a window (run in reverse mode), or invest in a small, benchtop fume extractor.
- Wear an N95 particle mask at all times.
- Use a polishing cabinet, DIY a Lucite grinding box, or work inside a cardboard box to contain debris.
- Hands – The friction created when using motor tools will heat metal and potentially damage your hands. There are a few ways to deal with this.
- Protect your fingers from abrasions and burns with tight-fitting leather or rubber finger cots, or by wrapping them in a self-sticking tape known as ‘vet wrap’. Do not wear full gloves. If the fabric gets caught in a rotating motor tool, gloves do not come off as quickly as the fingertip covers, which may result in serious injury.
- Hold the workpiece with a wooden ring clamp or clothespin using a rubber band to reinforce the grip.
- Body – Controlling where your hands and arms are in space will ultimately provide the best leverage and put you and the work in the safest position for a successful outcome.
Make sure your body is stabilized. Hold your upper arms tight to your sides, with the forearms resting on the edge of the work surface. Brace one finger or thumb against the other to secure it. If you try to hold the work ‘in the air’, the hand trying to polish will continually push away the hand holding the work, significantly reducing the workpiece’s polish.
Understanding Metal Clay vs. Milled Metal
Having a basic understanding of the material you’re using is critical when designing, making, and finishing any kind of jewelry. The stronger and denser the metal, the more abuse it will take in the finishing stage, or when worn (as in a ring or bracelet).
Milled materials start with bits of metal (recycled scrap or clean grain) that have been melted and poured into an ingot mold. To make a flat sheet or wire, the cooled ingot is then either repeatedly fed into a rolling mill, threaded through a draw plate, or forged with a hammer until it is the thickness or circumference desired. In this process, the metal particles become compressed, and the sheet or wire is as close to ‘solid’ as it can be.
Cast pieces are slightly porous. After the molten metal has been poured into a mold and allowed to cool, it is not as dense as milled metal because it has not been forged in any way. Small pockets of air may develop as the metal flows into the mold and will not be compressed.
Because the metal content of metal clay never fully melts, the resulting product has even more porosity than cast metal. Although metal clay is a strong material, it is not as dense and, therefore, not as strong or ductile as fabricated or cast work.
Further information about this subject can be found at, newagoldsmith.com Forged Vs Cast Jewelry
All materials can be scored for hardness, including metal and gemstones. The MOHS scale (Visual of MOHS for metal) rates some of the metals we use this way:
- Gold, Silver – 2.5 Fine silver is not differentiated from alloyed silver in this scale. You can safely assume that fine silver is softer than sterling.
- Copper, Brass, Bronze – 3
- Steel – 4
Plan Ahead
Think ahead as you design your work. Knowing what steps are necessary at each stage of the design path will help to keep surprises and disappointments to a minimum. How will a polishing or finishing tool reach into ‘that’ space after it’s fired? Do you already own a variety of tools to experiment with? Can you make specific tools with materials you have on hand?
Check for Repairs
One of the most amazing things about working with metal clay is its ability to be refired to perform repairs, add decorative details, or make other adjustments. Whenever possible, start repairs when metal clay is fresh out of the kiln. The rough surface of unpolished metal clay allows new lump clay or thick paste to grab onto it, travel into the microscopic pores, and create a solid connection.
Refine before firing where possible
Hand Finishing
New metal clay makers are most often taught to finish their work by hand using several methods. The first line of attack is usually to scrub the freshly fired piece with a fine metal brush. In general, brass is used for silver because it is a soft metal and is less likely to scratch the even softer silver. Stainless steel is harder and will do a faster job on base metal but can scratch silver pieces. No matter the metal content, a thicker, coarser wire will scratch any type of metal clay. Be sure to use a brush created for jewelry, don’t buy one at your local hardware store.
An alternative to a wire brush is grade 4/0 or 0000 steel wool (pronounced ‘four aught’). Care should be taken when using steel wool as it generously sheds tiny particles of fine steel wire, which can get into fabric and carpet, and may eventually make its way into your (or your pets) skin.
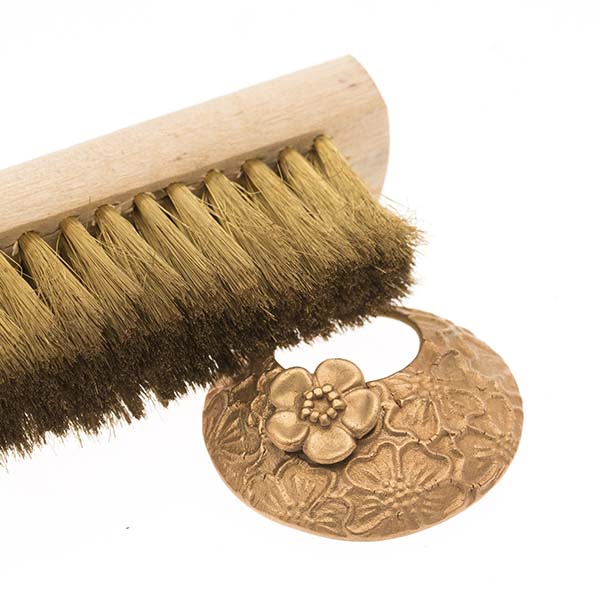
Brass brush gives a satin effect and can be used on many metals
Video shows how to use a brass brush
Once the initial brushed finish has been completed, the work can be brought to a higher shine using one or more of the following:
1. A tumbler loaded with stainless steel mixed shot
- Barrel, magnetic, and vibratory (vibe) tumblers all work similarly. Magnetic and vibe tumblers are more expensive but produce results slightly faster than rotary tumblers.
- Steel shot will create a shiny surface, but it will not remove scratches or dings.
- Steel shot is just one kind of media used in tumblers. More aggressive media is most often used to polish rocks, clean up castings, or create a satin surface on a finished work of jewelry. Ceramic or plastic pins and cones also come in a range of grades to provide different finishes for tumbled work.
- Carbon steel shot can rust and should be kept submerged in water or hand dried before it is put away. A hand-held blow dryer can speed the process.
- Stainless steel shot will not rust and can be spread on a towel to air dry.
- Store dry shot in a lidded container.
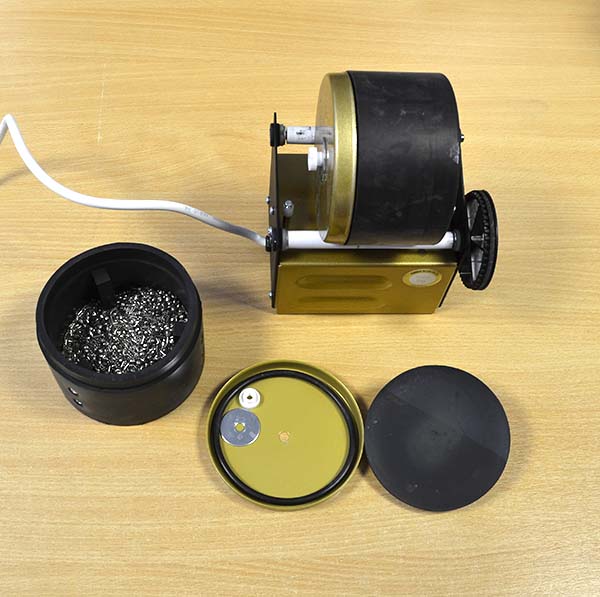
A tumbler is used with stainless steel mixed shape shot
2. Abrasive papers
- Sand and polishing/finishing papers can be used wet or dry. Water will help trap microscopic particles of the abrasive that might otherwise loft into the air and into your lungs.
- The grit used in finishing papers is finer than that used in sandpaper. So, 400 grit finishing paper is finer than 400 grit sandpaper.
- Always go in order, from coarse to fine. Turn the work 90 degrees each time you switch to a different grit. This will allow you to see scratches that were not removed previously.
- Rinse the work every time you change grits. If some of the loose grit from the previous pass remains, it could scratch through what you are trying to refine.
- Start with the least coarse grit that will still do the job. In general, start with 320 or 400 then go to 600, then to 800, then to 1200, etc.
- Many makers like to use cushion backed buffs and sticks from the beauty supply. They come in various grits from coarse to fine, and the backing sometimes makes them easier to handle.
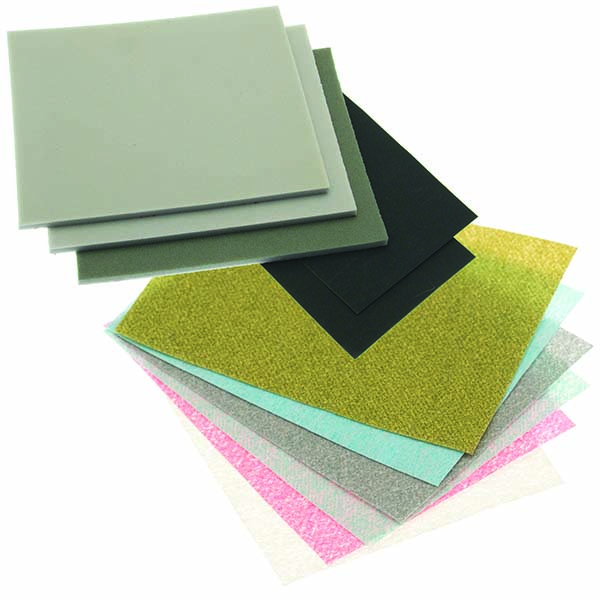
From top, foam backed sanding pads, dark grey wet & dry sandpaper, colour coded polishing papers. Colour denotes the grit.
3. Burnishers
- While they are not recommended for polishing in recesses, specific areas of higher relief can be brought to a high shine with a polished steel or agate burnisher.
- Make sure burnishers are free of scratches and dings. The marred surface of a burnisher will transfer undesirable marks to the piece.
- Some burnishers are shipped from the factory with sharp edges and tips. Take the time to ‘groom’ your tools before using them. Filing, sanding, and polishing sharp edges will help keep your work scratch-free.
Burnishers can be metal or agate
4. Polishing Pads and Cloths
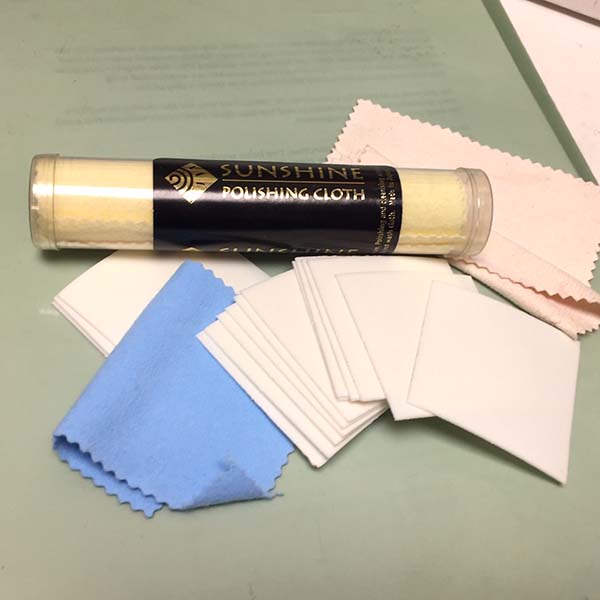
- Polishing cloths have been saturated with different types of compounds that will remove tarnish, leave a protective anti-tarnish material behind, and/or polish metal to a lovely luster.
- One popular brand is called the Pro Polish Pad. Impregnated with a fine abrasive, this pad is made of a rubbery material that will get gummy when wet, so be sure to dry your work before using one.
- Polishing cloths and pads are considered consumables and are thrown away and replaced when the entire surface is black.
Polishing cloths come in a wide range of styles
Machine Polishing
Machine polishers are either battery or electric. They range in size from about that of a microwave to something you could fit in a pocket, and they are priced accordingly. All will do the job, but some will do the job faster, better, and with less strain on the operator’s body.
Bench Top Jewelry Lathes
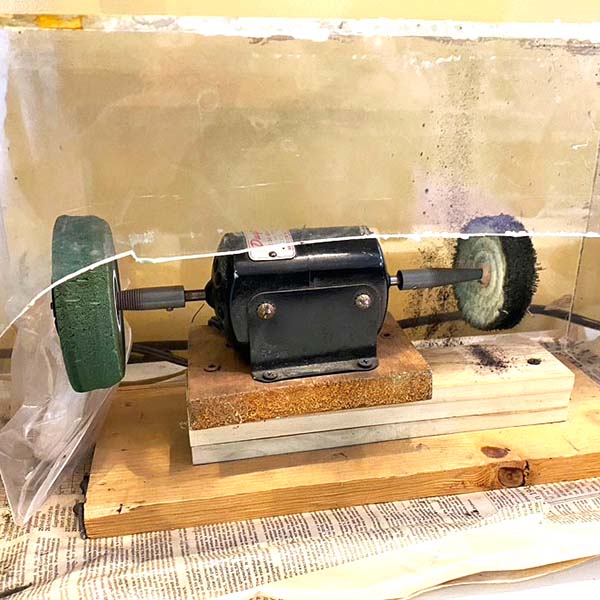
A lathe is basically a motor that rotates one or two tapered spindles onto which a variety of cutting, grinding, and polishing accessories can be mounted. Most lathes operate in a horizontal position and should be placed within a cabinet or box designed to catch the cast-off debris as the tools are used. Accessory tools are interchangeable between lathes manufactured by different companies.
The JOOLTOOL is a machine whose spindle is mounted vertically, allowing the operator to look down on specialized, see-through finishing accessories. It has a small, built-in backing to contain debris. Except for 3M’s radial disks, the patented accessories have been specifically designed to use with the JOOLTOOL alone.
Bench polisher with lucite cage, photo: N. Hamilton
Pendant Motors
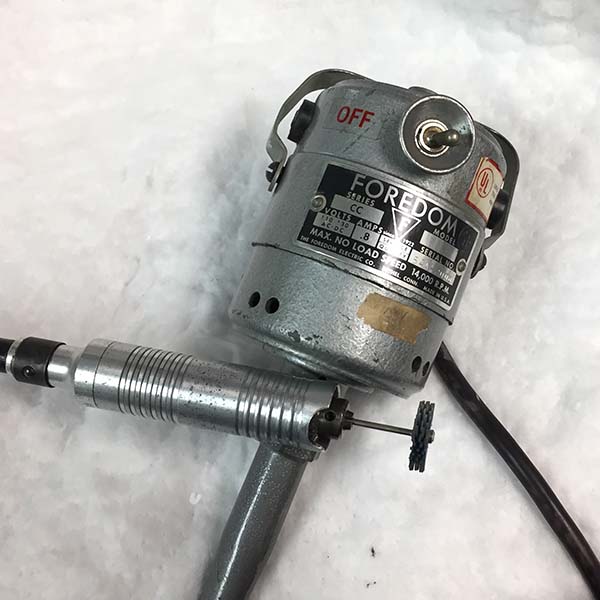
Pendant motor polishing machines (also called flex shaft machines) have a collection of parts that work together to create a hand-held polishing tool. They consist of a self-contained motor (which is normally designed to hang suspended from a hook), a flexible shaft, a handpiece, and a foot pedal similar to the ones used with a sewing machine.
The motor and flexible shaft work in tandem, but foot pedals can be interchangeable. Several different types of handpieces are available so shop around and check that the system you choose is compatible with any polishing mandrels or tools you already have.
There are several pendant motor and flexible shaft brands with a range of prices that offer well-made systems. Some of these include Foredom, Proxxon, Contenti, Chicago, and others.
One of the significant benefits to pendant motors is the ability to control the speed with the touch of the foot pedal. Learn to use the foot pedal as you might a car’s accelerator. If the tool is not in use, get used to lifting your foot away from the pedal, bending your knee, and tucking your foot under your chair. At the first sign of danger, simply raise your foot to stop the tool’s rotation in your hand.
Handheld Micromotors
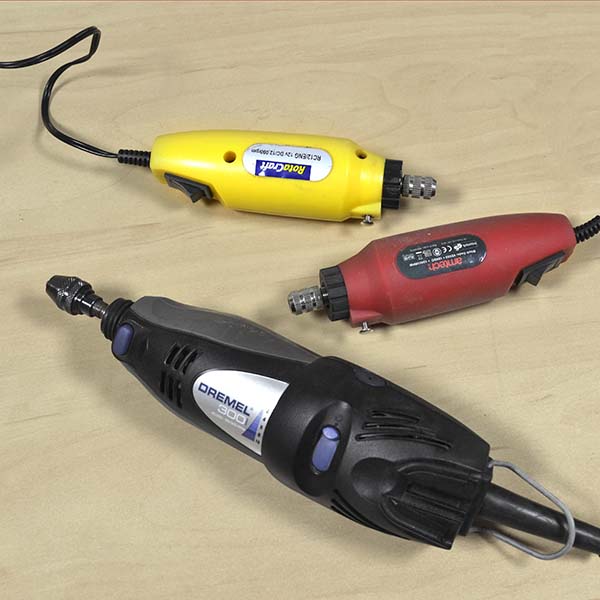
Micromotors come in a variety of sizes and are often the first rotary tool jewelers buy as they can be inexpensive and some are available from hardware stores so are quite accessible. They are normally a simple on/off device with a single speed or they have variable speeds on the handpiece. Micromotors can be wired or battery operated and are useful if you travel to classes as they are light and easy to transport.
Some brands offer accessories that include flexible shafts and foot pedal controls so they can be a good option if you want to start with a lower investment and add to the tool as your experience grows. Well known micromotor brands include Dremel, Foredom, Osada, Saeshin and Proxxon.
Battery operated bead reamers and electric manicure polishing drills do a similar job and are much less expensive options. They are also great to take to and from classes, although their motors are smaller, and their useful days may be numbered.
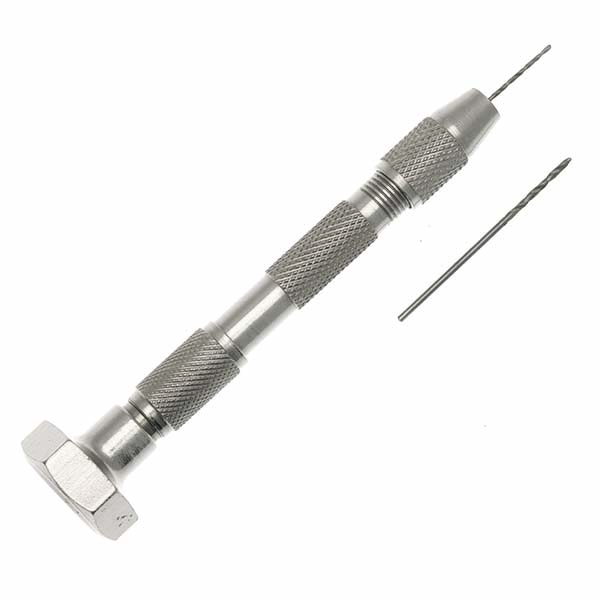
Often the jaws of all of these micromotor options match only one size bit or mandrel. Additional pin vise collets might be a necessary purchase if you want to use less expensive drill bits with smaller mandrels or rotary tools with larger mandrels.
Rotary Tools
There are many rotary tools, bits, bobs, and sexy accessories, and so little time to talk about them all. Here are just a few explanations and recommendations.
Cutting and Drilling
- Drills
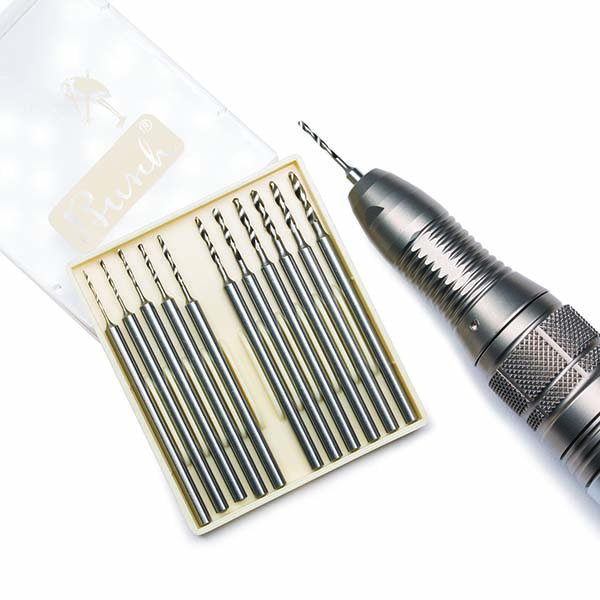
Twist drills are made in a few different metals and a couple of mandrel configurations. The size of the mandrel most often corresponds to the size of the flutes of the bit. This means that a very narrow or large drill will not fit in a quick-change motor tool handpiece or in most micromotors, so you’d need to buy a pin vise adapter to mount them in any handpiece other than the #30. But some manufacturers make drills with a 3/32-inch (approx. 2.38mm) mandrel, no matter the drill size. They’re a little more expensive, but the convenience might be worth it.
Diamond drill bits – tiny, industrial diamonds are either simply mounted to the surface or sintered into the body of diamond drills. The less expensive surface version will eventually wear down to the original tool metal, but the sintered ones have diamond through and through, so as they wear down, new diamond particles are being revealed. More expensive, but you’ll get much more use out of them.
Diamond core or twist drill bits are often used for adapting tools, drilling holes in stone or glass, and reaming pearls. Please note that diamond drills’ bit size is not as accurate as metal drill bits due to the diamond coating.
Metal drill bits – there are so many different kinds of drill bits that it can get really confusing when looking through a catalog. Tungsten, Vanadium, Carbide steel, the list goes on. For our purposes – whether using them on dry clay, sintered metal, or milled metal, you want to find High-Speed Steel (HSS) drill bits. ‘High-speed steel’ is not the same as just ‘high-speed’– so read the description carefully before you buy a set of drills.
Drills will not fit into a wire gauge because the flutes get caught on the slots’ edges, so you might also want to invest in a drill gauge. Look online to find a comparison chart of drill sizes versus metal gauge or mm. For instance, 1mm = 4 cards unfired metal clay = 18-gauge sheet or wire and is closest to a #60 drill bit.
Drills, stone setting burs, and wire rounding cup burs are all metal. Both the business end and the shaft have been machined out of a single wire.
Use a drill to create a hole for a jump ring or just drill holes as an added decoration. To start a hole in either dry metal clay, sintered metal clay, or milled metal, first put a divot into the workpiece. The drill point now has somewhere to rest as it starts to revolve; otherwise, centrifugal force will spin the drill all over the workpiece and scratch the surface instead of drilling a hole.
Drill bits are available that are made to fit a handheld motor
Pin Vice and drill bit
Silicone wheel polishing kit
Sanding and Polishing
• Silicone Wheels
Silicone rubber polishing and grinding wheels are impregnated with various grits from very coarse to very fine. They come in shapes such as knife-edge, flat edge, barrel, and bullet and are either mounted permanently to the mandrel or are temporarily attached to a mandrel with a screw. They are most often graded as ‘coarse’, ‘medium’, ‘fine’, and ‘ultra-fine’ – but some are rated with the grit number instead. Each type has benefits and drawbacks.
Unmounted wheels are packaged in a kit that includes all grits of that particular shape and size wheel and one mandrel, or individually (usually in a bag of 6 -12). When the wheel wears out, you simply put a new one on the mandrel. The drawback of this type is that the screw is closer to the workpiece, and if you’re not careful how you hold and handle the tool, it can cut deep gouges into the metal in a second.
Unmounted wheels have a hole that threads onto a specific size screw on the mandrel, so take the time to match the wheel to the mandrel when you make up your shopping list. If the wheel’s hole is larger than the size of the threaded screw on the mandrel, the wheel will wobble around. If the screw is larger than the hole – the wheel won’t fit onto it. The mandrel will last almost forever, so you may not have to replace it in your working lifetime.
Mounted wheels permanently attached to the shaft/mandrel do not have a screw on the end. When a mounted wheel has reached the end of its life – the whole tool is usually thrown away, so the mandrel ends up in a landfill unless you learn to make other DIY tools with it.
- Radial Disks
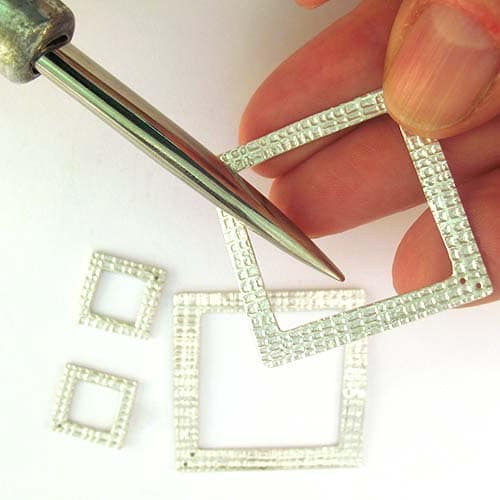
Manufactured by a couple of different companies, radial disks look like pinwheels and are impregnated with aluminum oxide grains ranging from very coarse to very fine. The little fingers of the disks reach almost every nook and cranny of an elaborate design and polishing with them is very effective. Because the entire wheel is saturated with the grit, they will do a good job even as they wear down. Each individual pinwheel is very thin and, if used alone, would grind a groove into the workpiece. Always mount between three and six disks at a time and move the tool in a circular motion as you work. Make sure all the disks are facing the same way. Once mounted, they should be rotating clockwise as you look down on the top of the screw. Radial disks are to be used as sandpaper, moving from coarse to fine in progression.
Many metal clay artists like to use radial disks to polish work right out of the kiln, bypassing the wire brush. Start with 220 or 400 and move down to finer and finer grits until you achieve the amount of polish and shine you prefer.
- Pins
Silicone rubber pins 2-3mm in diameter and about one inch long (23mm) are small enough to reach inside bails and other difficult to access parts of a design. They can be pre-mounted in a pin vise or can be directly chucked into the handpiece. Don’t be afraid to customize the tip by sharpening it to a point with a file.
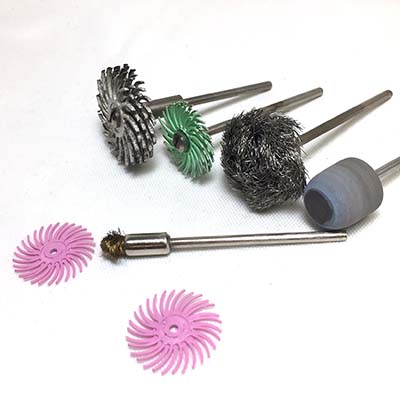
Wire brushes, radial disks and pins
All manufacturers color code their tools in a proprietary way. Although silicone wheels, radial disks, and pins may do a similar job, the colors used to differentiate the grits are specific to each company. The cutting material is present throughout, which allows the tool to be effective even when it has almost completely worn away. Just be careful not to let any metal parts on the tool come in contact with or damage the workpiece as the working end gets smaller.
- Wire Brushes
Wire brushes designed to be used with motor tools are either stainless steel or brass, just like their hand-held counterparts. Two to four-inch (10 cm) wheels can be mounted to a bench lathe. Smaller versions made to be used in a rotary tool come permanently mounted to a mandrel. They’re available in three basic shapes with either crimped or straight wire:
- End brushes – the wires on end brushes extend straight out from the ferrule like the bristles of a stencil brush. They are handy when working inside a bail or in the tight spaces between design elements.
- Cup brush – These are a little broader with a cupped center and can uniformly burnish small 3D shapes and decorations.
- Wheel brush – Similar in shape to a brush used by a chimney sweep, wheel brushes should be used cautiously. The way the wires on the small version of this bush are mounted sometimes allows individual wires to be spun out of the hub like tiny projectiles. Make sure to wear safety goggles and an apron while using this brush.
Crimped wire creates a slightly softer, matte, finish than straight wire does. At some point, the wire of all brushes will become tangled, twisted, and work-hardened – so which profile you choose to buy may not matter much after time.
- Slotted or Split Mandrels
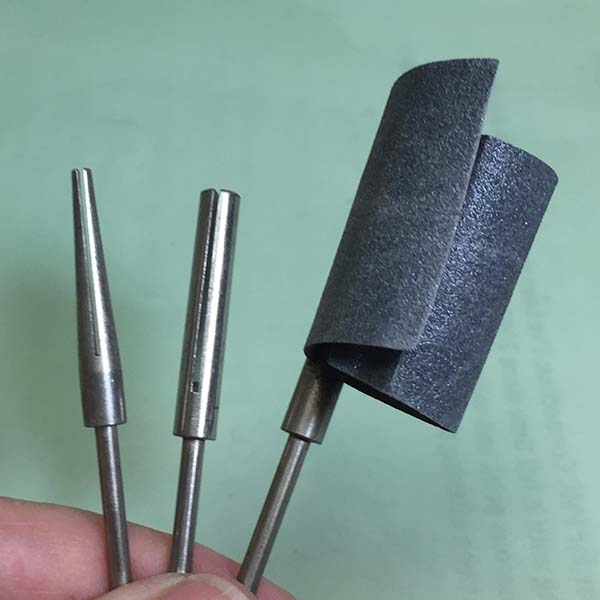
A split mandrel is a tool that allows you to slide a piece of sandpaper into a slot to flatten and smooth surfaces. They are most useful on the untextured back of a piece, inside ring shanks, or around the edges of a piece and come in a few sizes and shapes. Cut a strip of sand or finishing paper about one inch (25mm) wide and load the right side into the slot with the abrasive side facing you. Slowly rotate the tool and allow the remainder of the paper to roll around the mandrel. It’s OK if it winds above the top of the tool. Allow centrifugal force to keep the paper in position as the tool spins or tape the bottom edge to the mandrel.
Split/Slotted Mandrels
Video showing polishing with pumice and a flexishaft tool.
Polishing Compounds
Products like rouge and tripoli are grease or soap-based polishing compounds impregnated with various cutting and polishing abrasives, which help the final finishing process go a little faster. These compounds are meant to be applied with felt, muslin, or flannel buffs. To avoid cross-contamination, all tools, buffs, and accessories are usually kept in a bag with the compound they are used with. Never use a single buff with multiple compounds.
However, due to the porosity of metal clay, these greasy compounds are not recommended. When used on a rotary tool, the compound is forced into the metals’ microscopic voids and is difficult to thoroughly remove without boiling or steaming.
Although they’re more appropriate for milled metal designs, there are rouge bearing flannel polishing cloths that remove fine surface scratches and polish the metal. Because they are used by hand, not with a rotary tool, the compound is not forced deeply into the work, so cleaning sintered metal is easier.
Mirror Finishes
Most of the work to create a mirror finish on metal clay should occur when the unfired work is dry. After firing, use finer and finer grades of sandpaper, finishing paper, or radial disks. Rub the piece with a polishing cloth as the final touch.
On work with no or little texture, a mirror finish makes a significant impact. But when you combine high shine with texture, details can get lost in the light. Because silver is a highly reflective surface, the light will bounce all-around a mirror finish, and the textured design won’t be easy to see. Highly polished texture complemented with patina allows the work to sing.
Remember what you learned about the MOHS scale? Fine and sterling silvers are soft metals and are easily scratched, so the mirror finish you spent so long to apply will likely show the wear and tear of daily life more quickly than a satin finish.
In the end, how you choose to finish your work is a personal preference, and there are no right or wrong ways to do it. The more you know about finishing tools and methods, the better your work will look.

