Rehydrating Metal Clay
Metal clay dehydration happens over time. Out of the package it is malleable, takes texture well and can be molded, rolled and cut easily and cleanly. After a while the clay begins to feel slightly dry but will still take texture and can be manipulated easily. A short time later you may notice cracks forming or find that it can’t be compressed into a smooth, solid mass. Left exposed to the elements for another period of time it will become so dry that it seems unusable, yet you can still press into it with your fingers. Finally, when metal clay has lost all moisture it becomes so hard and dense it is no longer malleable at all. The remedy in all these stages is to replace the water content. How much is dependent on how far along the drying spectrum the clay has travelled.
Why Does Metal Clay Dry Out?
When we think about the ingredients found in metal clay, it’s really not surprising that it doesn’t retain moisture well. After all, metal clay is mainly metal! That means that the tiny grains of organic binders that are left have to do the big job of maintaining the water content that makes metal clay supple.
Avoid overheating
The major factor in metal clay dehydration is temperature.
- Heat – either from the temperature of the air, or from the warmth of your hands as you hold and handle it will immediately begin the process of evaporation.
- Air movement also accelerates drying. Working outside on a windy day or indoors with a fan blowing will make it more difficult to keep the clay fresh and workable.
Can De-hydration Be Avoided?
The best technique you can practice to avoid this phenomenon is to keep the clay protected until you’re ready to use it. This means having all your tools, textures, cutters, and a design plan in place before you even open the package! Make sure there’s a hydrating container, the original packaging the clay came in, or a piece of plastic wrap nearby.
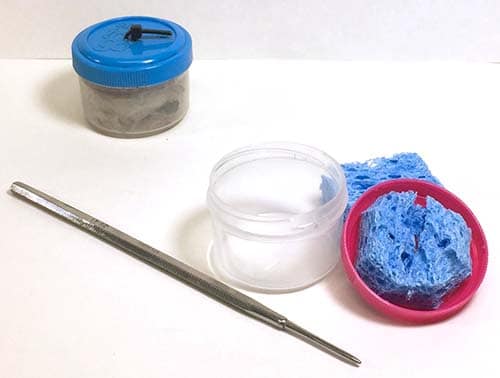
Hydrating container
- When using a hydration container lay a sheet of plastic wrap over the container’s opening before placing the lid.
- Make your own using a small container (like a salad dressing or micro jam jar) Drill two holes in the lid and attach a square of kitchen sponge with inexpensive wire.
- Saturate the sponge with water.
Hydrating container
Original Packaging
All metal clay suppliers package their clay a little differently. Many use plastic or foil covered zip lock Baggies.
- Spritz a little water inside the bag or insert a small square of wet paper towel or sponge.
- Loosely wrap the clay in plastic wrap and place it in the bag.
Plastic wrap
- When using plastic wrap, make sure the size of the plastic matches the size of the metal clay mass. A sheet of plastic wrap that is too large will develop many folded areas or pockets, which will in turn trap air, leaving the clay vulnerable to drying out – even while wrapped up.
- Tear a piece of wrap from the roll that is about 4″ wide, then cut that in half. Save both halves – one to wrap the clay you’re not actively working with, and the other to cover a rolled-out design or lump of clay if you have to leave the work area.
Thinking Green
- Use small glass containers instead of plastic when creating a hydrating container.
- Search for ‘compostable plastic wrap’ online.
- Try to re use traditional plastic wrap multiple times before throwing it away.
Tip: Making sure the clay does not directly touch a damp sponge or wet paper towel will help ensure that it doesn’t become a slimy mess. Always use a small piece of plastic wrap as a barrier
How to Store Metal Clay
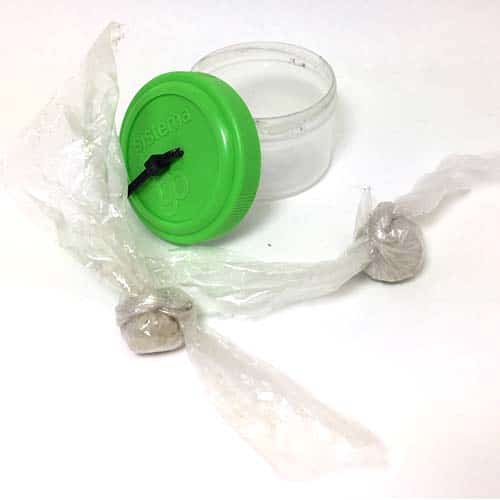
- When you are done working for the day, mist the remaining clay with a little water, put it in one corner of the plastic wrap, roll it all the way to the other corner, twist the ends opposite ways – like a hard candy wrapper – and tie once. This should protect the clay until the next time you use it.
- If you’ll be away from the clay for a while, I suggest you wrap it in another layer of plastic wrap and put a piece of wet sponge or paper towel in the zip lock bag or other container with the wrapped clay.
- Alternatively, metal clay can be stored in the hydrating container using the previously stated precautions.
Wrap clay like a hard candy wrapper!
What Should Metal Clay Feel Like?
Lump Clay
Each brand of lump clay has its own feel and working characteristics.
- Metal clay should not feel wet or viscous.
- It should not stick to your hands, tools, or textures.
- Properly hydrated metal clay should feel silky to the touch and should mold easily without cracking or splitting.
Silver vs. Base Metal Clays
- Lump silver clays tend to be smooth and creamy right out of the package.
- Some base metal clays may feel a bit grainy due to the size and shape of the metal particles used in that specific blend.
- The moisture in base clays may need a bit of conditioning to make it easier to manipulate.
- First knead the clay within a plastic wrap barrier to re-distribute the existing water content, then if necessary, proceed to the Stage One rehydrating suggestions below to add a bit more moisture.
Tip: The best practice is to pay attention to what properly hydrated clay feels like to you and do what it takes to maintain that texture and workability
Syringe Clay
Clay packaged in a syringe is a slightly different formulation than lump clay. It is somewhat moister but is made to hold a cylindrical shape as it is extruded. If not taken care of, metal clay will dry out inside the syringe. First the clay in the nozzle will harden, and eventually that in the larger body of the syringe will follow.
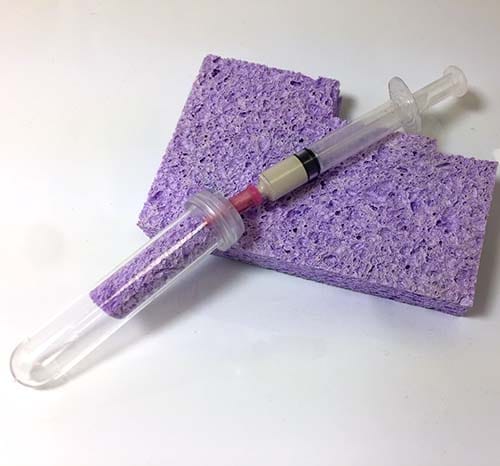
- Syringe clay can be stored upright in a container with the nozzle under water or in the type of vial that florists use to keep single stem roses fresh.
- Insert a small piece of wet sponge in the vial so the water doesn’t evaporate as easily.
- If clay in the tip of the syringe dries, insert a dressmaker’s pin into the nozzle to re open the passage.
- Keeping the syringe in a vial makes it easier to transport to a class or workshop.
Syringe Keeper
Slip or Paste Clay
Slip and paste are the same material, with either more or less water content. Which one is used depends on the preference of the maker, and the project in question. The word slip usually refers to liquid clay the thickness of nail polish or yogurt. Paste is a little thicker, more like peanut butter or Spackle™.
- No matter what kind of container it is kept in, slip/paste will eventually dry out, just like any other form of metal clay.
- Check it occasionally to make sure it is the viscosity that you like.
- When it becomes thicker than you prefer add a few drops of water, cover, and let it sit overnight to bring it back to a creamy consistency or stir water in using a plastic or metal spatula.
- Rock hard slip can be rehydrated using the Stage Three rehydration suggestions below.
REHYDRATING LUMP CLAY
Stage One – clay drying but still malleable
As you work with an individual bit of metal clay, you might notice small cracks along the edges of the clay, or you might find that it’s difficult to impress a good texture into it but the clay is still very malleable.
- When this happens press the clay flat with your fingers or a roller then place it on one end of a piece of plastic wrap, or other plastic surface.
- Dip a finger in water and spread it over the clay.
- With your fingers on the outside of the plastic wrap, fold the clay in half (with the water on the inner layer) and press the water into the body of the clay.
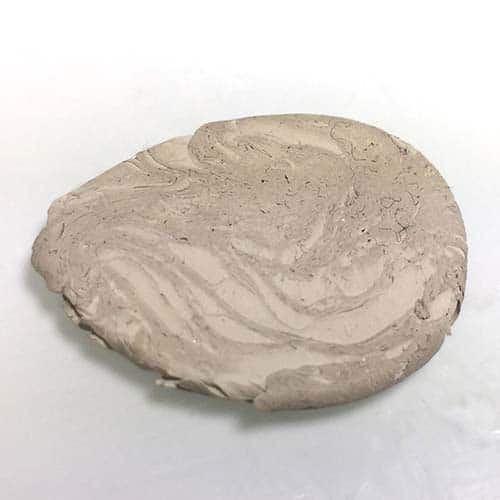
- Flatten and fold the water into the clay at least two more times before adding additional water.
- The action of ‘Flatten and Fold’ repeated at least three times ensures that the water will be evenly distributed throughout the lump of clay.
How much water you add is dependent on how dry the clay is, and you will become better at gauging it with experience.
- It’s better to add a small amount of water repeatedly, than to add too much to begin with.
- When you think you have blended in enough water, wrap up the lump of clay and let it ‘rest’ for around 45 seconds. This is to allow the binder time to fully absorb the water, so the surface of the clay is no longer sticky.
Tip: The reason to blend using a piece of plastic as a barrier is because your hands absorb moisture from the clay, so if you try to rehydrate the clay with just your fingers alone, not only are your fingers getting really messy but your skin is wicking the moisture away from the clay that you’re trying to rehydrate.
Stage Two – clay almost dry
At this point the clay is much drier and more difficult to manipulate with your fingers alone.
- Replace the thinner plastic wrap with a heavier piece of flexible plastic – like a freezer bag or an office type page protector that has been cut to open like a book.
- Switch to a roller to flatten the clay.
- Using more pressure to blend the water into the clay, repeat the techniques used in Stage One rehydration.
- When the clay returns to a good consistency, let it rest for at least an hour or overnight to allow the binders to fully absorb the moisture.
Stage Three – rock hard completely dry clay
When clay has gone a very long time without attention it becomes rock hard. This hard stage is fine when the design work has been completed and it’s ready to refine before firing. If the clay has dried out during storage, it can be reconstituted into malleable clay again. To replace the lost moisture content in completely dry clay, follow one of the two suggestions below.
The first method requires the clay to be turned back into powder. There are a couple of ways of doing this.
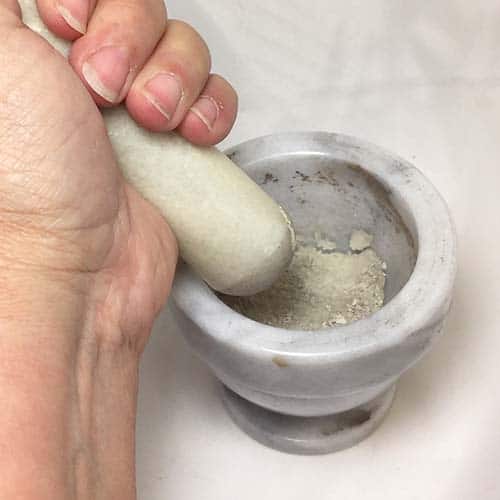
- Use a tissue blade to chop the hard clay into tiny pieces, and then use a mortar and pestle to grind it into dust. The closer you get to dust and the more you grind; you might notice the powder turn into what looks like thin sheets of dry clay – but it’s just compacted dust. Stir with a pin tool to loosen it.
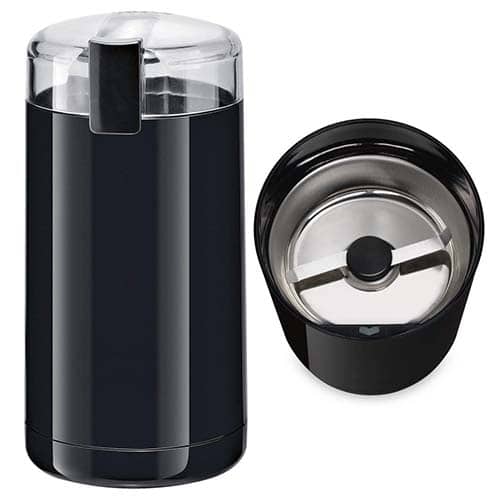
- Use a dedicated coffee grinder to make powder. Keep one grinder for all silver clay, and a second for base clays. Use a fluffy brush to reclaim residual powder from the blades of the grinder.
Once the dry clay has been reduced to powder the technique is similar to the suggestions above.
- Transfer the powder to a small glass or glazed ceramic container.
- Add water a drop or two at a time (if you add too much, you’ll bypass the lump clay stage and make slip) and stir it in with a spatula or palette knife.
- When the dust sticks to itself in a lump and comes away cleanly from the sides of the container, transfer it to plastic and use the same directions as Stage One to fully rehydrate it back into malleable clay.
Another technique is to place the hard clay in a small container and cover with water.
- Wait a day or two until the water has been totally absorbed.
- If the clay is still too hard, cover with water again until the clay is the consistency you desire.
- Repeat as needed.
Reduce dried clay to powder with a pestle and mortar
Small electric coffee grinders work well to reduce clay to powder.
Dealing with Binder Decomposition
As metal clay is repeatedly reconstituted the binder in it is depleted, which causes the clay to dry out much more frequently. At one point it becomes unworkable and looses elasticity.
To combat this, try using one of the following binder refreshers:
CMC Powder/Tylose
CMC is a food grade powder used in the baking industry. After reducing fully dry clay to a powder, prepare a separate mixture of 1/2-cup warm water and 1/4 tsp of food grade CMC. Add this mixture to the ground clay one or two drops at a time and mix well after each addition until it comes back to a useable clay consistency. Wrap in plastic, cover and let it rest in a hydrating container for about 24 hours.
Methylcellulose
RECIPE: (works with any brand or type of metal clay) courtesy of Bill Struve, creator of Metal Adventures brand clays.
- 100ml of hot water (about 3.4 ounces)
- 1-gram methylcellulose
- Stir until the methylcellulose is thick or dissolved, it should be clear when cool
- Add small amounts into the depleted metal clay and mix until you get the consistency you like
PMC AQUA
For dry but still malleable clay use 1 drop per gram and let rest for at least 10 minutes before using.
For rock hard dry clay use 3 drops per gram and let rest at least six hours or overnight before using.
- It is very important to measure the metal clay to be rehydrated and use the correct amount of PMC Aqua to revive it.
Kim’s ClaySpray
Spritz and knead the spray into a lump of drying clay and allow it to be absorbed. Once the clay is in the consistency you prefer, it’s ready to be used.
Note: This product is sold as a concentrate that must be diluted. Pay close attention to the instructions that come with the product
Additional Hacks and Tips
- Never use glycerin or oil of any kind to rehydrate metal clay. Glycerin may extend the working time, but it is used to add a flexible quality and does nothing to refresh the binder.
- Oil will make the clay grainy and difficult to use as well as accelerate binder decomposition.
- If lubricants or oil transfers from hands or tools adversely affect clay, mix it with fresh clay in a 50/50 ratio.
- Anything added to metal clay will push the metal particles further apart and result in additional shrinkage.
- To reduce the growth of mold use distilled instead of tap water or add vinegar or a drop or two of an essential oil (like lavender or orange oil).
The goal when using metal clay is to not have to rehydrate fresh clay more than once or twice, and never to get to Stage Two or Three until all the wet stage work has been completed but things happen and clay dries out so don’t let that put you off.
