


Have you ever thought about entering a challenge and wondered how other artists approach a design challenge? Annemarie Klappe shares what inspired her, and how she approached designing her entry for a recent Bits and Pieces Challenge. Her winning piece evolved during the process, which included experimentation, design changes on the fly, and happy accidents!
Here’s Annemarie’s story of the birth of her winning challenge piece “Steampunk Heart.”
One of the posts in the Metal Clay Fun with AMCAW group was an inspirational image with steampunk elements. It sparked an idea to create a three-dimensional heart with steampunk elements: cogs, tubes and buttons. However, as I usually have two or three ideas a day, it was parked somewhere in my brain until I could find a use or time for it. But as time went on, I began to see hearts or steampunk in everything. When I saw the description for the February Bits and Pieces Challenge, I had found my excuse.
How I thought this piece would fit the requirements:
1. Embeddable bail(s): I planned to use at least two on the upper sides of the heart.
2. Something symmetrical: the heart would be symmetrical, but the decorations would be asymmetrical so something extra would be nice.
3. Metal clay dots: I planned on using dots to resemble rivets.
4. Something molded: a nail art mold has been sitting in my toolbox for ages, waiting for its glory day. It has small dots with sculpted edges, perfect to create buttons.
5. For texture or used in the design – a skeleton leaf. I really wanted the front of the piece to be as smooth as can be, to represent metal. So, I had to figure out a way to incorporate the leaf in my pendant.
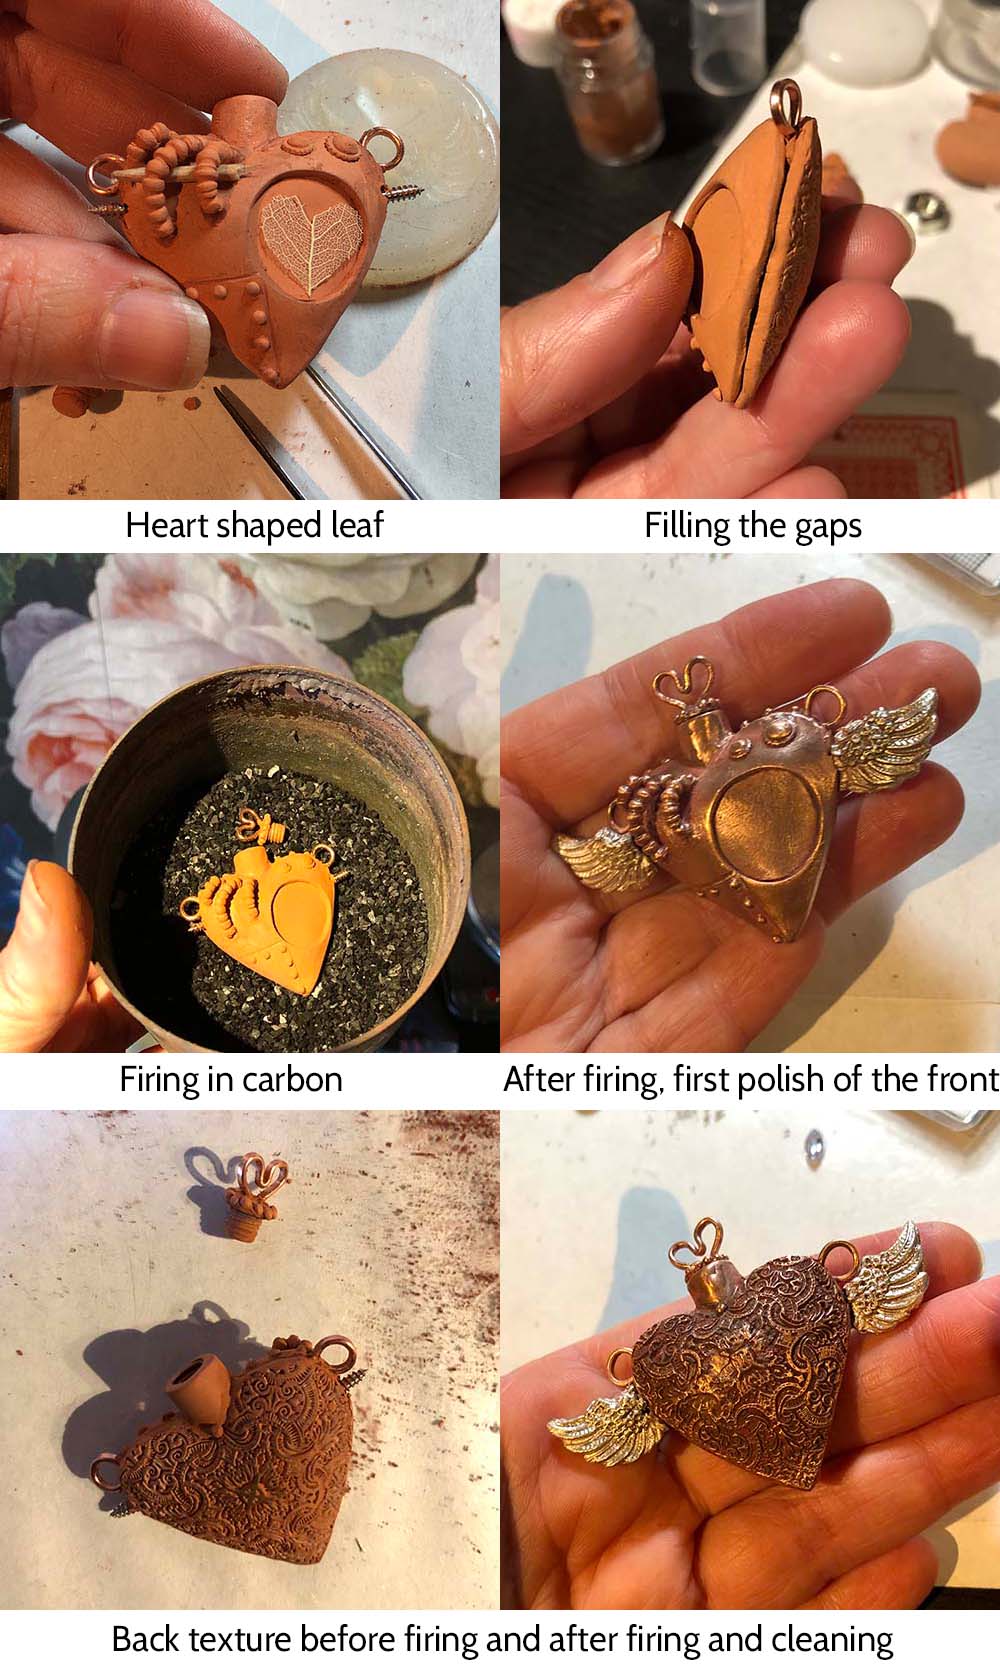 To protect the delicate leaf, I would have to cover it in resin. By creating that it would look like a window. Ooohhh, wouldn’t it be cool if I could cut the leaf in a heart shape? It took me a few tries but that was a success and meanwhile a story popped up in my head: a man wanting to protect his fragile heart, building a cold armour for it… and there we have the challenge’s theme of cold!
Looking for images of hearts for inspiration, I found a lot of them with angel wings. Now as I have a mold of left and right angel wings, that would be an extra use of a mold and add symmetry to my design.
Putting all my pieces together, I realised this pendant would become quite big and I decided to use copper instead of silver. The wings would be beautiful in silver though, so I fired my copper heart first because of the high temperature and then added the silver wings and fired again. To attach the wings on my hearts I would have two stainless steel screws sticking out, I had never fired those at that high temperature, but I figured I could always file them off if it didn’t work.
I used a heart made from resin to dome my heart. I had to cut the two hearts a lot bigger than the shape to cover it completely. Still the two hearts didn’t line up, a large gap in between inspired me to create a screw top tube. Yes, now my heart was a bottle too, by happy accident! Filling the gap took a lot of perseverance and I often wished I had just started over when I first saw the gap… but then it wouldn’t have become a bottle.
I loved creating the steampunk look and found myself laughing out loud when a coil really looked like a tube and the rivets worked as the look I had in mind. With syringe, I created a delicate little silver key to open the heart… but couldn’t find a right place for a keyhole, so I hoped no one would notice…
The screws made it during the first firing and were firmly in place to hold my silver wings. I made four so the bottle would look good on either side.
Unfortunately, the second firing without carbon turned my copper black of course and a lot of polishing was needed. During that polishing I lost some of the delicate texture. I could have cried, but that wouldn’t help and I just imagined it added to the old look I was going for. When I put the delicate heart in its space, it really blended into the background, so I first put down a layer of deep red for contrast and then domed some UV resin over it. I braided a long leather necklace and attached the silver key with a bronze chain. All the different materials added to the steampunk feel.
I am really happy with the result. My daughter who doesn’t care for mum’s roses immediately fell in love with this pendant and confiscated it. which maybe was even better than getting the first prize recognition of the jurors (although I am very proud of that too!)
Guest Blog: Annemarie Klappe
Fancy having a go at the current Bits and Pieces challenge? Check out the details here