Fired Findings Formed From Metal Clay
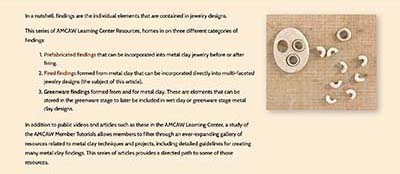
In a nutshell, findings are the individual elements that are contained in jewelry designs.
This series of AMCAW Learning Center Resources, homes in on three different categories of findings:
- Prefabricated findings that can be incorporated into metal clay jewelry before or after firing.
- Fired findings formed from metal clay that can be incorporated directly into multi-faceted jewelry designs (the subject of this article).
- Greenware findings formed from and for metal clay. These are elements that can be stored in the greenware stage to later be included in wet clay or greenware stage metal clay designs.
In addition to public videos and articles such as these in the AMCAW Learning Center, a study of the AMCAW Member Tutorials allows members to filter through an ever-expanding gallery of resources related to metal clay techniques and projects, including detailed guidelines for creating many metal clay findings. This series of articles provides a directed path to some of those resources.
FIRED FINDINGS FORMED FROM METAL CLAY
Many of us entered the world of metal clay with the intention of creating our own findings. They can be designed to be both fabulously formed and perfectly functional. In this article, expect to see fired findings formed from metal clay that can be integrated into future jewelry designs.
Be aware, however, that findings made from metal clay, as a sintered metal, are generally less strong than same-sized findings formed through traditional metalsmithing and manufacturing techniques. Taking that into consideration, it may be prudent to create metal clay findings just a bit thicker and sturdier than their non-sintered counterparts. This guideline is particularly important for metal clay clasps and bails/bales, the workhorses of any piece of jewelry.
An integrated bail/bale is part of the body of the pendant that is physically attached directly to the pendant design. See Article 3 – “Greenware Findings Formed From and For Metal Clay” for a discussion of this topic.
A floating, articulated, or swinging bail/bale is connected separately and adds movement to the pendant. In the jewelry findings world, most bails/bails are of the floating variety. They connect to the pendant by an open ring built into the body of the bail, a jump ring, a beaded link, or similar joining mechanism. This style is a good candidate for creating it as a fired finding as it can easily be incorporated into future pieces. Each of the bails/bales in the following examples could be formed as individual elements, fired, and added to or incorporated into metal clay creations.
Beads
Beads are very versatile jewelry findings. They can be large or small, solid or hollow, fairly flat or wildly 3-dimensional. The thing that makes a bead a bead is the fact that it has a hole, allowing it to be strung onto wire, chain, leather, etc.
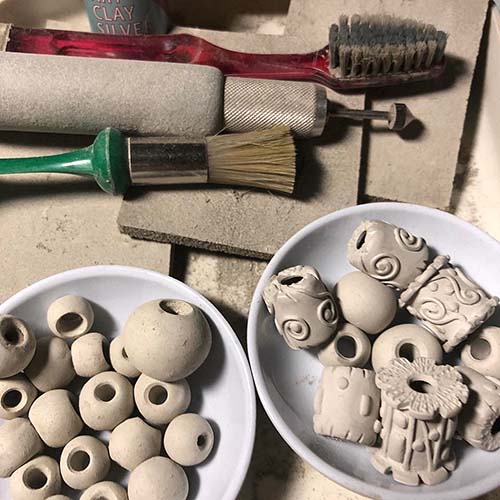
Beads formed from metal clay range from small accents in a multimedia jewelry piece to show-stopping focal elements
See the articles Hollow Forms in Metal Clay and Metal Clay and Beads.
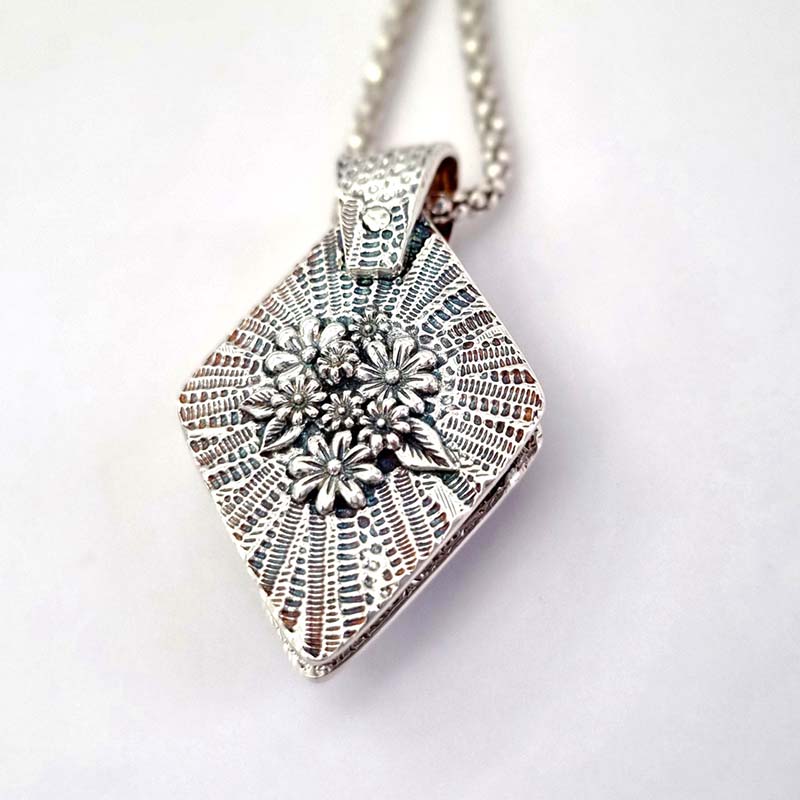
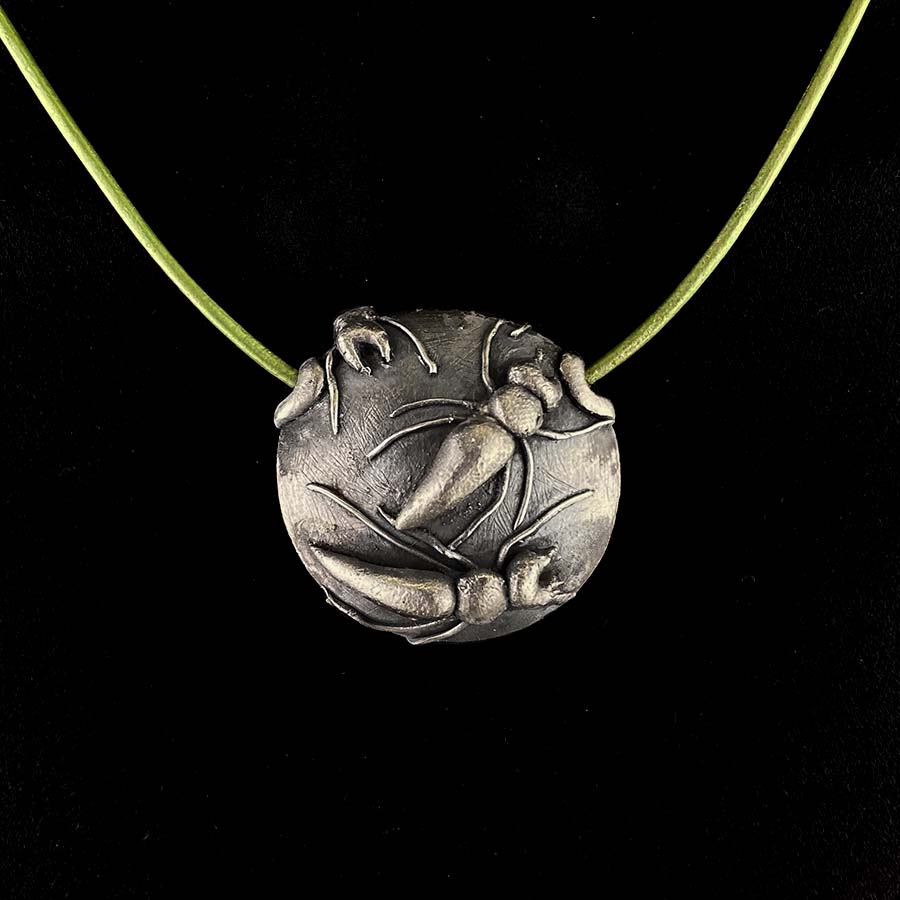
A single bead strung on a simple chain offers an elegant minimalist approach to creating a pendant. Or, as shown with this solitary lentil bead, it can create its own bold statement.
Colony Pendant By Barbara Becker Simon, Creatures & Critters Collection (AMCAW Tutorial)
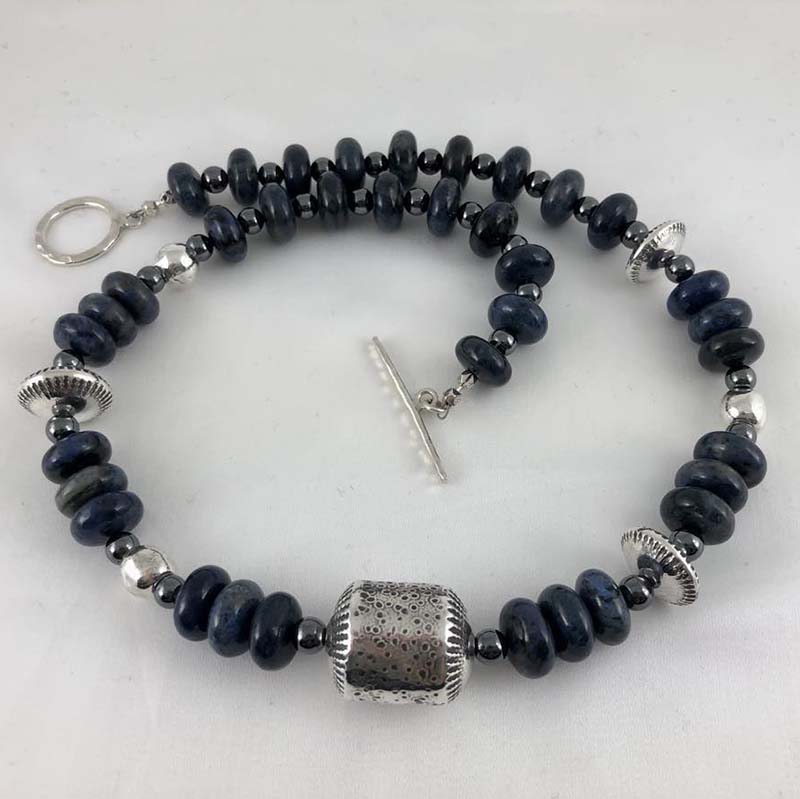
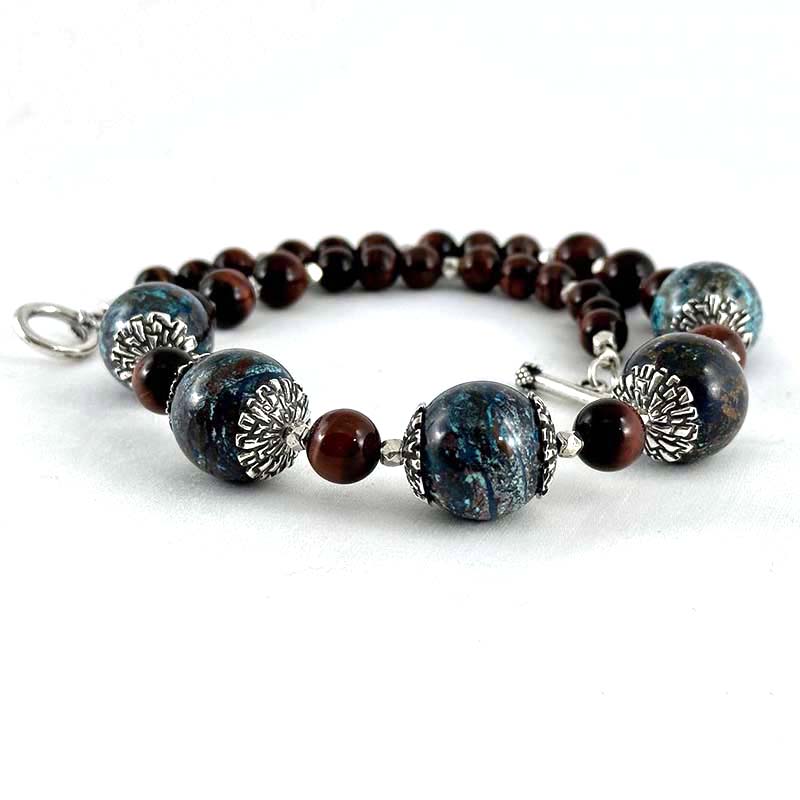
The textured fine silver focal bead and lentils in this Dumortierite, Silver, and Hematite necklace were created with fresh lump-form fine silver clay. The smaller silver globe beads were formed from reconstituted clay. Metal clay beads are especially compatible with stone, pearl, or other natural elements. They also pair beautifully with artistic glass beads.
Artist: Loretta Hackman, Photo: Artist’s Own
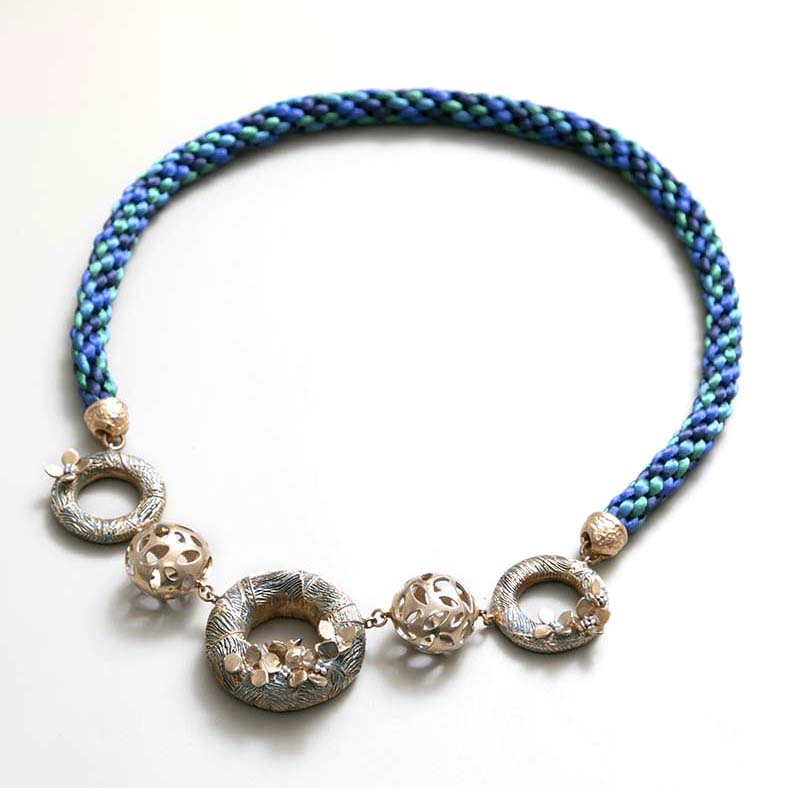
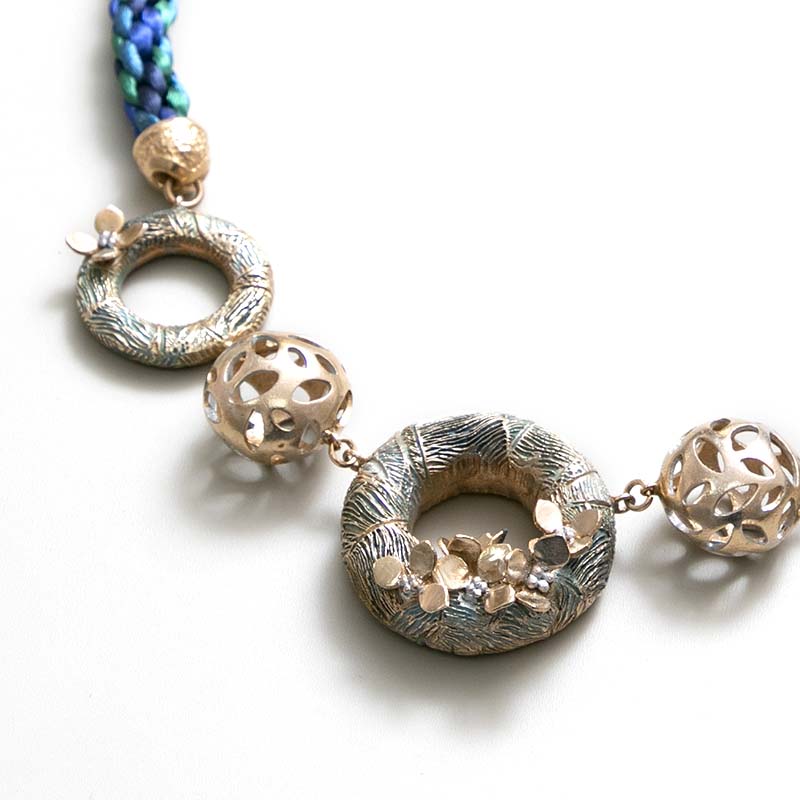
The elegant, linked necklace in the final image showcases intricate and interesting techniques for creating beads from metal clay.
Hydrangea Necklace By Irina Vasilieva, Mixed Media Collection (AMCAW Tutorial)
Bead Caps
Bead caps are domed findings designed to dress up the holes on a bead. They are especially effective on larger beads and can convert a simple bead into a classically elegant focal element.To create a domed bead cap for a spherical bead, roll out metal clay and cut it to your desired shape (circle, flower, star, etc.). Dome the bead cap by gently forming the wet clay directly on the bead. If the bead is porous, it may be wise to place a piece of plastic wrap between the bead and the clay.
Dry the bead cap until it reliably holds its shape, then remove it from the bead and dry it completely. Drill a hole in the center of the cap. Proceed as usual through the finishing, firing, and polishing steps.
Artist: Loretta Hackman, Photo: Artist’s Own
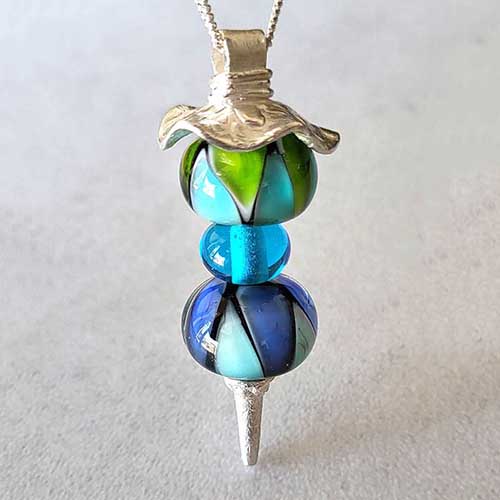
For a much fancier bead-enhancing option, consider creating an interchangeable bead pendant
All Change By Sally Caslake, Mixed Media Collection (AMCAW Tutorial)
Charms
Creating charms and small pendants is an excellent starting point for those new to metal clay, requiring very few tools, minimal amounts of clay, and many fine silver pieces can be torch-fired. Charms make very effective simple pendants and earring dangles. Charms can also be included in almost any jewelry project either as a focal point, a tag, or a last-minute add-on. Information about creating simple charms and getting started in metal clay can also be found in AMCAW Learning Center Videos “Metal Clay Leaf Pendant” by Pam East and “Creating Coils” by Gordon Uyehara.
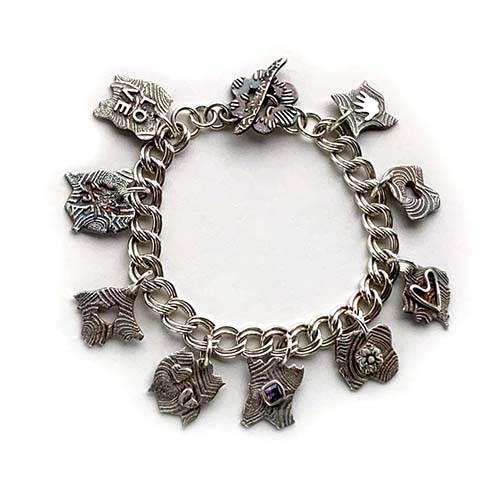
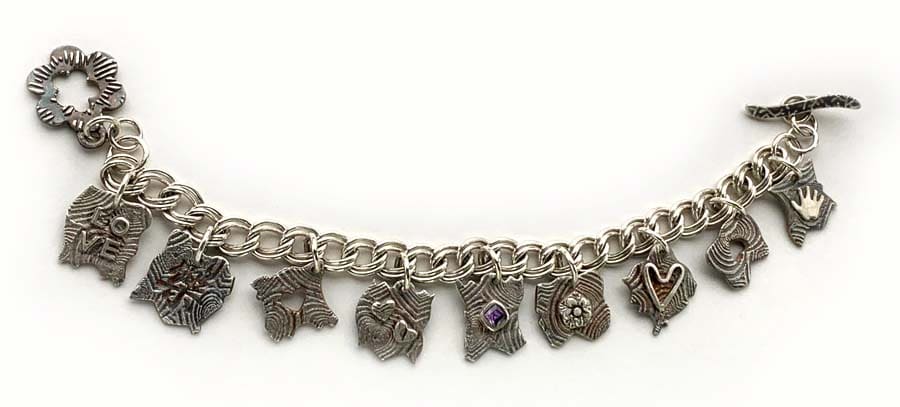
This puzzle bracelet has nine clever charms, each created with a unique metal clay embellishment technique.
Piecing It All Together By Lyle Rayfield, 20G Collection (AMCAW Tutorial)
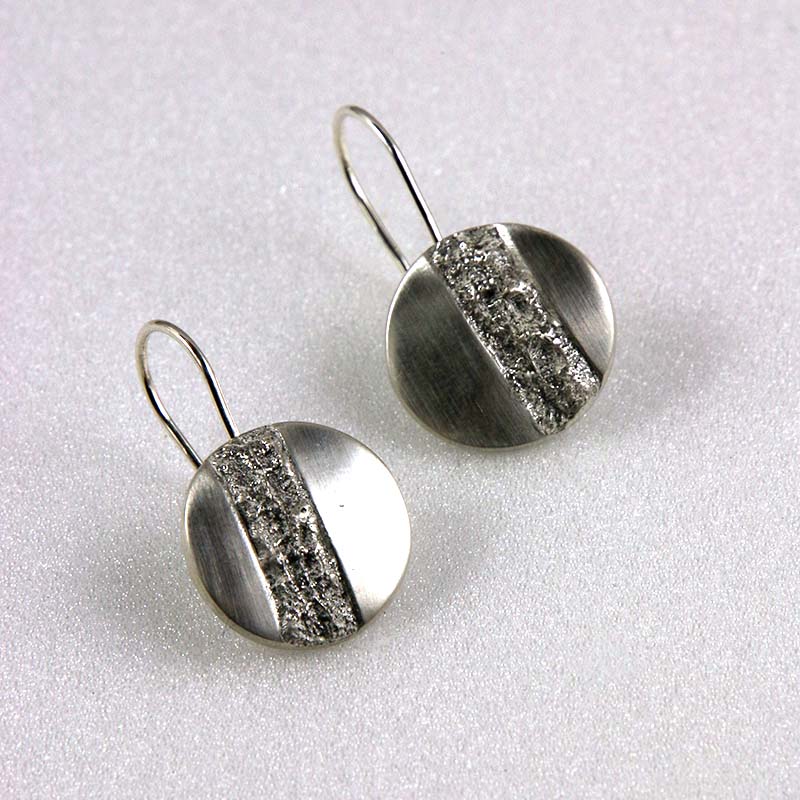
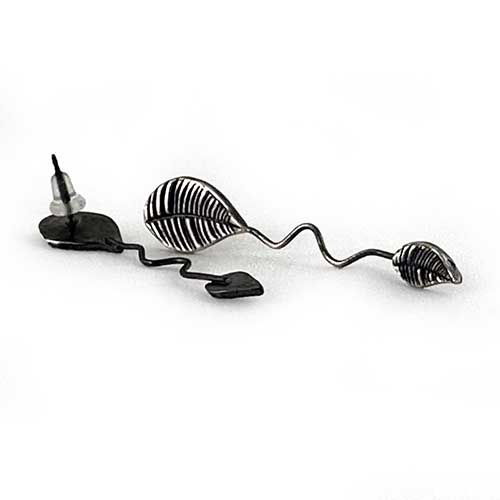
The charms used in these earrings use a clever technique to create holes at the back.
A Deceptively Simple Design By Helga van Leipsig, 20G Collection (AMCAW Tutorial)
Clasps
The clasp is an essential element in most necklaces and bracelets. It can have either a minimal, strictly functional impact on a jewelry piece or it can be the focal element and lynchpin for the entire design. Do a quick internet search for jewelry clasps. The general types break down into two categories:
- Mechanically complex clasps that use spring-based closures or tension fittings, such as lobster claws, spring rings, barrel clasps, slide clasps, screw clasps, filigree hook clasps, tongue in groove clasps, box clasps, etc. These are often simple-looking clasps that rely on the use of strong materials and a strong internal tension or friction mechanism to provide and maintain closure. Mechanically complex clasps are designed to tight standards and their production is generally best left to the prefabricated jewelry findings industry.
- Clasps that use simpler mechanics to operate, such as toggles, hook-and-eye clasps, button closures, magnetic clasps, interlocking clasps, etc. These are better design options for metal clay.
Clasps – Toggles
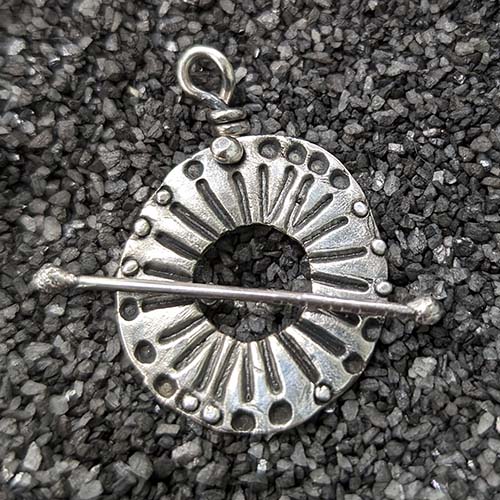
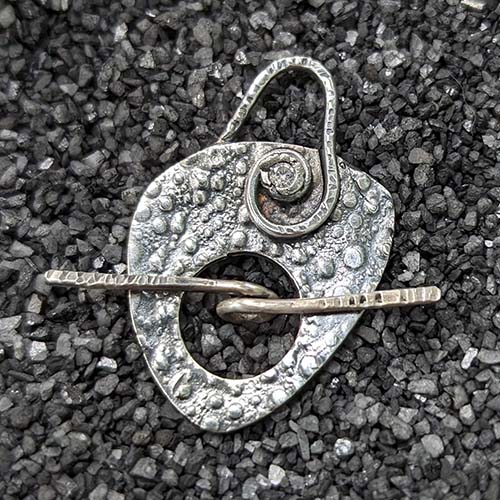
Toggle clasps are fairly straightforward. They consist of a loop and a bar, which fits through the loop to provide closure. The loop may or may not be round; the bar may or may not be straight. There are a few crucial features that must be designed into any trustworthy toggle clasp. Specific photo examples are included later in this section:
- The bar must be slightly longer than the widest dimension of the hole in the loop. If the bar is any shorter, it is liable to slip out of the loop during active wear. A toggle loop with a round hole needs a bar that is slightly longer than the hole. A toggle loop with an oval hole needs a bar that is slightly longer than the length of the oval, not the width. A toggle loop with a square or rectangular hole needs a bar that is slightly longer than the diagonal length from its internal corner to corner. Toggle bars can be longer than this critical length, but they should be no shorter.
- The toggle bar must be able to negotiate a pathway completely through the loop. For a jewelry piece that has large beads or large end elements that cannot go through the hole in the loop end, a certain amount of ease will need to be designed into the bar end of the toggle. This could be as simple as including a few links of chain or stringing smaller beads immediately next to the bar.
- As the clasp is the workhorse of any jewelry piece and operating it is usually a one-handed job, it should be designed for strength and ease of use.
Both the loop and the bar need the ability to connect mechanically to the jewelry piece, with the loop at one end and the bar at the other. For the loop end, this connection can be created by:
- Simply running chain or a beaded element through the loop’s center hole;
- Connecting a jump ring through a small hole drilled near the edge of the loop’s frame;
- Designing an open area at the edge of the loop, such as with an added coil element; or
- Soldering a metal jump ring to the edge of the loop after firing.
Connecting the bar to the other end of the jewelry piece can be either very simple or much more involved:
- A slab-formed bar could have:
– a hole at the center with a jump ring attached after firing;
– a hole at the center with a head pin/wire-wrapped-loop placed after firing;
– a sturdy metal clay loop centered on the back, similar to attaching a coil-formed bail. Ideally, this would be slightly embedded below the surface of the back of the bar to increase the strength of the connection; or
– a loop of embedded wire centered below the surface on the back and fired in-place. For silver clay, use fine silver wire, not sterling. - A coil- or wire-formed bar could be designed with a loop in the center; or
- A simple bar with no gemstones in place could have a jump ring soldered on after firing.
The flower-shaped toggle has a slightly curved bar with a loop on the back. It is attached to the bracelet by a jump ring.
Piecing It All Together By Lyle Rayfield, 20G Collection (AMCAW Tutorial)
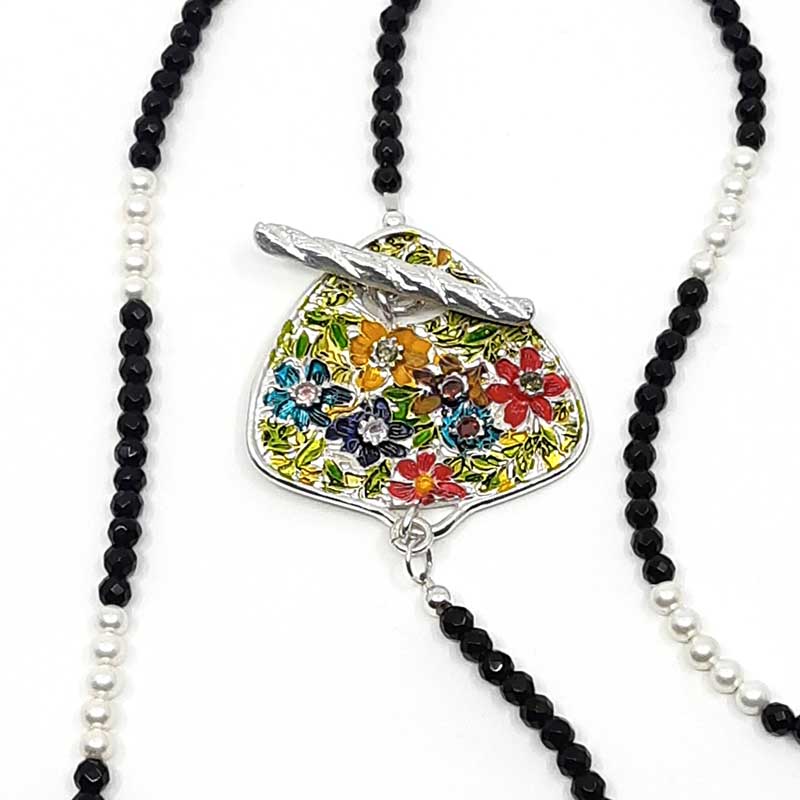
Often clasps are designed to sit at the back of the neck, but the highly decorative toggle in the third photo is the focal element of this stunning necklace and is designed to be worn in the front. See Stylish Clasp by Ana Townsend Notice that the coil frame surrounding the loop end has a slight opening at the bottom of the picture. This gap allows the beaded chain to be easily attached using two jump rings. The tutorial for this project has several versions of this clasp, including some very simple ones, and provides wonderful instructions.
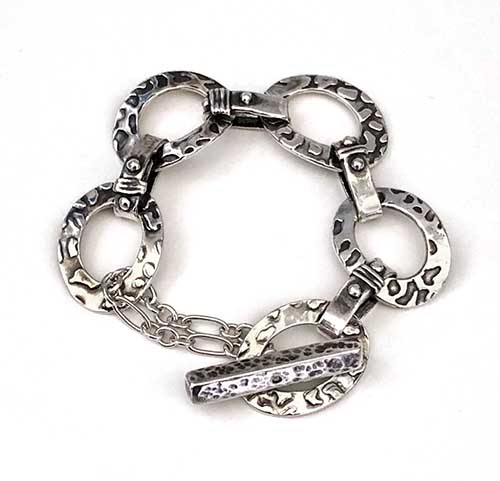
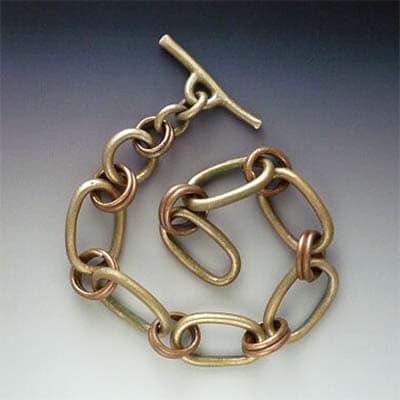
The oval-linked bracelet has a three-dimensional rectangular bar with a slightly recessed hole to capture 16-gauge sterling silver wire. After firing, one end of the wire is flared to create a rivet, the wire is then strung through the bar. A section of sturdy chain is looped through the end oval at one end of the bracelet. Note the length of the chain, which makes it easier to create the connection between the bar and the loop. A wire-wrapped loop is started at the bar. Both ends of the chain are connected into the open loop, then the loop is wrapped, securing the bar to the chain.
The fourth and fifth toggle clasps shown here use heavy gauge sterling silver wire as the toggle bar. Each bar is designed with a loop in its center, allowing it to be connected easily to the jewelry piece.
By mixing materials in this way, the metal clay textures take center stage while the wire toggle bar offers strength and contrast.
Clasps – Hook and Eye
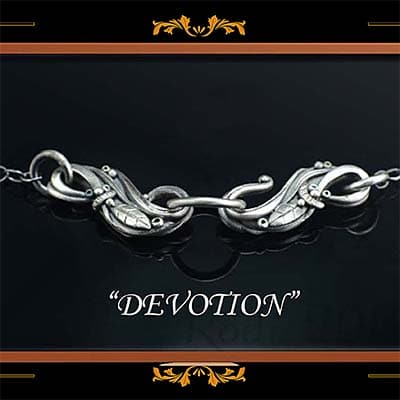
hook-and-eye clasps such as this elegant “Devotion” focal piece truly showcase the range of coil-formed design opportunities that metal clay makes possible.
This is not your typical manufactured S-hook style clasp, which is often created with wire elements. A manufactured hook-and-eye clasp can take a considerable amount of manipulation, tightening and loosening of the clasp, during its lifetime.
Devotion Clasp By Rodi Frunze
Flash & Fire Collection (AMCAW Tutorial)
For this type of clasp in metal clay, it is extremely important to design the piece to avoid the need for manipulation as sintered metal clay doesn’t have the ability to accept much repeated torque action. Repeated adjustments to the closure will soon result in a broken piece.
Notice that the artist (Rodi Frunze) has designed this focal clasp with one end that is permanently closed and the other end open, thereby avoiding the need to manipulate the finished piece. The ends of the clasp that attach to the chain are similarly closed. With proper usage, this beautiful focal clasp can function for several lifetimes.
Earring Posts and French Hooks
The term earring finding usually refers to the earring element that rests at or in the ear lobe or other ear position. An internet search for earring findings brings up links to post findings, French hooks, hoops, leverbacks, and clip-on findings. An earring finding generally must be lightweight, strong, and easy-to-operate. There are two primary ways to reliably create post-backed or French hook styled earring findings from metal clay.
- A pre-firing option is to embed a Titanium post or 20-gauge Titanium wire in a metal clay greenware piece, using lump clay to create a connection. Generally speaking, fine silver wire is too soft to use as a reliable post or French hook. Similarly, sterling silver degrades in strength when fired long and hot in a kiln so although it’s possible, it can result in a more fragile end product. However, Titanium posts are available to use for this purpose and can be fired up to 1500°F/815°C. Pam East has created a YouTube video that clearly describes this process and covers firing guidelines for silver clay, bronze clay, and copper clay. (Making Post Earrings with Metal Clay – Feb. 22, 2022).
- For a piece that has already been fired, soldering is an excellent approach. It also opens up the option to use sterling silver findings. There are several videos in the AMCAW Learning Center Video Resources that can introduce you to this process.
Endcaps
Endcaps give the designer the ability to transition a variety of three-dimensional materials such as leather, braided fabric, kumihimo, and peyote cables into jewelry pieces. Endcaps are usually placed between dissimilar components in jewelry. For example, transitioning from a clasp to a necklace element or from a necklace element to a centered focal design.
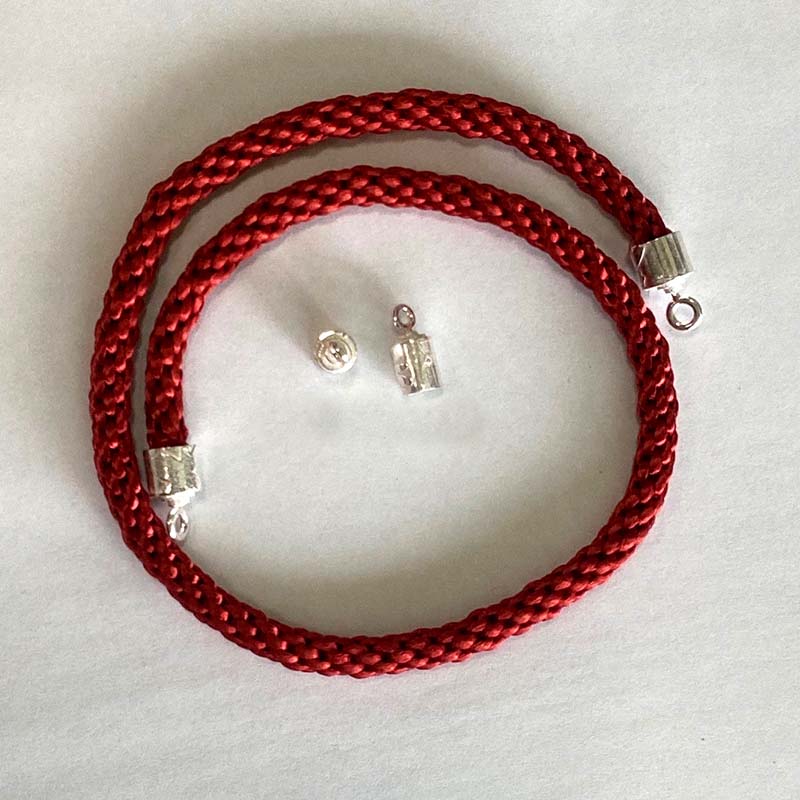
The ends of this hand-woven kumihimo necklace are flanked by endcaps formed from metal clay with embeddable loops. The tutorial for this piece also introduces the concept of creating multiples for functional pieces such as these, making your future work process easier.
End Caps By May Bartrum, Mixed Media Collection (AMCAW Tutorial)
Similarly, this beautiful necklace has a kumihimo neck piece with endcaps created from bronze clay.
Hydrangea Necklace By Irina Vasilieva, Mixed Media Collection (AMCAW Tutorial)
Links
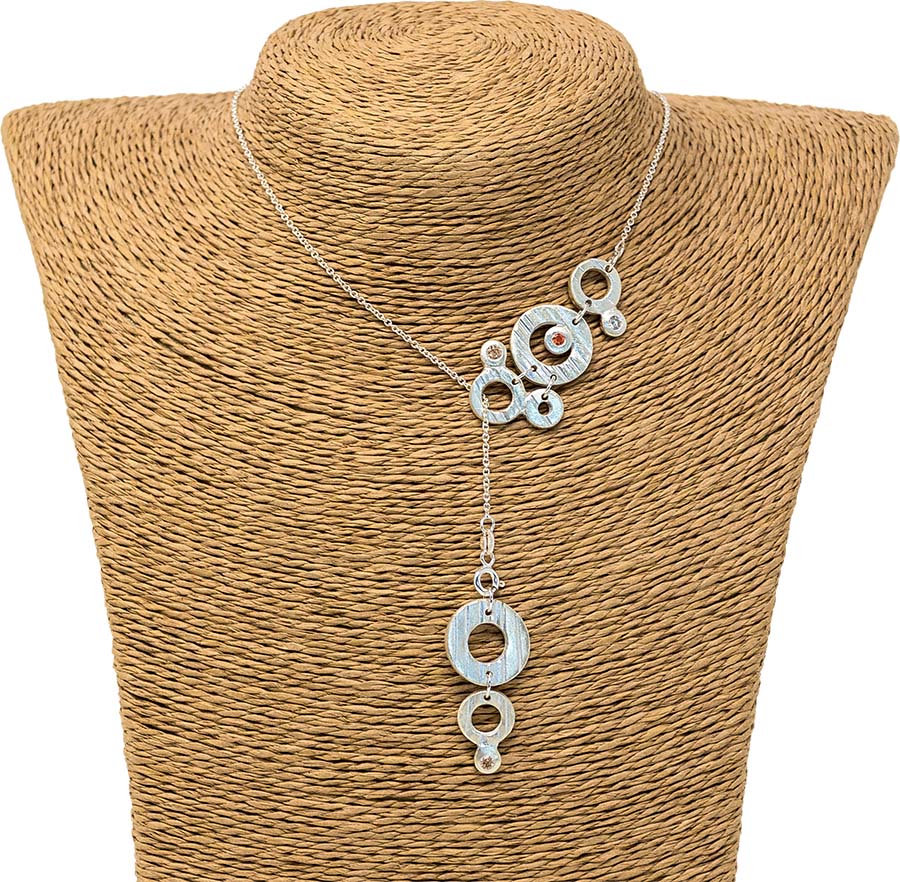
Metal Clay is not just for stand-alone pendants and earring elements. Using classic stringing and wiring techniques, it can be incorporated into multi-media pieces with beads, chain, leather, and other clever jewelry design elements. Consider creating extras of individual elements in your classic creations. Consider how you can use them in another capacity to create a multi-media piece. Imagine disassembling the individual links in these pieces and using them as elements in a colorful future design.The rhythmic repetition of the slab-formed circles in these links is beautiful. Imagine them separated by elegant artwork glass disc beads to pull in some color and catch the eye.
The bronze and copper coil-formed links in this gorgeous bracelet would be a powerful complement to earth-toned stones in a linked necklace.

