Search

Setting Stones After Firing

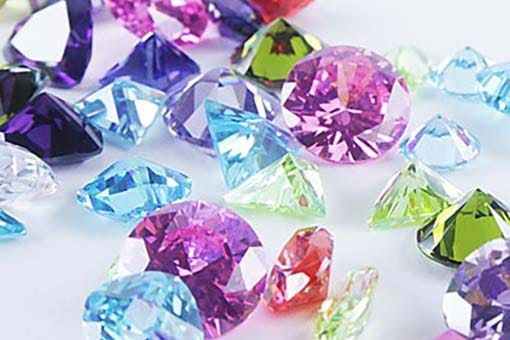
While there are many types of gemstones that can be directly set into and co-fired with metal clay, the options for non-fireable stones is much greater, and in many cases, more desirable.

The primary consideration when co-firing anything with metal clay is to make sure the item will tolerate the heat it will be exposed to. The kiln will simply incinerate natural objects like pearls, bone, and wood; and many natural stones – both translucent and opaque – will fracture, burn, or change colors. So how can metal clay artists include perishable stones in their work? We must refer back to the way stones have been set in jewelry for millennia. They must be set after the metal clay piece has been fired, polished, and patinated.

Although it primarily refers to fire-in-place stone setting, there is a lot of helpful information regarding non fireable stones in this article.

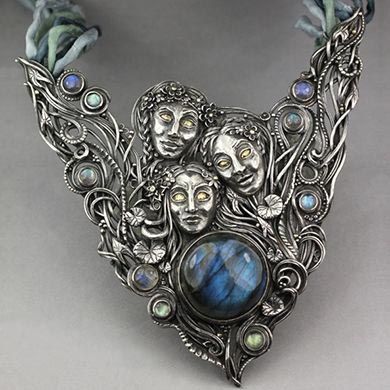
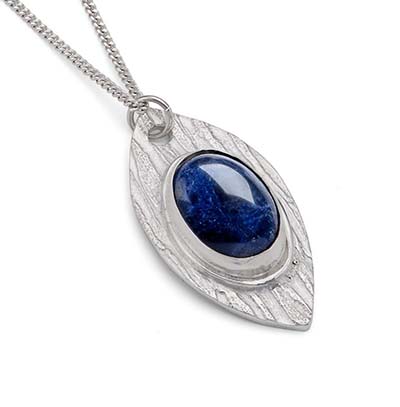
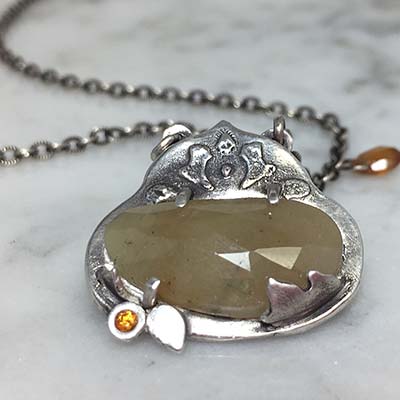
Rebecca Natanson pendant

Artist: Rebecca Natanson

Working with Metal Clay Shrinkage

When using metal clay, making a setting for non fireable stones comes along with its own set of concerns. It’s all about shrinkage and how you want to address the issue.

If you make a milled metal bezel to fit the stone perfectly, how will you attach it to the metal clay backing piece? Remember that the metal clay will shrink, and the milled metal will not.

If you make a bezel out of metal clay and fire it in place with the metal clay backing, will the stone still fit after the piece is sintered?

This article is intended to provide a basic set of guidelines and explanation of the various ways stones can be set after firing but is not meant to be a step-by-step tutorial. Please do more research either online or by taking a class to fill in the gaps of the process.

Things to Keep in Mind

When working with any of these findings or methods, there are some universal guidelines that you will want to follow or be aware of.

  • Always abrade, file, or sand milled metal where it will be embedded into metal clay.
  • Before placing in the clay, dip the metal item in slip that matches the clay you’re using.
  • Remember to use the correct firing method for the metal used. Fine silver can be torch or open-shelf kiln fired, base metal clays and .925 sterling will need to be buried in carbon.
  • Fine silver metal can also be used with enriched sterling clay types.
  • Consider the effects of shrinkage on settings that will be co-fired with the metal clay base.
  • Manufactured findings have not been made to fit a specific stone perfectly and will always need to be checked and perhaps refined to see that the stone fits, sits level in the setting, and can be set safely.
  • Sterling silver begins to melt from the inside out. The crystalline structure begins to change and is compromised long before it reaches the temperature when it will flow. Depletion gilding will only protect the very outer skin of the metal, so if you want to fire a sterling component in place in fine silver, you’ll need to use a clay type that can be sintered at 1200ºF/705ºC.
  • Fine silver can be fired to 1650ºF/900ºC with no problem, fine silver cast or die struck findings are strong and durable.

The most common ways to set stones is in a bezel or with prongs, but even within those parameters there are a number of variations that will expand the design choices you can use to create one-of-a-kind designs.

Cool Tools Nano Gems

Instructor Showcase Tutorial (members only)
Two Stones for the Price of One by Jennifer Knollenberg

BEZELS

A bezel is a strip of metal that wraps around the rim of the stone and is thought to be the earliest method of setting stones into jewelry.

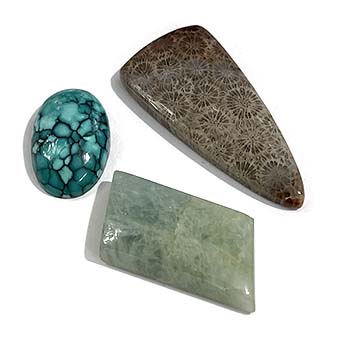
The most common profile that bezels are used with are flat bottomed, cabochon stones. These can either be translucent (like agate, rose quartz, and moonstone), transparent (like tourmaline, citrine and sapphire), or opaque (like turquoise, onyx, and jasper).

  • Commercially manufactured bezel wire comes in a variety of heights and gauges. It is usually very thin (between 30 and 24 gauge or 0.3 and 0.5mm), and can be made of gold, fine silver, sterling silver, brass, bronze, or copper. It’s also available in a few different profiles. Straight bezel wire is flat on both the top and bottom edges. Scalloped wire is flat on one edge with rounded sections on the other, and serrated wire is flat with sharp, zig zag cuts on the other side.
  • Scalloped and serrated wire sometimes makes the setting process a little easier because the gaps in the design are a little more forgiving as they are bent over and around the stone.
  • Gallery wire is the name of the fancy bezel wire that resembles Victorian filigree house trim. It is available from many vendors in a number of different design and metal options. Search the internet and Etsy to see what’s available in your area. Because gallery wire is not available in fine silver, it will be easier to attach using solder, or when buried in carbon.
  • Some companies make ‘tabbed’ bezel wire that was designed to be implanted directly in metal clay and co-fired.


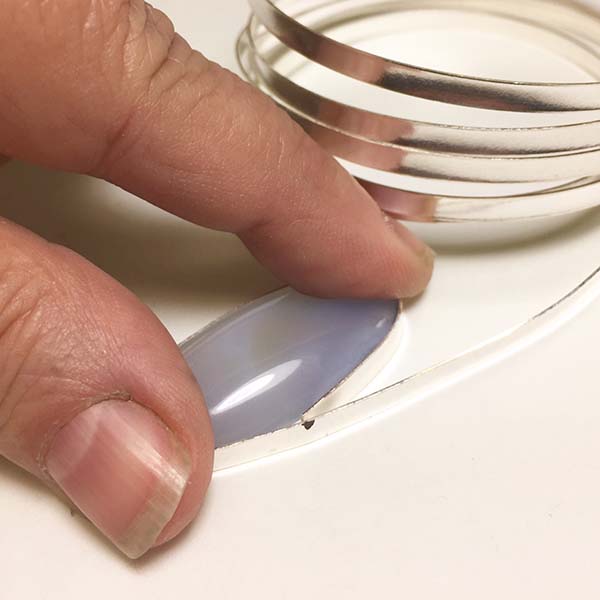
Wrapping a stone with bezel wire

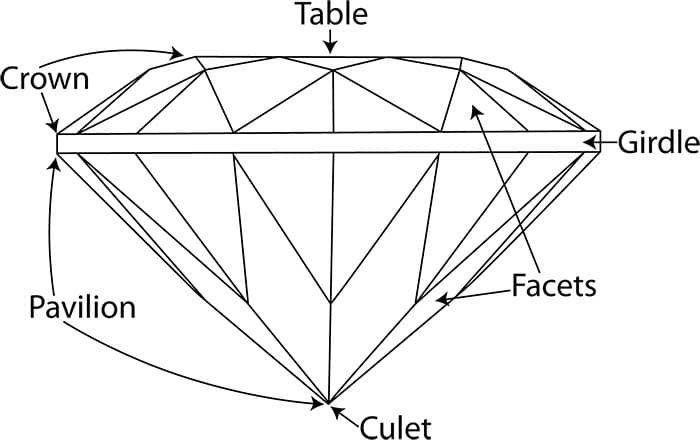
You can also use bezel wire to set inverted, faceted, stones! (table facet down, culet pointing up)

Cabochons that have a very low dome can be supported in ‘step’ bezel wire, which is formed of two layers – one is a little shorter to raise the stone while the longer portion secures the stone in the setting.

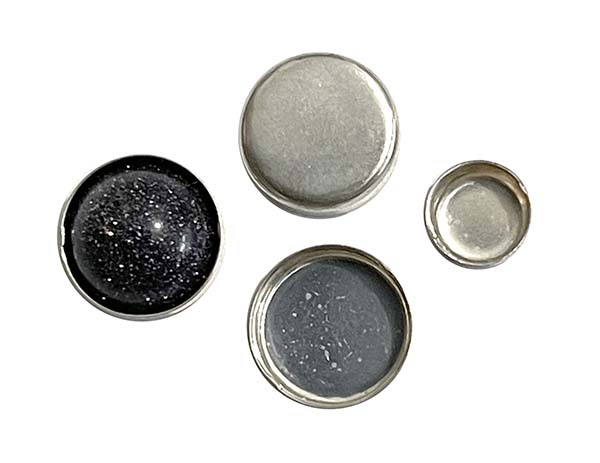
Pre-made bezel cups come in sizes that have been calibrated to match the dimensions of machine cut stones. Because the cups are punched out of a single sheet of metal, the bottoms are slightly rounded and may not sit perfectly flat on the backing or fit the stone as well as a custom-made bezel cup. Some filing, sanding, and shaping may be required when using these findings.

How-To: Joining a Milled Metal Bezel to a Pre-Fired Backing Plate

Anna Mazon Midsummer Night

Artist: Anna Mazon, bezel set cabochons

Affixing a shaped and closed bezel to a pre fired backing plate might be a more reliable method because the metal clay has shrunk to its fullest extent, the bezel is made to fit the stone perfectly, and the two can be joined without worrying if the bezel will be the correct shape to securely hold the stone.

Remember to enlarge the metal clay backing to match the shrinkage rate of the clay type (see how to calculate it below), so that after it is sintered and has shrunk to its final dimensions the bezel will still have room to be fully supported.

Soldering

After your metal clay piece is fired and polished, do what metalsmiths do – shape the bezel wire to fit the stone, solder it closed and use your torch to solder it into place on the backing plate.

Because metal clay is porous, you’ll have an easier time if you burnish the area really well to close the surface pores and remove the flame as soon as you see the solder flow.

If you leave the heat on the join too long, the solder will sink into the body of the sintered metal and the connection will be lost. (Read the information under ‘Understanding Metal Clay vs. Milled Metal’ in this article for an explanation.

Twice Fired Method

Sintered metal clay comes out of the kiln with a little ‘tooth’ or a rough surface that allows fresh clay to bond to fired clay a little better, so if you want to use metal clay to join it to a pre sintered metal clay backing plate – it’s best to start when the work is fresh from the kiln. After cutting, shaping, and using tension to snap the bezel wire shut, you can either fuse it, or close it with metal clay right before you join the bezel to the backing.

Fusing fine silver bezel wire closed (Sterling, copper, and bronze cannot be fused)

  1. Fuse the bezel closed using metal clay slip to aid the process. Close the bezel with tension until you can no longer see light when you hold the seam to the light. Then brush metal clay slip over the seam.
  2. Torch fire until the clay on the seam is bright orange. This tells you the metal is reaching the temperature needed for fusing. In a second or two you should see a flash of silver – remove the flame immediately (you don’t want to melt the bezel)!
  3. Use sandpaper or a fine file to smooth and refine the bezel seam.

Fusing fine bezel wire

Securing the seam with metal clay  (these guidelines can be used with any type of bezel wire, but the firing process should match the metal – fine silver in an open kiln or with a torch, sterling, bronze, and copper buried in carbon. Always be sure to sand milled metal to create some ‘tooth’ when you join fresh metal clay to it.)

  1. When working with fine silver clay, use a brush to paint a layer of slip or Overlay Paste over the inside and outside of the seam and wait for it to dry. Torch fire to sinter the join but know that it will just form a metal clay ‘band aid’ bridging the two sides of the bezel seam. It will not make a solid join like fusing or soldering would, and the connection will be fragile until the setting is fired in the kiln.
  2. Base and sterling metal clays cannot be torch fired closed due to the oxidation that will form, and solder cannot be kiln fired, so it is better to close the seam with a one card thick strip of clay or a swipe of paste and then attach it to the backing plate before placing it in carbon to be fired. It will be a fragile connection, so be sure to be gentle when pouring carbon into the container.
    Meropi Toumbas gold ring with stones

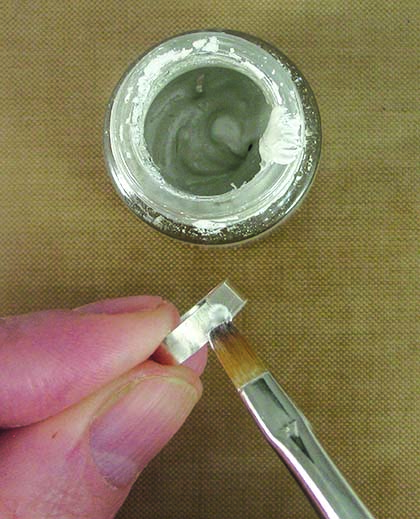
    Painting paste on a bezel join

    Joining the closed bezel to the backing plate

    1. First check the fit by placing the closed bezel on the backing plate and looking at the bottom edge of the wire to make sure there are no gaps, and it is sitting flat on the backing. If you can see some separation remove the bezel and refine the fit.
    2. Use a brush to trail a line of thick slip (or Overlay Paste if using fine silver) around the bottom edge of the bezel, then pick it up with tweezers and place it on the backing plate.
    3. Check the inside of the bezel cup you just made to ensure that there are no blobs of lump, slip, or syringe clay that might interfere with the fit of the stone after the setting is fired.
    4. Fire silver at the highest recommended temperature for at least an hour and follow the manufacturers recommendations when using base clay.
    5. When the work has cooled, test the join to make sure it’s fully connected.
    6. If there are gaps use syringe or lump clay to fill and refire.
    7. Finish and patina as desired before setting the stone.
    Meropi Toumbas gold ring with stones

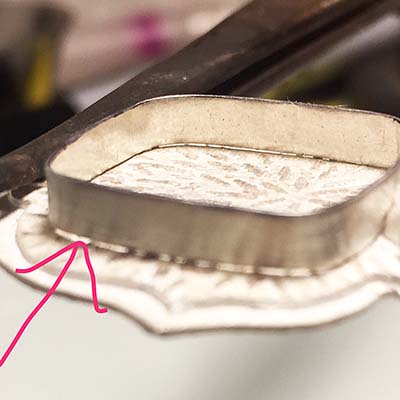
    Make sure the bezel sits flat to the backing with no gaps.
    This image shows gaps that should be removed with further refining. 

    How-To: Implanting milled metal bezels into fresh clay

    While you can set milled metal bezels directly into fresh clay and co-fire the two at the same time, there may be some trade-offs that you’ll want to be aware of and willing to work with. Because the metal clay will be shrinking, but the milled metal will not, the piece may warp or distort in some way during the firing process. Sometimes it will form a domed surface that might be attractive and add to the design, and sometimes you may need to make some adjustments after firing is complete.

    Note: Use fine silver bezel wire with silver clay to fire in an ‘open’ kiln. Bronze or copper bezel wire used with base clay designs will have to be co-fired while buried in carbon.

    Pre-Made Bezel Cups – there are a few ways to attach bezel cups to fresh metal clay. Here are two options.

    Meropi Toumbas gold ring with stones

    20 Gram Tutorial (members only)
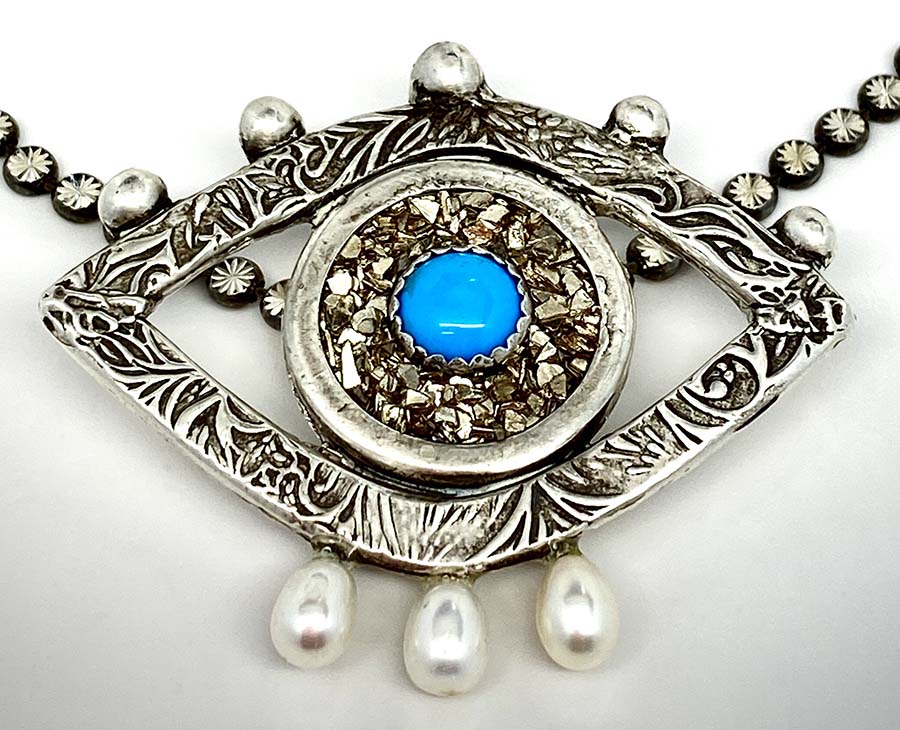
    Evil Eye Amulet by JJ Singh

    Option 1

    1. Use a file or coarse sandpaper to rough up the sides of the bezel cup. This will give the metal clay something to ‘grab on to’ as it shrinks.
    2. Invert the bezel cup and press it into the metal clay to make a hole.
    3. Brush slip around the sanded bezel.
    4. Hold the bezel with tweezers and lower it into the hole. It should fit very snugly.
    5. Allow the work to dry, then refine and fill any gaps.
    6. If desired, place a decoration or applique on the back to hide the bottom of the bezel cup.
    7. Make sure at least 1/3 of the bezel cup is above the surface of the clay, so it can be pushed over the stone.

    Option 2

    1. Use a file or coarse sandpaper to rough up the bottom and lower third of the sides of the bezel cup.
    2. Brush slip over the sanded areas and press the cup lightly into the clay. Do not push so hard that the cup breaks through the metal clay. You just need to make sure there’s really good contact.
    3. Use syringe clay, a tiny snake of lump clay, or other decorative elements to bridge the connection between the surface of the clay and the sides of the cup.

    Note: When implanting bezel wire into clay it may be useful to make a hole in the center of the area where the bezel wire will be set to lessen the chance of distortion due to shrinkage. Leave at least 3-4mm next to the bezel to support the rim of the stone when setting.

    Tabbed Bezel Wire

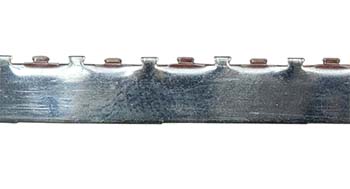
    Tabbed bezel wire has little ‘crenellations’ or tabs placed evenly along the edge of the strip. Some manufacturers make wire with more tabs than others. When there are many tabs, bend every other one in at a right angle before you shape it around the stone. Make sure the metal clay base is thick enough to accommodate the tabs, probably about 5-6 cards thick (1.25-1.5mm). The straight, unbent, tabs indicate how far the wire can be pushed into the clay, and the bent ones give the stone something to sit on. When using wire with fewer tabs that are placed further apart, bend every tab in at a right angle. The top of the bent tabs should be at the same level as the surface of the clay.

        Tabbed bezel wire Cool Tools

        Tabbed bezel wire Photo: Cool Tools

        1. Wrap bezel wire around the stone to shape it and cut where the wire overlaps to form a butt join.
        2. Work the metal back and forth a bit so that the ends of the wire meet perfectly and are held in place with spring tension.
        3. Seal the seam with thick slip.
        4. Torch fire the slip if using fine silver. Proceed to the next step if using base clay.
        5. Set tabbed bezel wire into the metal clay base, pressing down until the top of the bent tabs are on the same level as the surface of the clay. You should still be able to see the tabs – they should not be buried under the clay.

            Flat Bezel Wire (Straight, scalloped, and serrated)

            Review the more detailed instructions above for securing the seam

            1. Shape, cut and close the bezel wire
            2. Brush slip over the seam
            3. Torch fire the slip if using fine silver. If using base clay skip to the next step.
            4. Use tweezers to pick up the bezel and dip it in slip
            5. Use tweezers to hold the bezel as you push about 1mm into the clay
                Julia Rai pendant, Paul Mounsey Photo

                Artist: Julia Rai, Photo: Paul Mounsey

                Metal clay bezel wire

                Many metal clay artists prefer to make an entire design out of metal clay – bezel, backing, and all. That way there is no trouble with distortion between the bezel and the backing. But whether you’re using fine silver, enriched sterling, .925 sterling, or base clay – you’ll still need to take the shrinkage of the setting into consideration.

                  Meropi Toumbas gold ring with stones

                  Artist: Martha Vaughan

                  Options

                  1. Make a replica of the cabochon you want to set to act as a ‘place holder’
                  • Use polymer clay, 2-part silicone, plasticine, or any other material to create a mold of the bottom third of the stone.
                  • Fill the mold with any material that will not burn out in high heat (like jeweler’s investment or the brand ‘Creative Paper Clay’), and let it cure/dry completely.
                  • When you’re ready to fire, place the replica in the center of the metal clay bezel and fire as usual – the bezel will shrink up to the replica and no further.
                  1. Choose or prep the clay you want to use
                  • Add glycerin to any clay type to make a mixture that is more flexible when dry OR
                  • Use commercially made flexible clay (PMC, Hadar’s Clay, and Aussie clay manufacture Flex type clays) OR
                  • Use commercially manufactured paper/sheet clay.
                  1. Make the bezel strip
                  • Roll a strip of lump clay between 2-3 cards thick (0.5-0.75mm) – depending on the metal type. OR
                  • Cut a strip of paper type metal clay Note: a single sheet of PMC paper is 30g after firing. When doubled it is 26g. Art Clay paper type is slightly thicker.
                  • Cut by hand or on a die cut machine like the Cricut or Silhouette.
                  1. Shape the bezel
                  • Remember that the clay will shrink. Make a replica of the shape of the bottom of the stone but enlarge it by the percentage indicated by the shrinkage rate of the metal clay you chose. The silhouette/ ‘footprint’ of the replica should match the stone exactly.
                  • Wrap the strip of clay around the replica, cut, and seal the seam.
                  1. Dry, sand, and then join the enlarged bezel to an enlarged backing plate, and fire according to directions.

                    Calculating the enlargement percentage of metal clay designs.

                    Deduct the shrinkage rate % from 100, this will give you the final size you’re going for. Divide the % by the final size. Multiply that number by 100 and round up.

                    Example

                    PMC3 has a 15% shrinkage rate.

                    100 – 15 = 85
                    15 Ă· 85 = 0.176
                    Round up to .18 and multiply by 100

                    Enlarge the design by 118%

                    PRONGS

                    Used to secure either faceted or cabochon cut stones, prong or ‘claw’ settings are made from short lengths of metal wire that rise up from the jewelry piece and reach over the stone to hold it in place. The more prongs – the more secure the stone will be, but it is best to use at least three prongs. The gauge wire you choose will depend mostly on the size of the stone, and the exact way it will be set.

                    Cast Basket Settings

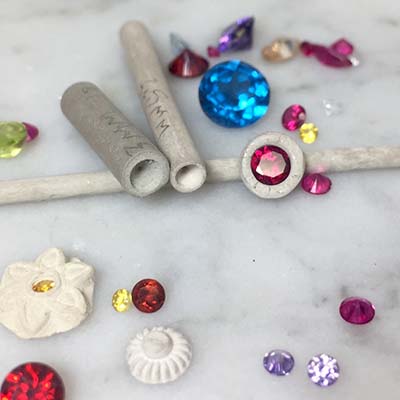
                    Intended for use with faceted stones, commercially manufactured cast settings are available from many different vendors in sterling, fine silver, gold, and other metals. These findings are built to look like a basket with two round rings attached to four straight wires. This basket, with the rings stacked one on top of the other, is used to hold the culet of a faceted stone off the surface of the piece it will be set on. The girdle of the stone rests on the uppermost ring, and the straight wires are meant to be bent around it and onto the crown facets. These types of settings will usually need some filing and sanding in order to fit the stone perfectly.

                    Basket settings have also been manufactured specifically to be used with metal clay. Sometimes the wire that forms the prongs extends past the bottom ring and is intended to be implanted into the metal clay base. Some will have a pre-cut notch on the inside of the wires designed to cup and bend around the girdle of the stone more easily, but these may also need some adjustments to fit perfectly.

                    As with any milled or cast metal implant, sand or file the metal where it will be embedded into clay and dip in slip before placing it. Metal clay will ‘shrink to fit’ the finding, creating a mechanical connection.

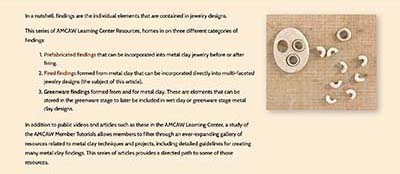
                    Wire prongs

                    Individual lengths of wire can be soldered on to sintered work, or implanted directly into fresh or dry, unfired clay (fine silver for all silver clays, matching metal for base clays).

                    Meropi Toumbas gold ring with stones

                    Artist: Lora Hart, wire prong setting

                    Clay prongs

                    Prongs can also be made by rolling very thin snakes of metal clay (sometimes called ‘calibrated’ coils). Metal clay rolled 4 cards thick is equivalent to 1mm which is 18 gauge. After sintering it will shrink to about 20 gauge. Fresh metal clay prongs can be left straight or can be slightly curved before being dried and sunk into the fresh metal clay backing. Care will have to be taken to make sure the prongs are set close to where the bottom of the stone will be set after firing, but not so close that it may impede the fit of the stone.

                    Lora Hart metal clay prongs

                    Artist: Lora Hart, metal clay prongs partial bezel setting

                    Rolling a calibrated coil

                    Other Setting Techniques

                    Tube Settings

                    A tube setting is just what it sounds like. A tube that is altered to support a faceted or small cabochon stone. Usually used with 2-4 mm stones, tube settings create a more substantial look that can isolate and raise the stone above the surface of the backing.

                    Meropi Toumbas gold ring with stones

                    Metal clay tube setting

                    1. Twelve-inch (300cm) sections of milled metal tubing is sold by the size/mm and the thickness of the wall. Use a variety of burs to cut a seat in thick-walled tubing. There are many good videos on YouTube – search stone setting that show the process of making and soldering milled metal tube settings.
                    2. Some manufacturers make die struck tube settings that can be soldered onto a sintered backing. Pay careful attention to the size dimensions and note if they refer to the inner diameter (which should match the girdle or base of the stone) or the outer diameter. Some custom cutting may be needed to make the setting fit the shape of the stone.
                    3. Metal clay tube settings can be made by rolling a snake that is 2mm larger than the girdle or base of the stone. After the snake is rolled and dried, the process is very similar to using milled metal tubing.
                    • Make sure the snake dries perfectly straight.
                    • Use a twist drill to make a hole in the center of the snake followed by ball and stone setting burs to cut the seat (all drills and burrs can be turned by hand – no need for a motor tool).
                    • The seat must match the dimensions of the stone perfectly, but it will be loose until the metal clay has ‘shrunk to fit’ the widest dimension of the stone (the girdle of a faceted stone or the base of a cabochon).
                    • To secure the stone as you work, use a little sticky slip to hold it in the seat.

                    Peg settings

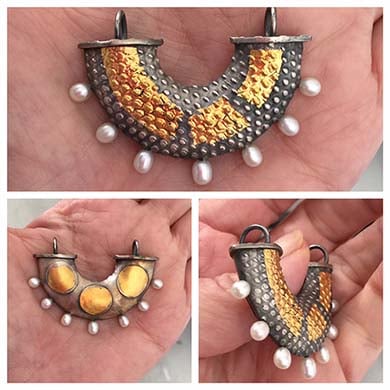
                    Wire pegs are used to set half drilled pearls or spherical gemstones. Beads are cut through and through, but pearls and some stones are meant to look like they’ve just been placed on the surface of the backing, so the hole is drilled only halfway into the center of the pearl/stone.

                        Barbara Simon, Macaroni

                        Barbara Simon, Macaroni
                        Pearls set on pegs

                        1. Fine silver wire can be implanted directly into fresh or dry clay before firing. Bend or notch one end of the wire before setting it in the clay. This bend or notch creates an anchor when the clay shrinks during firing. Adding slip or paste at the base of the connection will secure the wire in place.
                        2. Wire can also be soldered to a sintered backing.
                        3. Make sure the base of the pearl/stone has contact with the backing plate. If there is any exposed wire it may bend as the piece is worn and eventually snap off.
                        4. Pre fit the pearl/stone on the peg to make sure they match. Holes are usually drilled to accept a 20g peg, but sometimes gemstone holes are larger. The pearl/stone should fit snugly. If there is any ‘play’ the wire will bend inside the hole and eventually break off.
                        5. Place a tiny drop of two-part epoxy on the bottom of the peg before inserting it into the hole. Wipe away any overage immediately. Leave it to set for the amount of time the epoxy recommends.

                            This article has been a brief overview of stone settings used with metal clay when a stone cannot be fired in place. However, many of these settings can also be used for fire in place stones. The list is by no means complete.

                            Play and experiment with ways to set stones. The stone and the design may warrant a unique and innovative setting waiting for you to discover!