


Getting great photos of your work is totally achievable by anyone, yes I do mean anyone!
With my top 5 essential tools to help, you’ll be photographing everything like a star and nope it’s not going to break the bank.
1. Light tent – $20
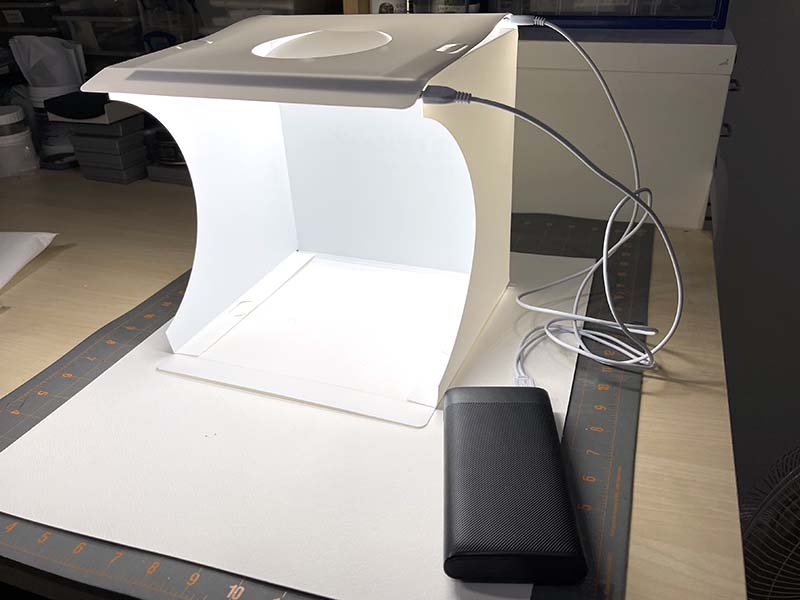
If you only invest in one thing make it this one! They are widely available from around $20 (I paid £13 in the UK).
These are popup tents (search for portable photo tent, light tent or light box) that have LED strips to light the subject inside the box. They run off USB cables so can be attached into a phone charging plug or a powerbank (big battery block!). They also fold flat for easy storage.
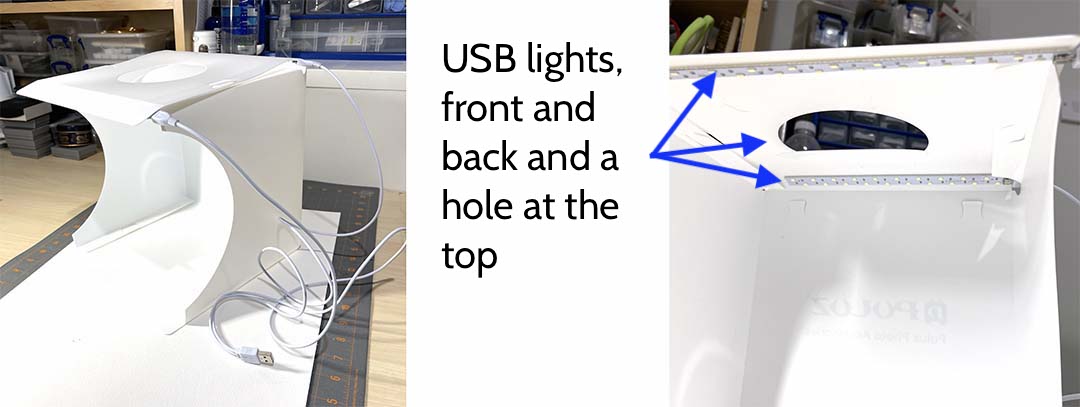
Look for one that has strips at the front and back rather than in a circle at the top. Make sure you go for one that has a circular hole cut out of the top so you can shoot straight down as well as from the front.
They work perfectly whether you shoot with a camera or phone.
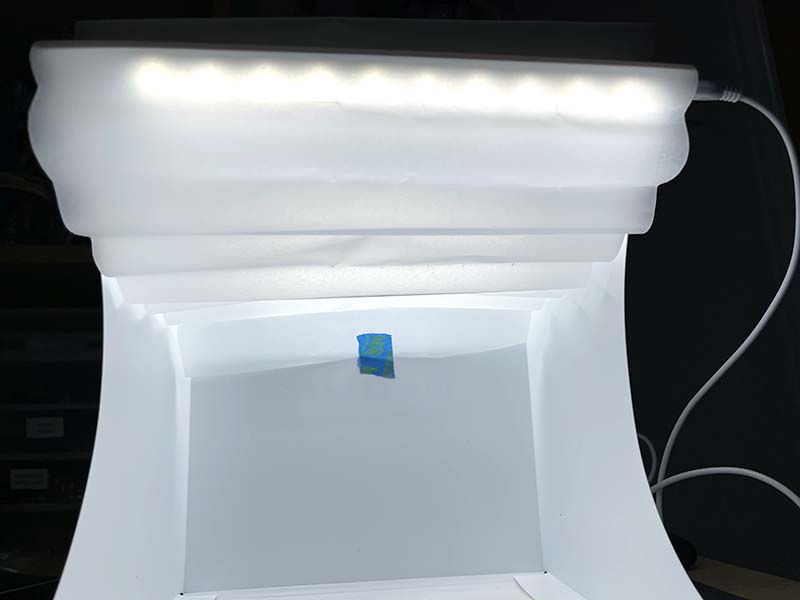
Tip! Use a piece of tracing paper to stop the LEDs reflecting on shiny metal. Use pieces of tape to secure the ends of the paper and wrap loosely, away from the lights to diffuse them.
2. Tripod
Very few people can keep their hands completely steady so it’s always a good idea to put your phone (or camera) on a tripod.
There are many available and it can be a bit of minefield trying to work out what to go for.
I regularly use two different ones, a gorilla pod and a goose neck mobile phone holder. If I could only choose one, I would buy a gorilla pod.
In fact, the mobile phone holder stays attached to my desk all the time, as it makes answering my phone hands free while I work at my computer much easier.
Gorilla Pod – around $10+
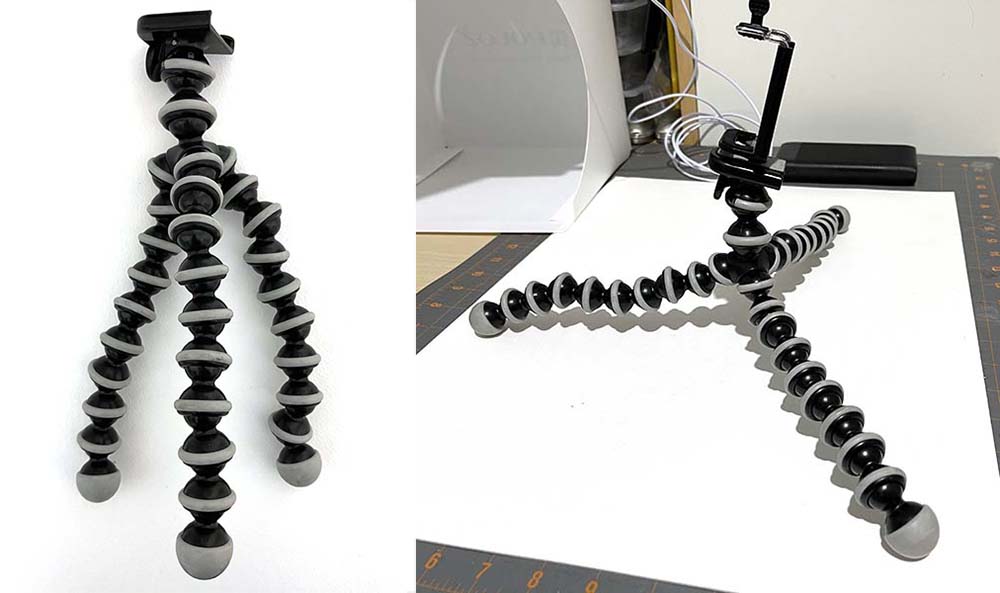
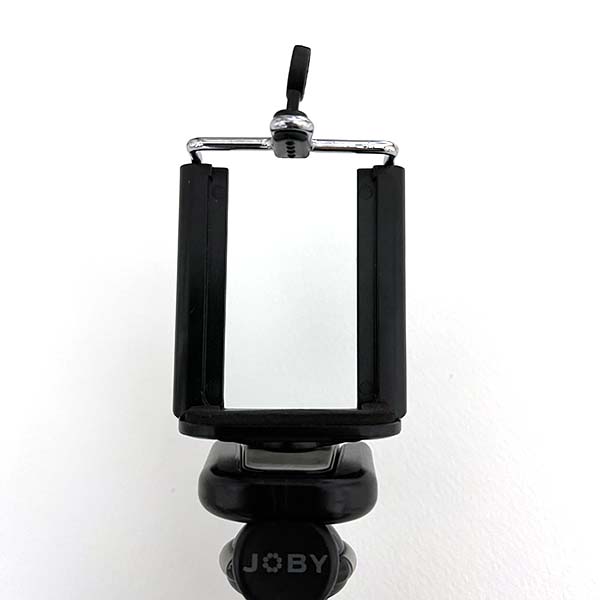 I have a branded Joby gorilla pod (bought second hand on ebay) but there are many cheaper brands out there. Search online or just drop onto Amazon to see the range.
The one thing to be aware of if you want to use a gorilla pod with a camera is ensuring you have one that can take the weight of the camera. Any reputable seller should give you a maximum weight the tripod can take and your camera’s manufacturer website should say what the weight of the camera is.
If you only shoot on a phone, then you can get a basic model. You will need to add a phone holder unless your pod comes with one.
Gooseneck phone holder – around $10+
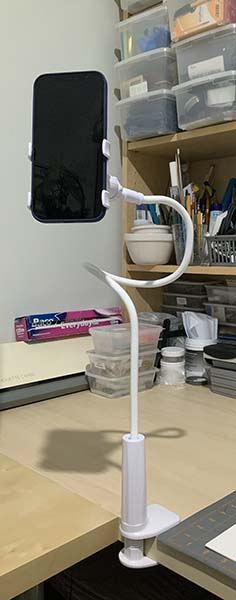 The gooseneck phone holder is the one I use if I want to shoot from above with the tent. You can get ones with very long necks that can be manipulated into the shape you desire.
A tip for using the goose neck is to set your phone up with a few second delay on the photo to ensure the goose neck is stable. As they can bob around a bit! Also check if your phone has a voice activated function allowing you to say ‘shoot’ rather than touching the phone.
Tip! Goose necks are clamped to a surface so you can also use this to take a photo of your family with you in it! As long as you have a timer on your phone – most do these days.
3. Backgrounds
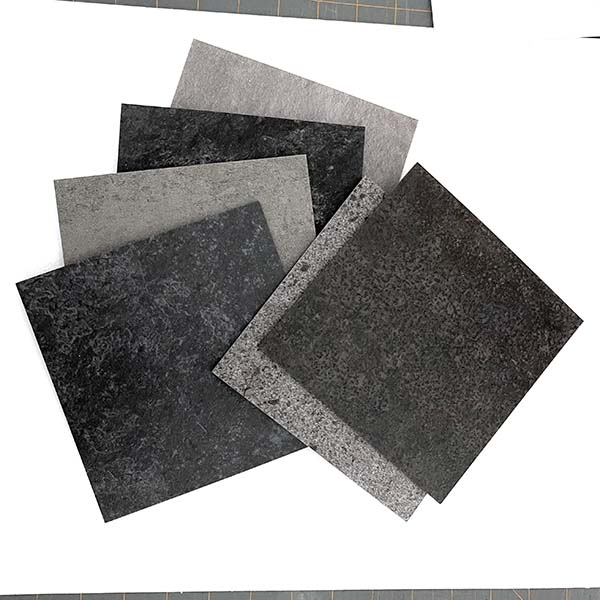 I’ve found the most useful backgrounds are cheap and some are free! The ones I use the most are free samples from a vinyl flooring company. I ended up with them because I was re-flooring my kitchen. Turns out they are perfectly sized to shoot jewellery on.
The full sized tiles from the same company are £3 each so still a really cheap option and they can be cut to size. You can also get wood effect and stone effect vinyl tiles!
You can purchase readymade backgrounds that are printed to look like whitewashed wood, stone etc. and I will say for a lot of product photography I do use these but not for jewellery or small items.
My smallest photo board is 40cm x 40cm so it doesn’t fit into my light tent and that in itself rules them out but they are also not printed to be shot very close up and you can see the print even on the most expensive boards.
Tip! With backgrounds keep it simple, you don’t want to overwhelm the jewellery. Often a clean shot on a white background is perfect for showing off your work, especially if the aim is to sell the piece.
4. Props
I don’t mean props in the way you may think, personally I don’t like to see jewellery propped that much. Maybe the odd stone or branch to create the angle you need but more than that is often distracting!
The kind of props I mean are used to actually prop the jewellery up to give you the best angle for your shot.
Blue Tack
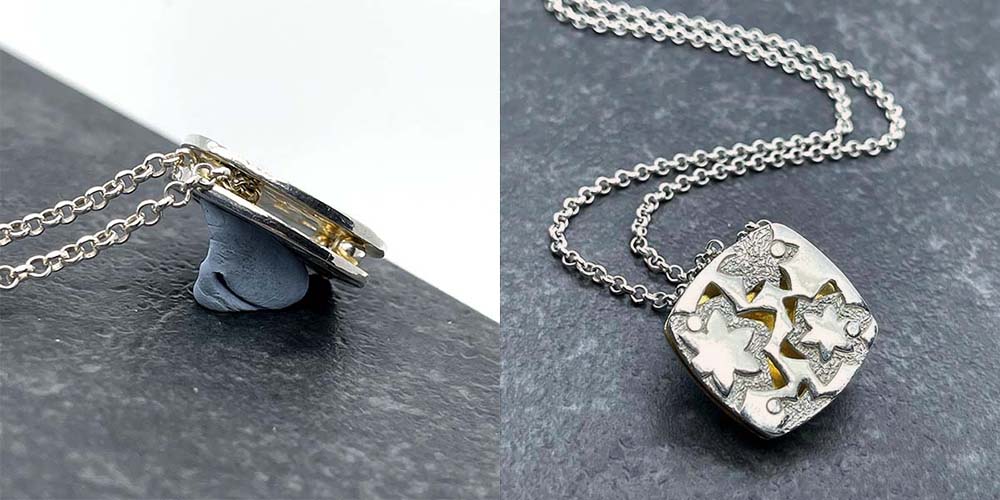
Or sticky tack as it’s also known. Blue Tack is the one I have to hand at every photoshoot I do. I have the white version but that can be softer, so I’ve found the stiffer blue works better for me.
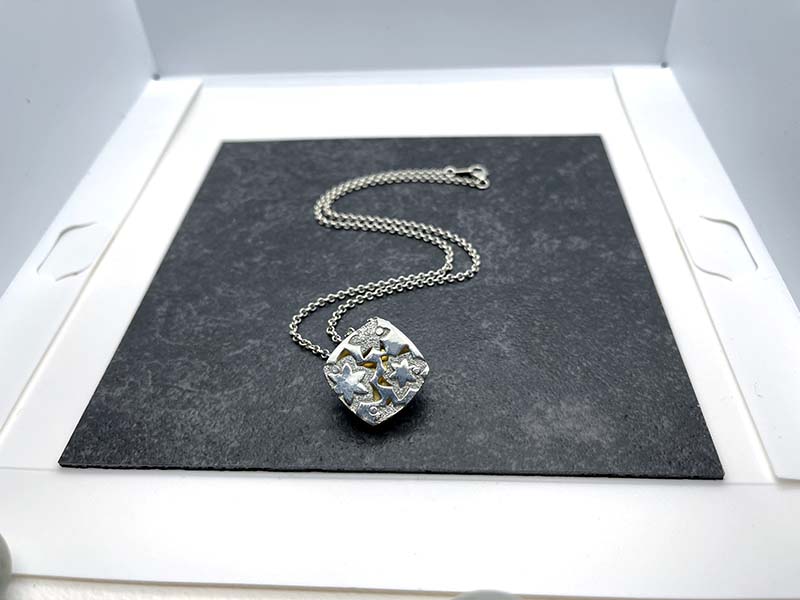
Tack is the perfect substance to use as an invisible prop. Take a small ball and place it on the back of the jewellery to give the piece a slight angle. Doing just this one slight change gives your piece more three-dimensionality and lifts it off the background creating a subtle shadow.
I also use blue tack to hold chains out of the way if they keep slipping around.
Decorative sand / stones
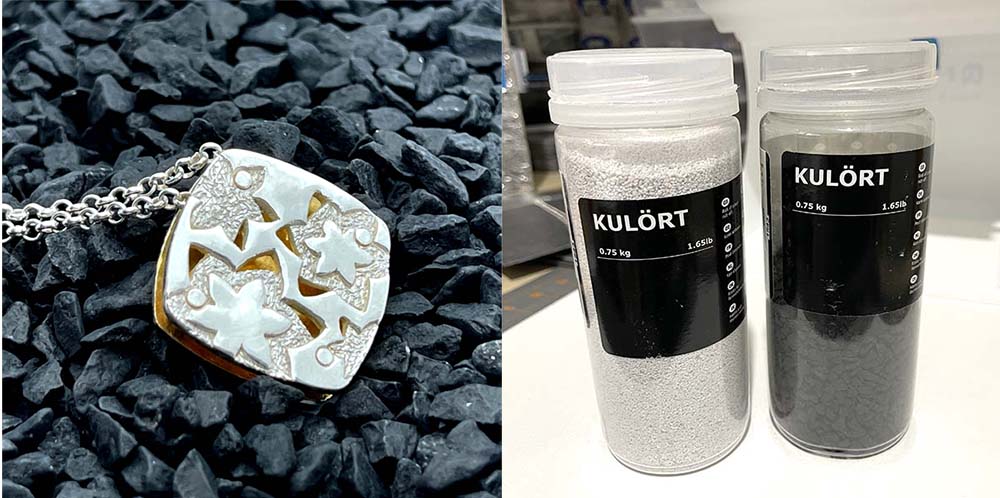
This is the stuff you can buy in containers to put in candle holders as surface decoration. I bought mine from Ikea about 10 years ago and I still use the same pot of sand or stones today. I have white sand and black stones, which both work well.
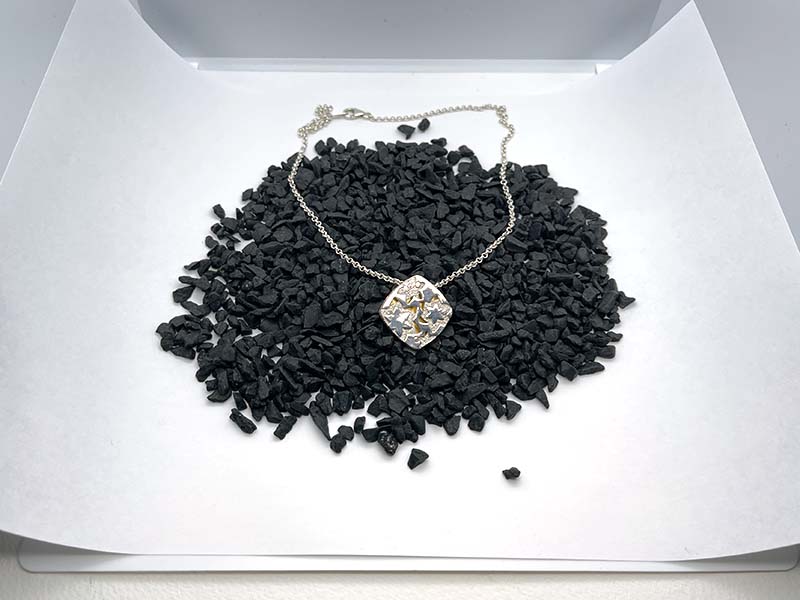
In the above photo you can see how I’ve poured the stones onto a piece of paper (makes it easy to get the sand back in the container!) and used it to prop the jewellery up. This gives a subtle texture to the background whilst not distracting your eye from the piece.
I’ve seen it on sale on ebay as well, the Ikea one is called Kulort so if you fancy this then keep an eye on auction sites!
5. Reflectors
Anyone who’s heard any of my photography talks will already know what I’m talking about! It’s a kitchen foil reflector. I make these in all shapes and sizes from cardboard boxes and kitchen foil.
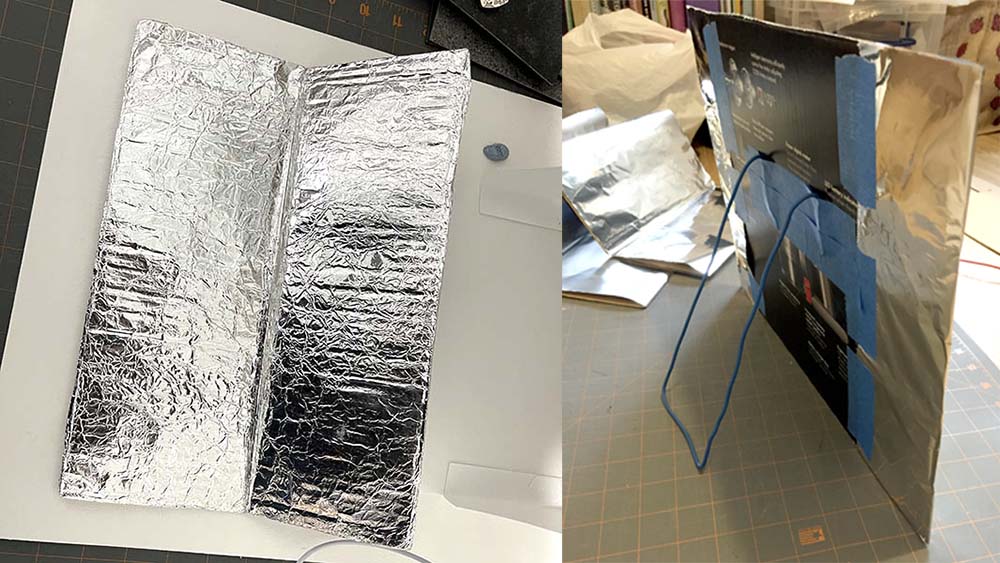
They work better if you slightly crumple the foil first then cover the cardboard. If you need them to stand up you can use the corner of a box or as you can see in one of these photos I’ve used recycled electrical wire as a stand.
Also have a dark board to hand (cardboard covered in matt black paper). I often use one of my small vinyl backgrounds if I’m shooting a very shiny silver piece (as you can see in the photo of my light tent setup). Adding shadow works in the same way as adding light (reflection) to a dark patinated piece.
Tip! Don’t underestimate what reflection can do for you! Try reflection even if you don’t think it’ll help.
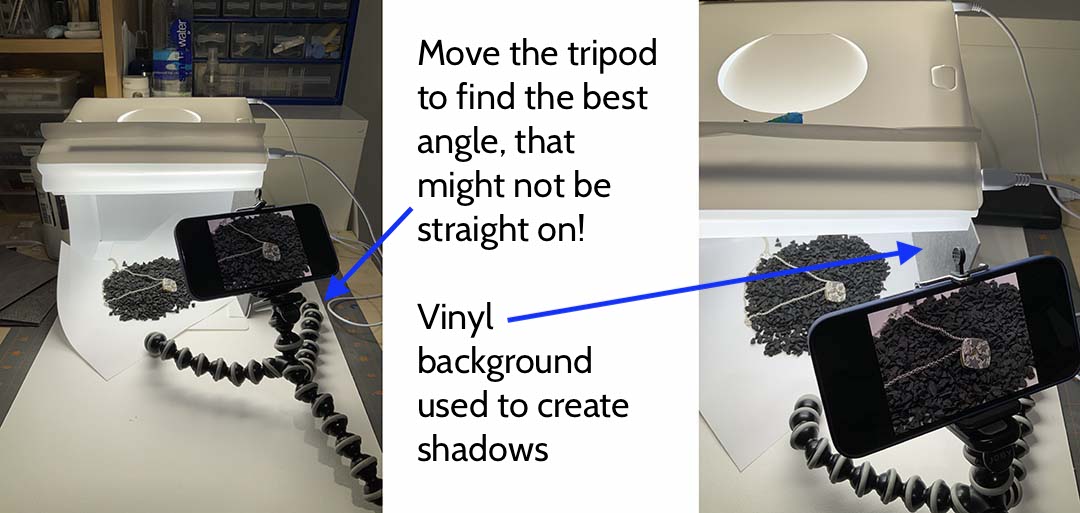
My final tip is to think about moving your camera around to get the best shot. Often when you have arranged a piece of jewellery the ‘facing straight on’ shot isn’t the best but it’s a pain to rearrange your jewellery if you have got it propped just right. Move your tripod around and keep an eye on the view.
Further reading Learn How to Edit Your Photos Like a Pro by Sian Hamilton or Jayne Roth’s Choosing the Right Background for Your Jewelry Photos
Guest Blog: Sian Hamilton
Sian trained as a jeweller in the 1990s and has worked as a designer ever since. She is passionate about metal clay and technology, a combination she often acknowledges are not natural partners. These days Sian is a web designer and created the AMCAW website back in 2018. She still looks after it today and loves to see all the new content coming in on a regular basis. Sian also volunteers as the head of the Web and Technology team and as a member of the Curating team for AMCAW.
As a web designer Sian has found that a lot of people struggle with photography, one of the most important things if you want to sell your work, enter competitions or even just show off your creations at their best on social media. With this in mind, she is determined to show that these skills are available to all and with a little knowledge and time anyone can take great photos.
In 2021, Sian is launching a course for small business owners, individuals and maker sellers on how to build your own website and e-commerce shop. If you would like to learn more about Sian’s course join her Facebook group Master Your WordPress Website or visit her website Sapphire Blue Academy and sign up for her newsletter.